

 The Iris Top and Dress has some lovely skill building techniques, which include pockets, inset sleeves and a front and back yoke with an corner inset V seam. I’m demonstrating on a starched medium weight muslin. I would suggest a light to medium weight fabric for a beginner, as the area where the sleeves intercept with the side seams can be thick and become a little more difficult to sew. [/caption]
[caption id="" align="alignnone" width="4284"]
The Iris Top and Dress has some lovely skill building techniques, which include pockets, inset sleeves and a front and back yoke with an corner inset V seam. I’m demonstrating on a starched medium weight muslin. I would suggest a light to medium weight fabric for a beginner, as the area where the sleeves intercept with the side seams can be thick and become a little more difficult to sew. [/caption]
[caption id="" align="alignnone" width="4284"] Piece One - Front / Cut 1 on FOLD Piece Two - Back/ Cut 1 on FOLD Piece Three - Back Yoke / Cut one on FOLD - Finish edges Piece Four - Front Yoke / Cut one on FOLD - Finish edges Piece Five - Pocket / Cut Four - Finish edges Piece Six - Shoulder Strap / Cut Two OPTIONAL Piece Seven - Shoulder Loop / Cut Two OPTIONAL [/caption]
ORDER OF CONSTRUCTION:
Front Yoke
Front facing
Understitch
Back Yoke
Back Facing
Understitch
Pockets
Shoulders
Sleeves
Side Seams
Hem
Optional: Shoulder straps and tabs
I’m demonstrating on a starched medium weight muslin. I would suggest a light to medium weight fabric if you are a beginner, as the area where the sleeves intercept with the side seams can be thick and become a little more difficult to sew.
 [caption id="" align="alignnone" width="4032"]
 Begin by adding a tiny piece of interfacing to the point on the front and front yoke wrong side, keeping it within the seam line. [/caption]
[caption id="" align="alignnone" width="3024"]
Begin by adding a tiny piece of interfacing to the point on the front and front yoke wrong side, keeping it within the seam line. [/caption]
[caption id="" align="alignnone" width="3024"] Mark your seam line at 1/2” to find the point on both the front and the front yoke. [/caption]
[caption id="" align="alignnone" width="4032"]
Mark your seam line at 1/2” to find the point on both the front and the front yoke. [/caption]
[caption id="" align="alignnone" width="4032"] Snip into the front of the bodice, stopping just before your marked point. [/caption]
 [caption id="" align="alignnone" width="4032"]
 Match the top of the point on both the yoke and bodice as shown right side to right side. [/caption]
 [caption id="" align="alignnone" width="5712"]
 Move your front yoke from the middle to the left of your bodice, pinning along the seam before removing the center point pin. [/caption]
[caption id="" align="alignnone" width="4032"]
Move your front yoke from the middle to the left of your bodice, pinning along the seam before removing the center point pin. [/caption]
[caption id="" align="alignnone" width="4032"] Place your needle directly into the point at the center, leaving long thread tails before sewing. Do NOT back tack…. [/caption]
[caption id="" align="alignnone" width="4032"]
Place your needle directly into the point at the center, leaving long thread tails before sewing. Do NOT back tack…. [/caption]
[caption id="" align="alignnone" width="4032"] Make three knots to tie off the thread and snip. This method is a little different than usual, and took me some trial and error but I find that it keeps the point neat and pucker free. Sewing the whole seam in one continuous line, usually creates a small crease at the center which is what we want to avoid. [/caption]
[caption id="" align="alignnone" width="5712"]
Make three knots to tie off the thread and snip. This method is a little different than usual, and took me some trial and error but I find that it keeps the point neat and pucker free. Sewing the whole seam in one continuous line, usually creates a small crease at the center which is what we want to avoid. [/caption]
[caption id="" align="alignnone" width="5712"] Your bodice and yoke should now look like this. [/caption]
[caption id="" align="alignnone" width="4032"]
Your bodice and yoke should now look like this. [/caption]
[caption id="" align="alignnone" width="4032"] Twist and line up the unfinished side, check that the bodice point is not creating a gather under the yoke. [/caption]
[caption id="" align="alignnone" width="4032"]
Twist and line up the unfinished side, check that the bodice point is not creating a gather under the yoke. [/caption]
[caption id="" align="alignnone" width="4032"] Drop your needle at the center point in the middle again, leaving long tails. Begin your stitch next to the stitch that was tied off. sewing from the middle point to the end. Tie off the threads in the middle again. (This side is a little more difficult to sew as you will have the bulk of the garment on the right side, feeding through the machine.) [/caption]
[caption id="" align="alignnone" width="4032"]
Drop your needle at the center point in the middle again, leaving long tails. Begin your stitch next to the stitch that was tied off. sewing from the middle point to the end. Tie off the threads in the middle again. (This side is a little more difficult to sew as you will have the bulk of the garment on the right side, feeding through the machine.) [/caption]
[caption id="" align="alignnone" width="4032"] Trim your seam allowance if your fabric is thick or heavy. Leave as is if lighter. Grade if necessary. Press well. [/caption]

 [caption id="" align="alignnone" width="5712"]
 Trim the excess at the shoulder line. [/caption]
[caption id="" align="alignnone" width="5712"]
Trim the excess at the shoulder line. [/caption]
[caption id="" align="alignnone" width="5712"] Place your front yoke facing right side to right side, pinning at the neckline. [/caption]
[caption id="" align="alignnone" width="4032"]
Place your front yoke facing right side to right side, pinning at the neckline. [/caption]
[caption id="" align="alignnone" width="4032"] Sew at a 5/8” seam allowance, snip into the seam releasing the curve. [/caption]
[caption id="" align="alignnone" width="4032"]
Sew at a 5/8” seam allowance, snip into the seam releasing the curve. [/caption]
[caption id="" align="alignnone" width="4032"] Fold both your seams to the facing side and understitch your facing to the seam as shown above, keeping your stitch just above the snips. This stitch will be seen on the right side of the facing, on the inside of your bodice. [/caption]
[caption id="" align="alignnone" width="5712"]
Fold both your seams to the facing side and understitch your facing to the seam as shown above, keeping your stitch just above the snips. This stitch will be seen on the right side of the facing, on the inside of your bodice. [/caption]
[caption id="" align="alignnone" width="5712"] Flip your fabric to the wrong side, and press the neckline. [/caption]
 [caption id="" align="alignnone" width="5712"]
 Pin your yoke over the front seams covering the stitching. [/caption]
 [caption id="" align="alignnone" width="5712"]
 Stitch in the ditch on the right side, keeping your stitch at 2.4 [/caption]
 [caption id="" align="alignnone" width="5712"]
 Trim if necessary. [/caption]
[caption id="" align="alignnone" width="4284"]
Trim if necessary. [/caption]
[caption id="" align="alignnone" width="4284"] Next up: Pockets [/caption]
[caption id="" align="alignnone" width="5712"]
Next up: Pockets [/caption]
[caption id="" align="alignnone" width="5712"]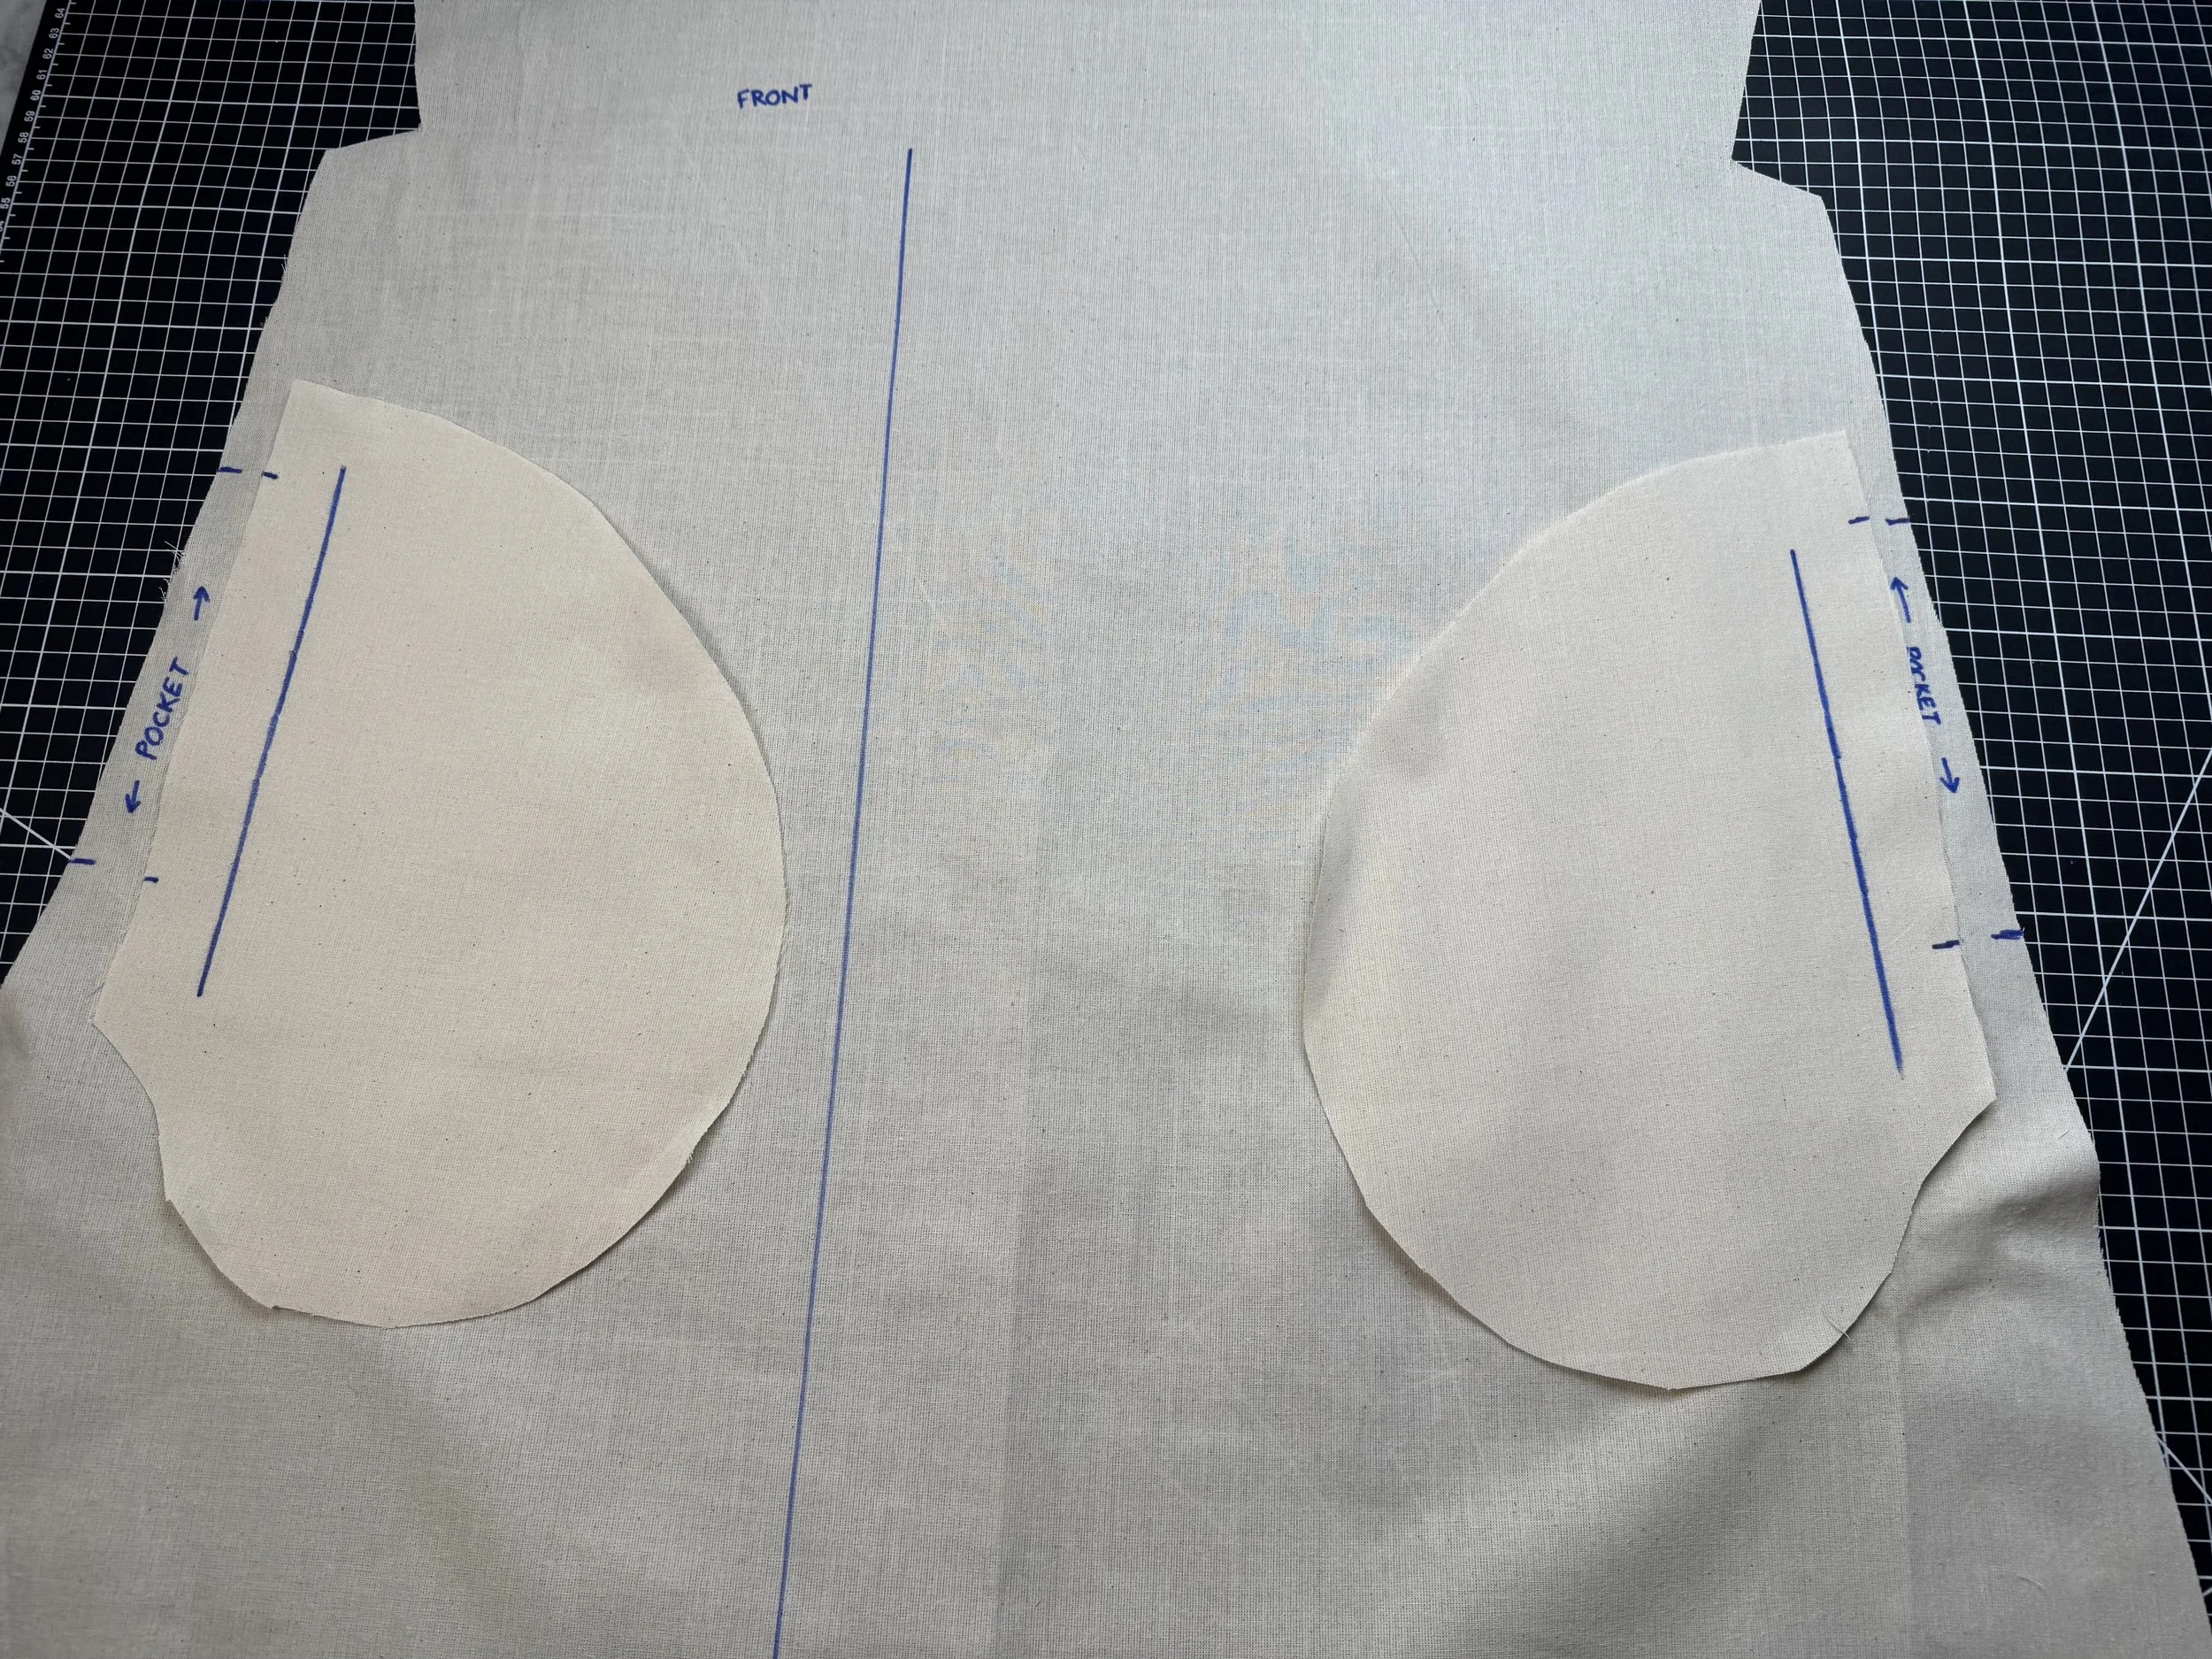 Match your notch marks, right side to right side. [/caption]
[caption id="" align="alignnone" width="5712"]
Match your notch marks, right side to right side. [/caption]
[caption id="" align="alignnone" width="5712"]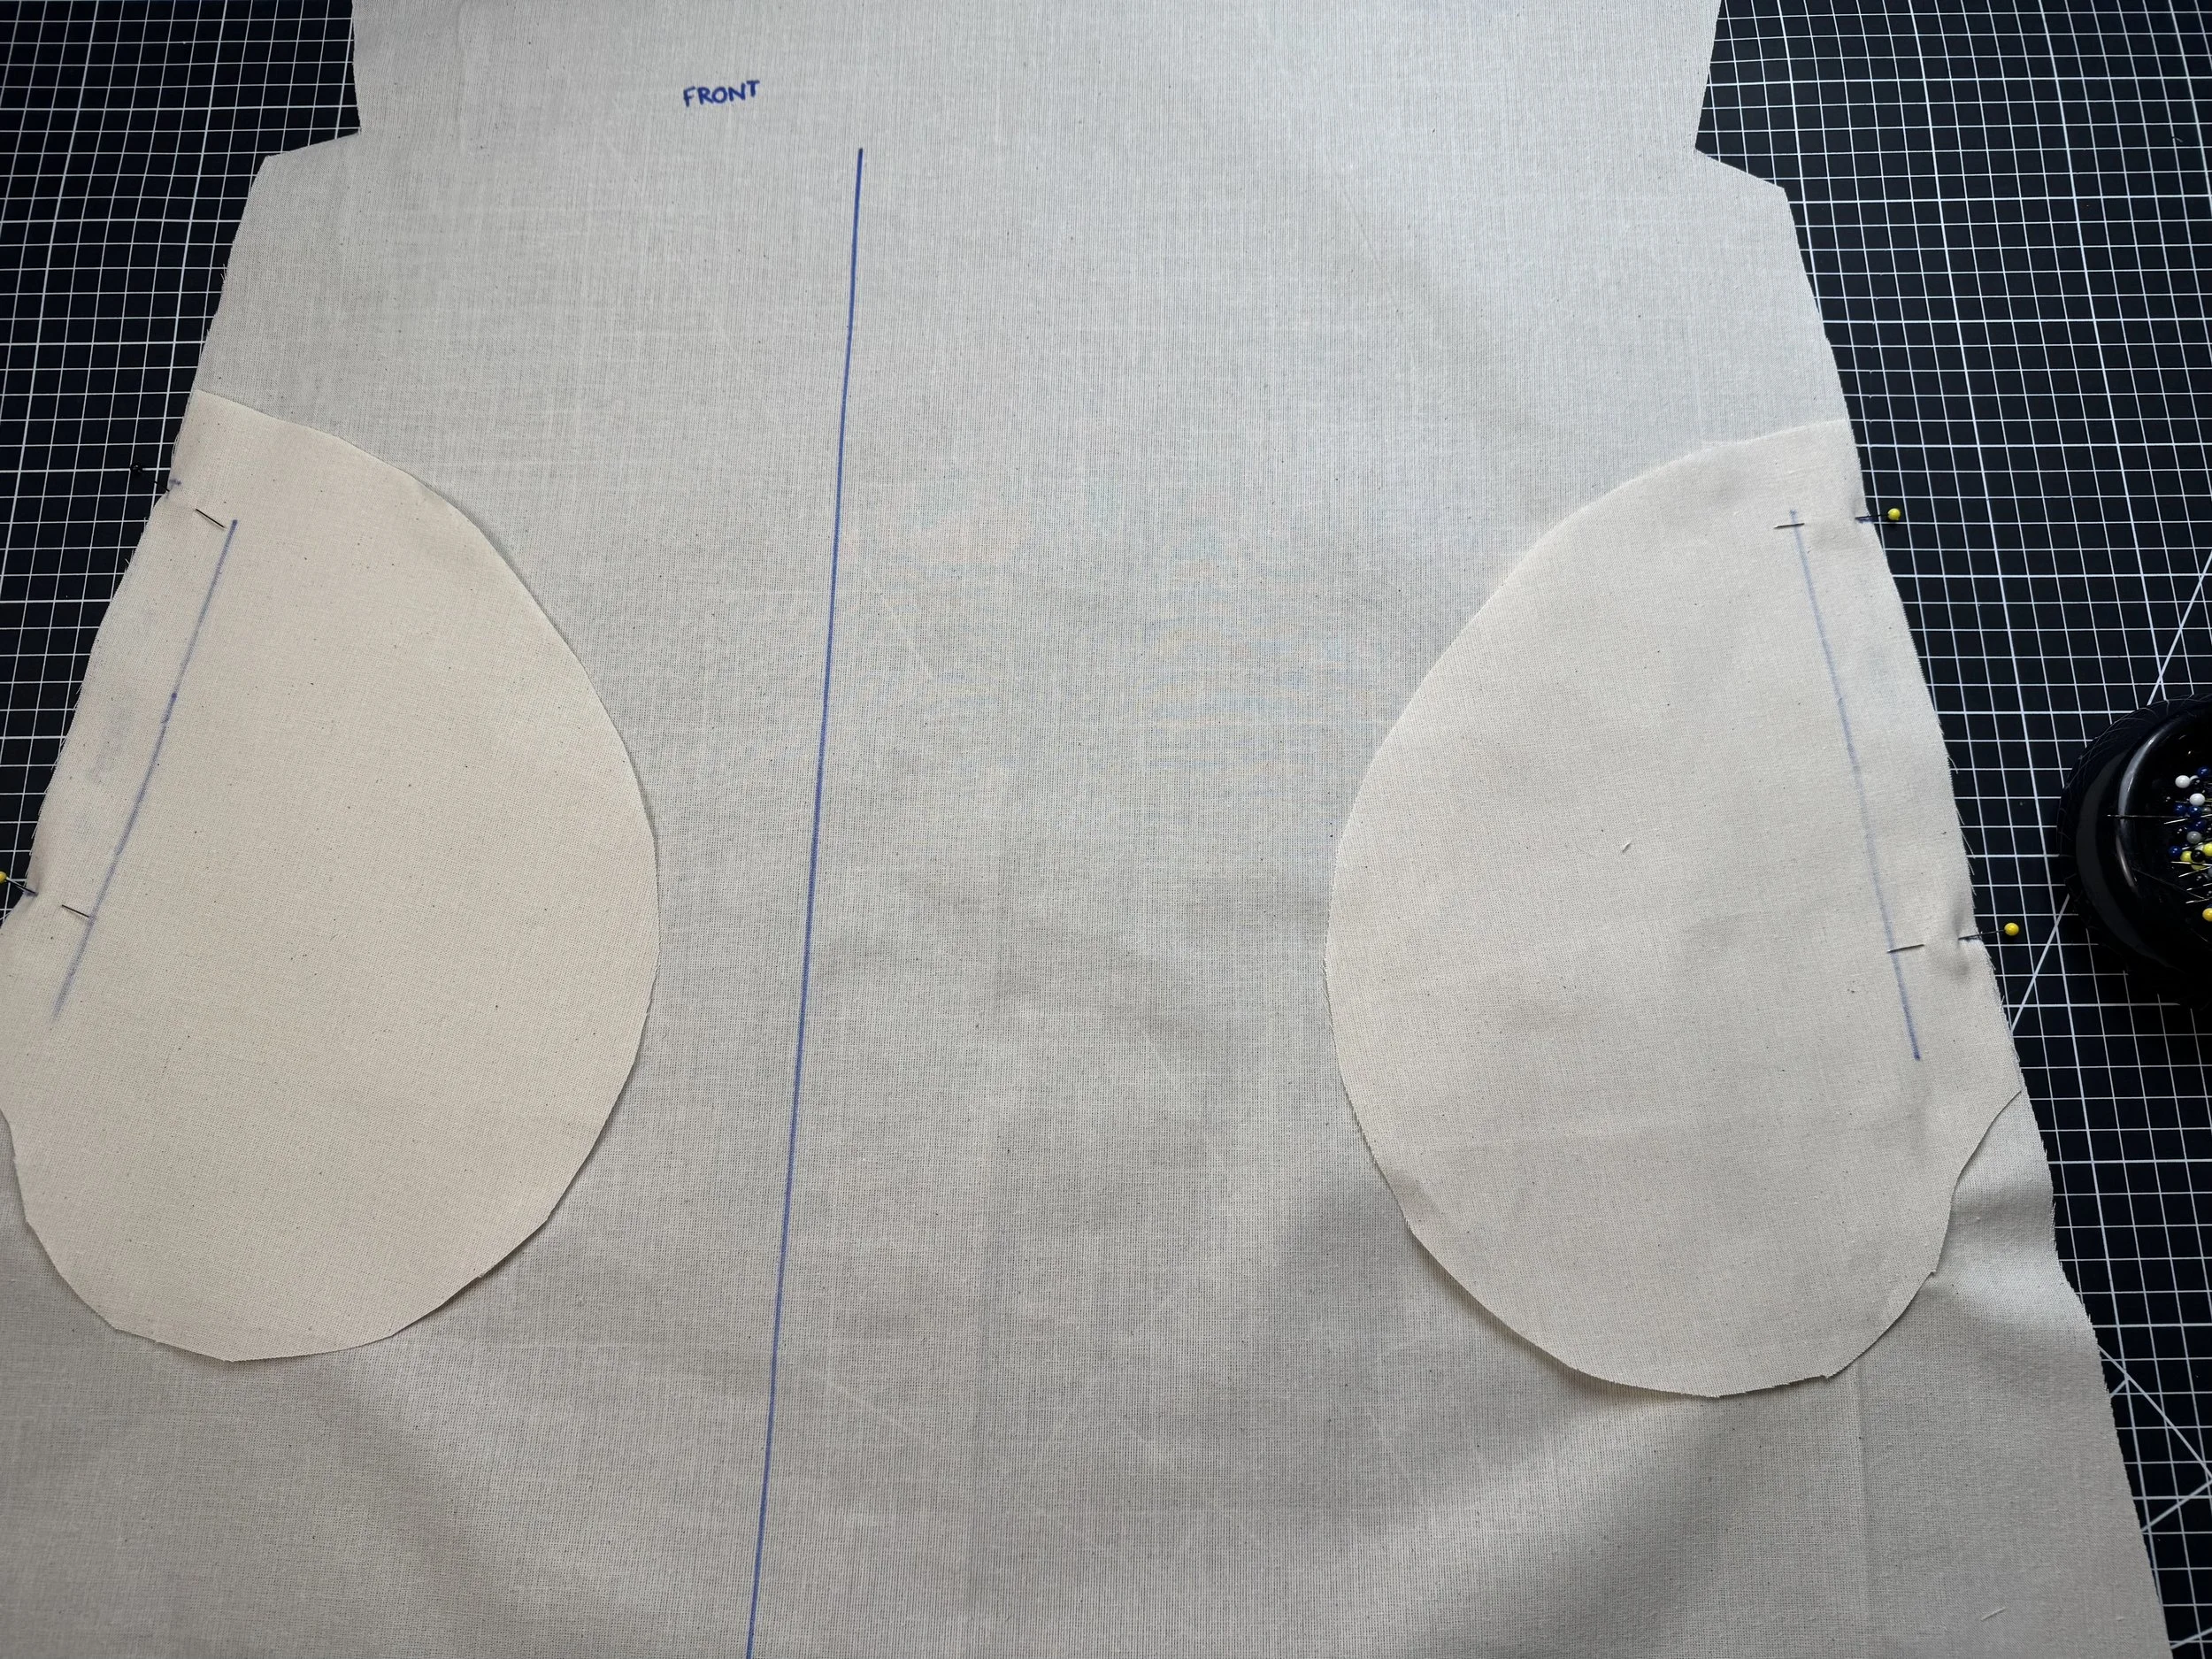 Pin and stitch at a 5/8” seam allowance [/caption]
[caption id="" align="alignnone" width="5712"]
Pin and stitch at a 5/8” seam allowance [/caption]
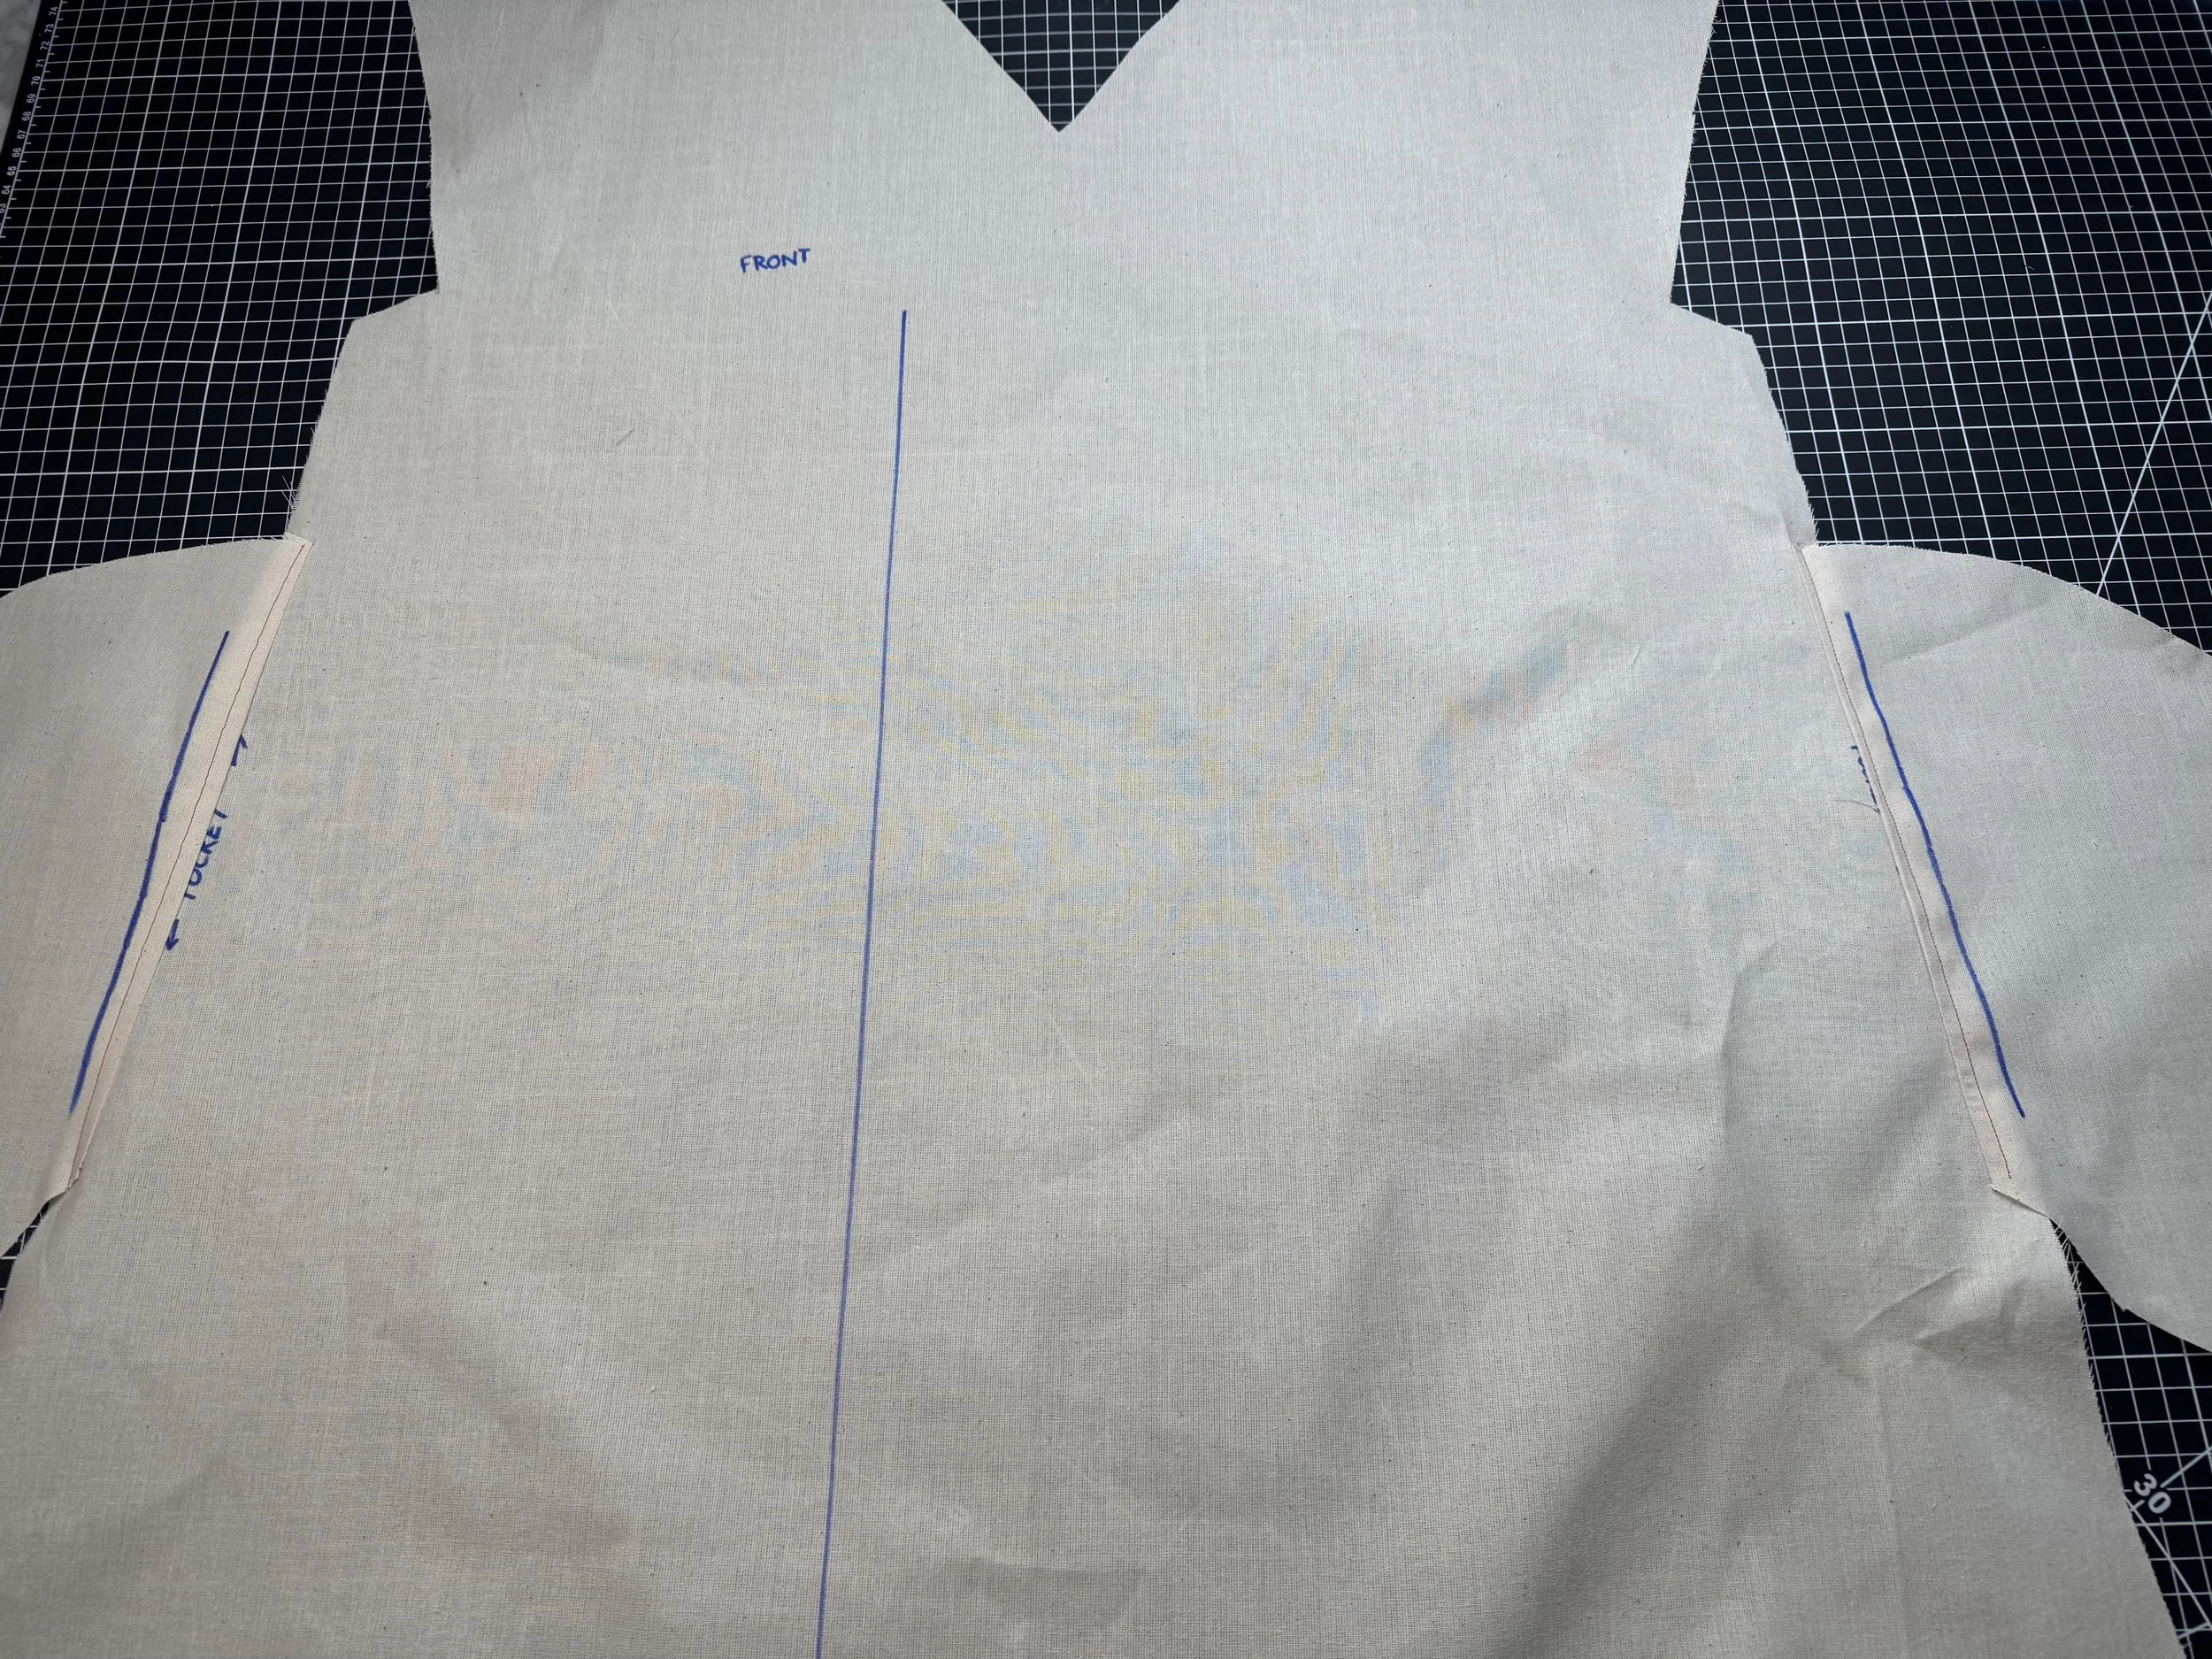
[caption id="" align="alignnone" width="5712"]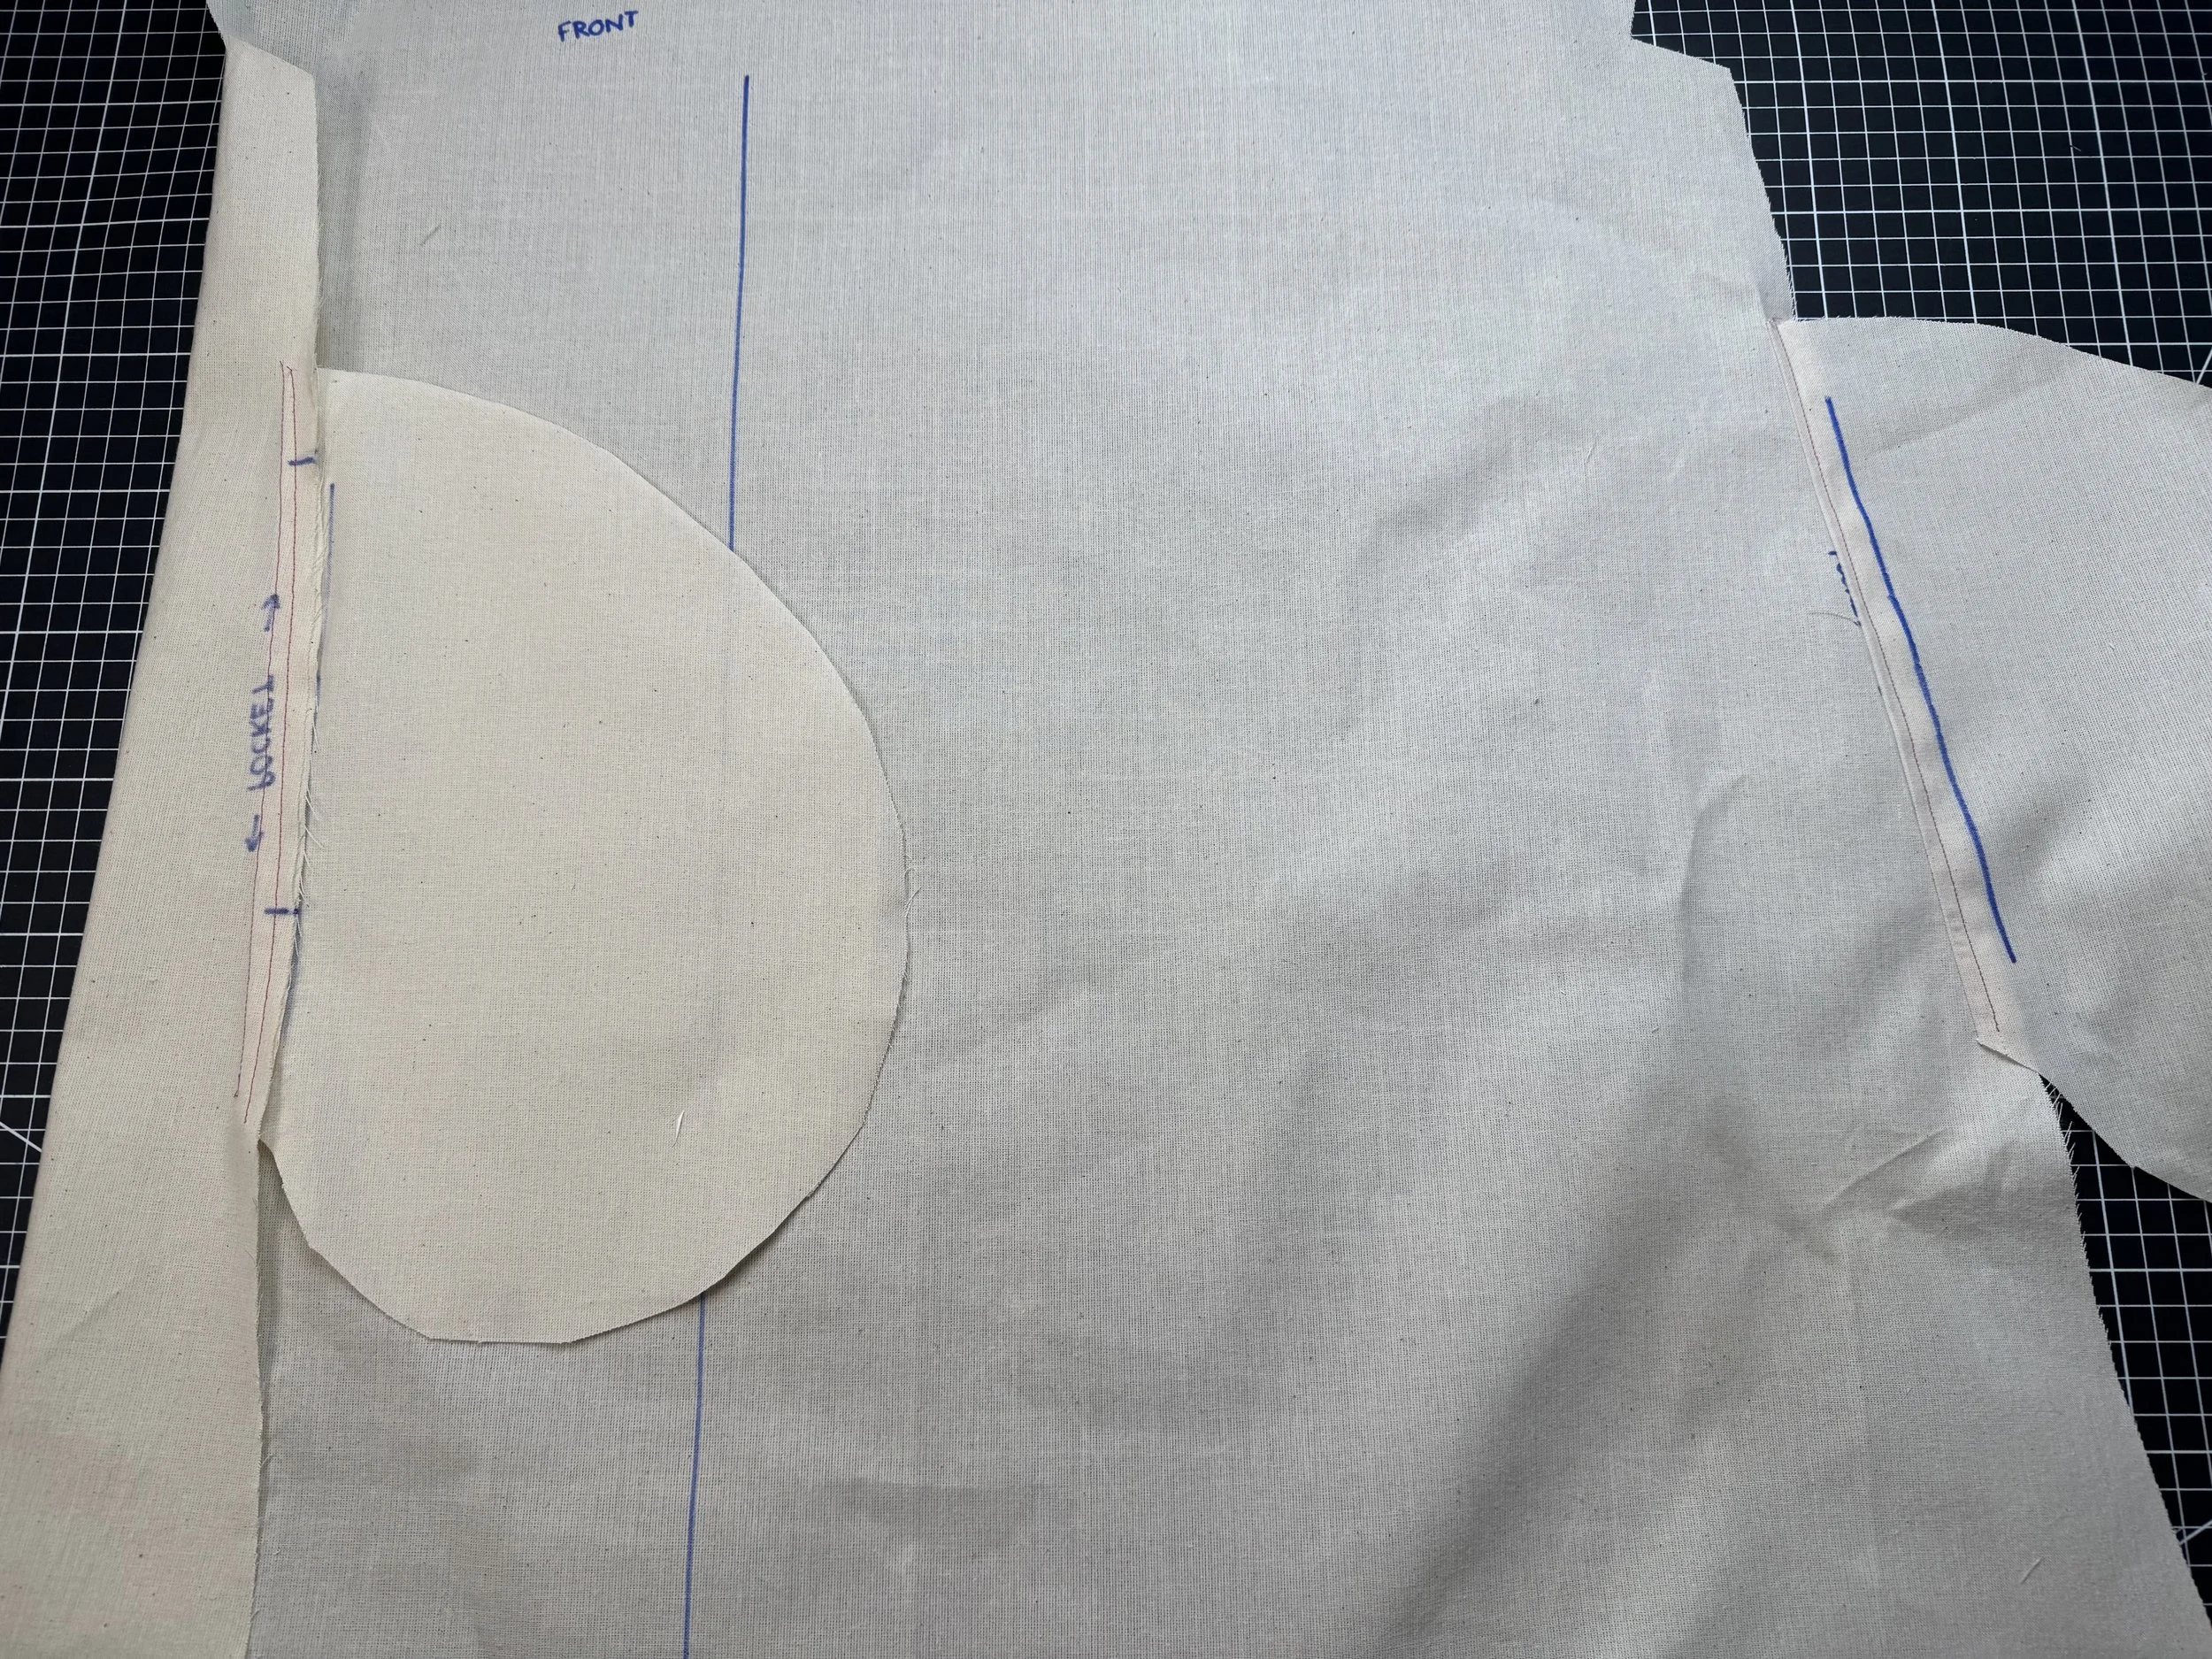 Flip your seam allowances to the pocket side, and understitch as shown. [/caption]
[caption id="" align="alignnone" width="5712"]
Flip your seam allowances to the pocket side, and understitch as shown. [/caption]
[caption id="" align="alignnone" width="5712"]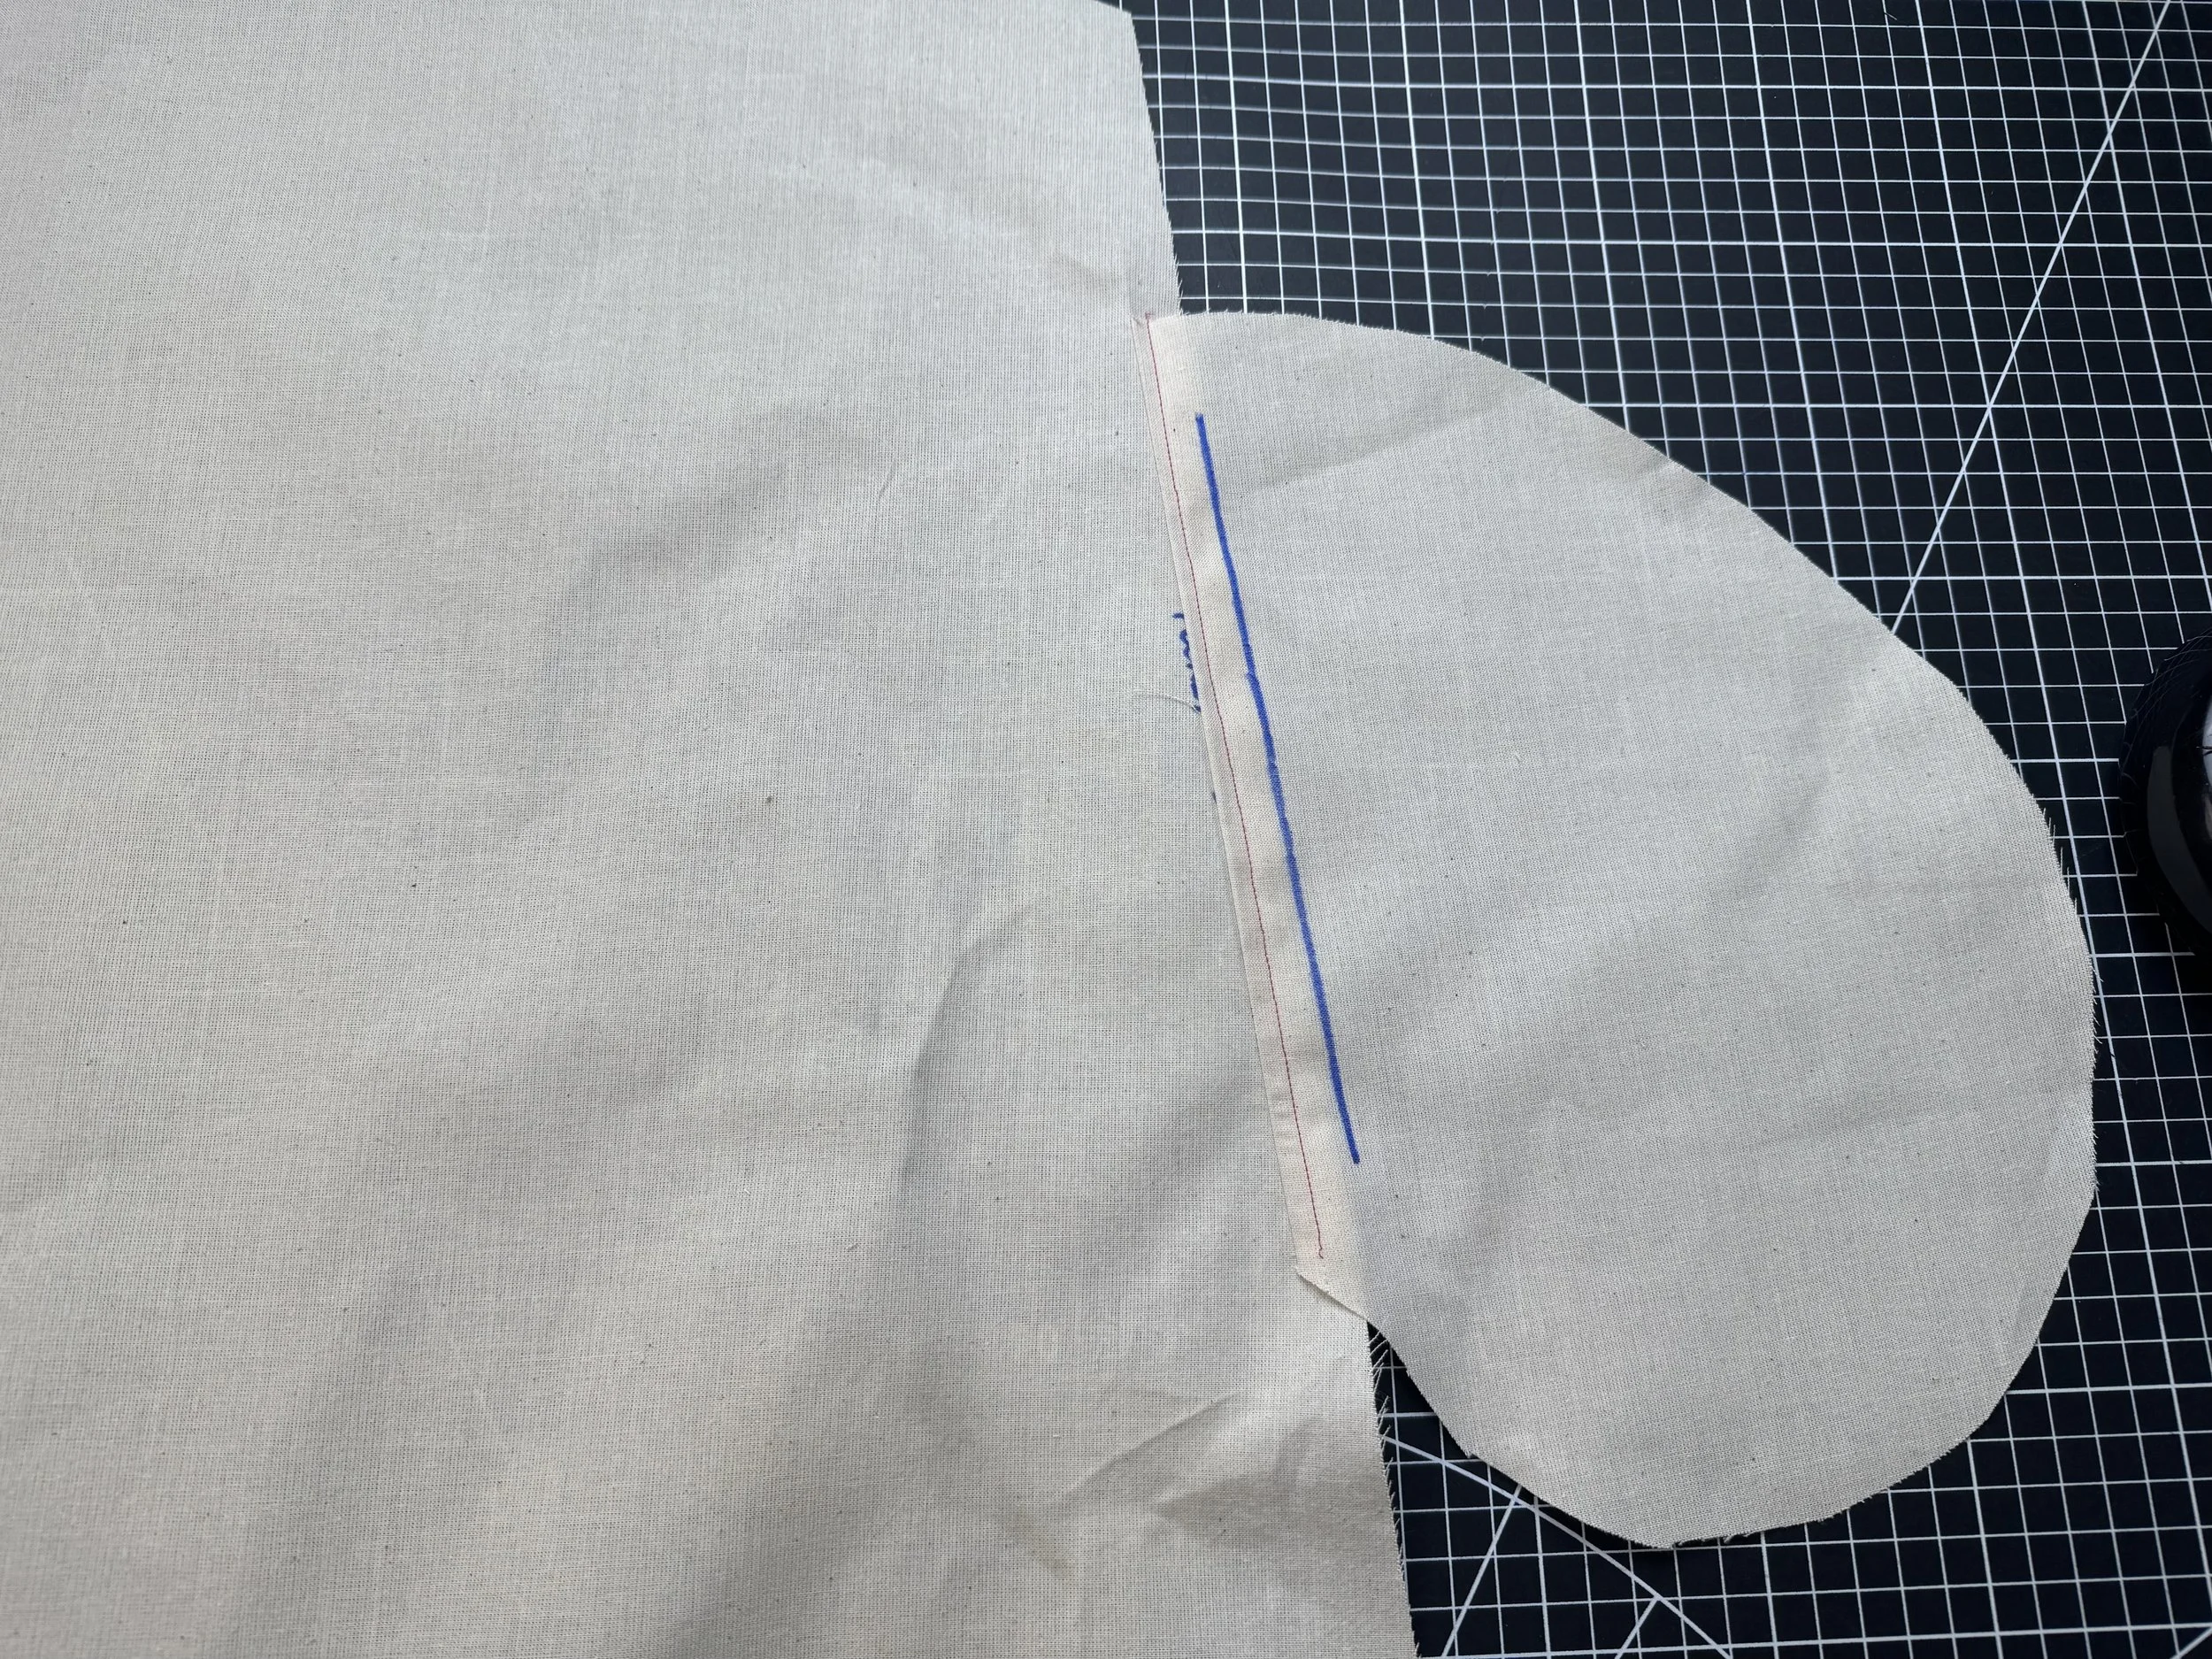 The understitch shown on the right side. [/caption]
 [caption id="" align="alignnone" width="5712"]
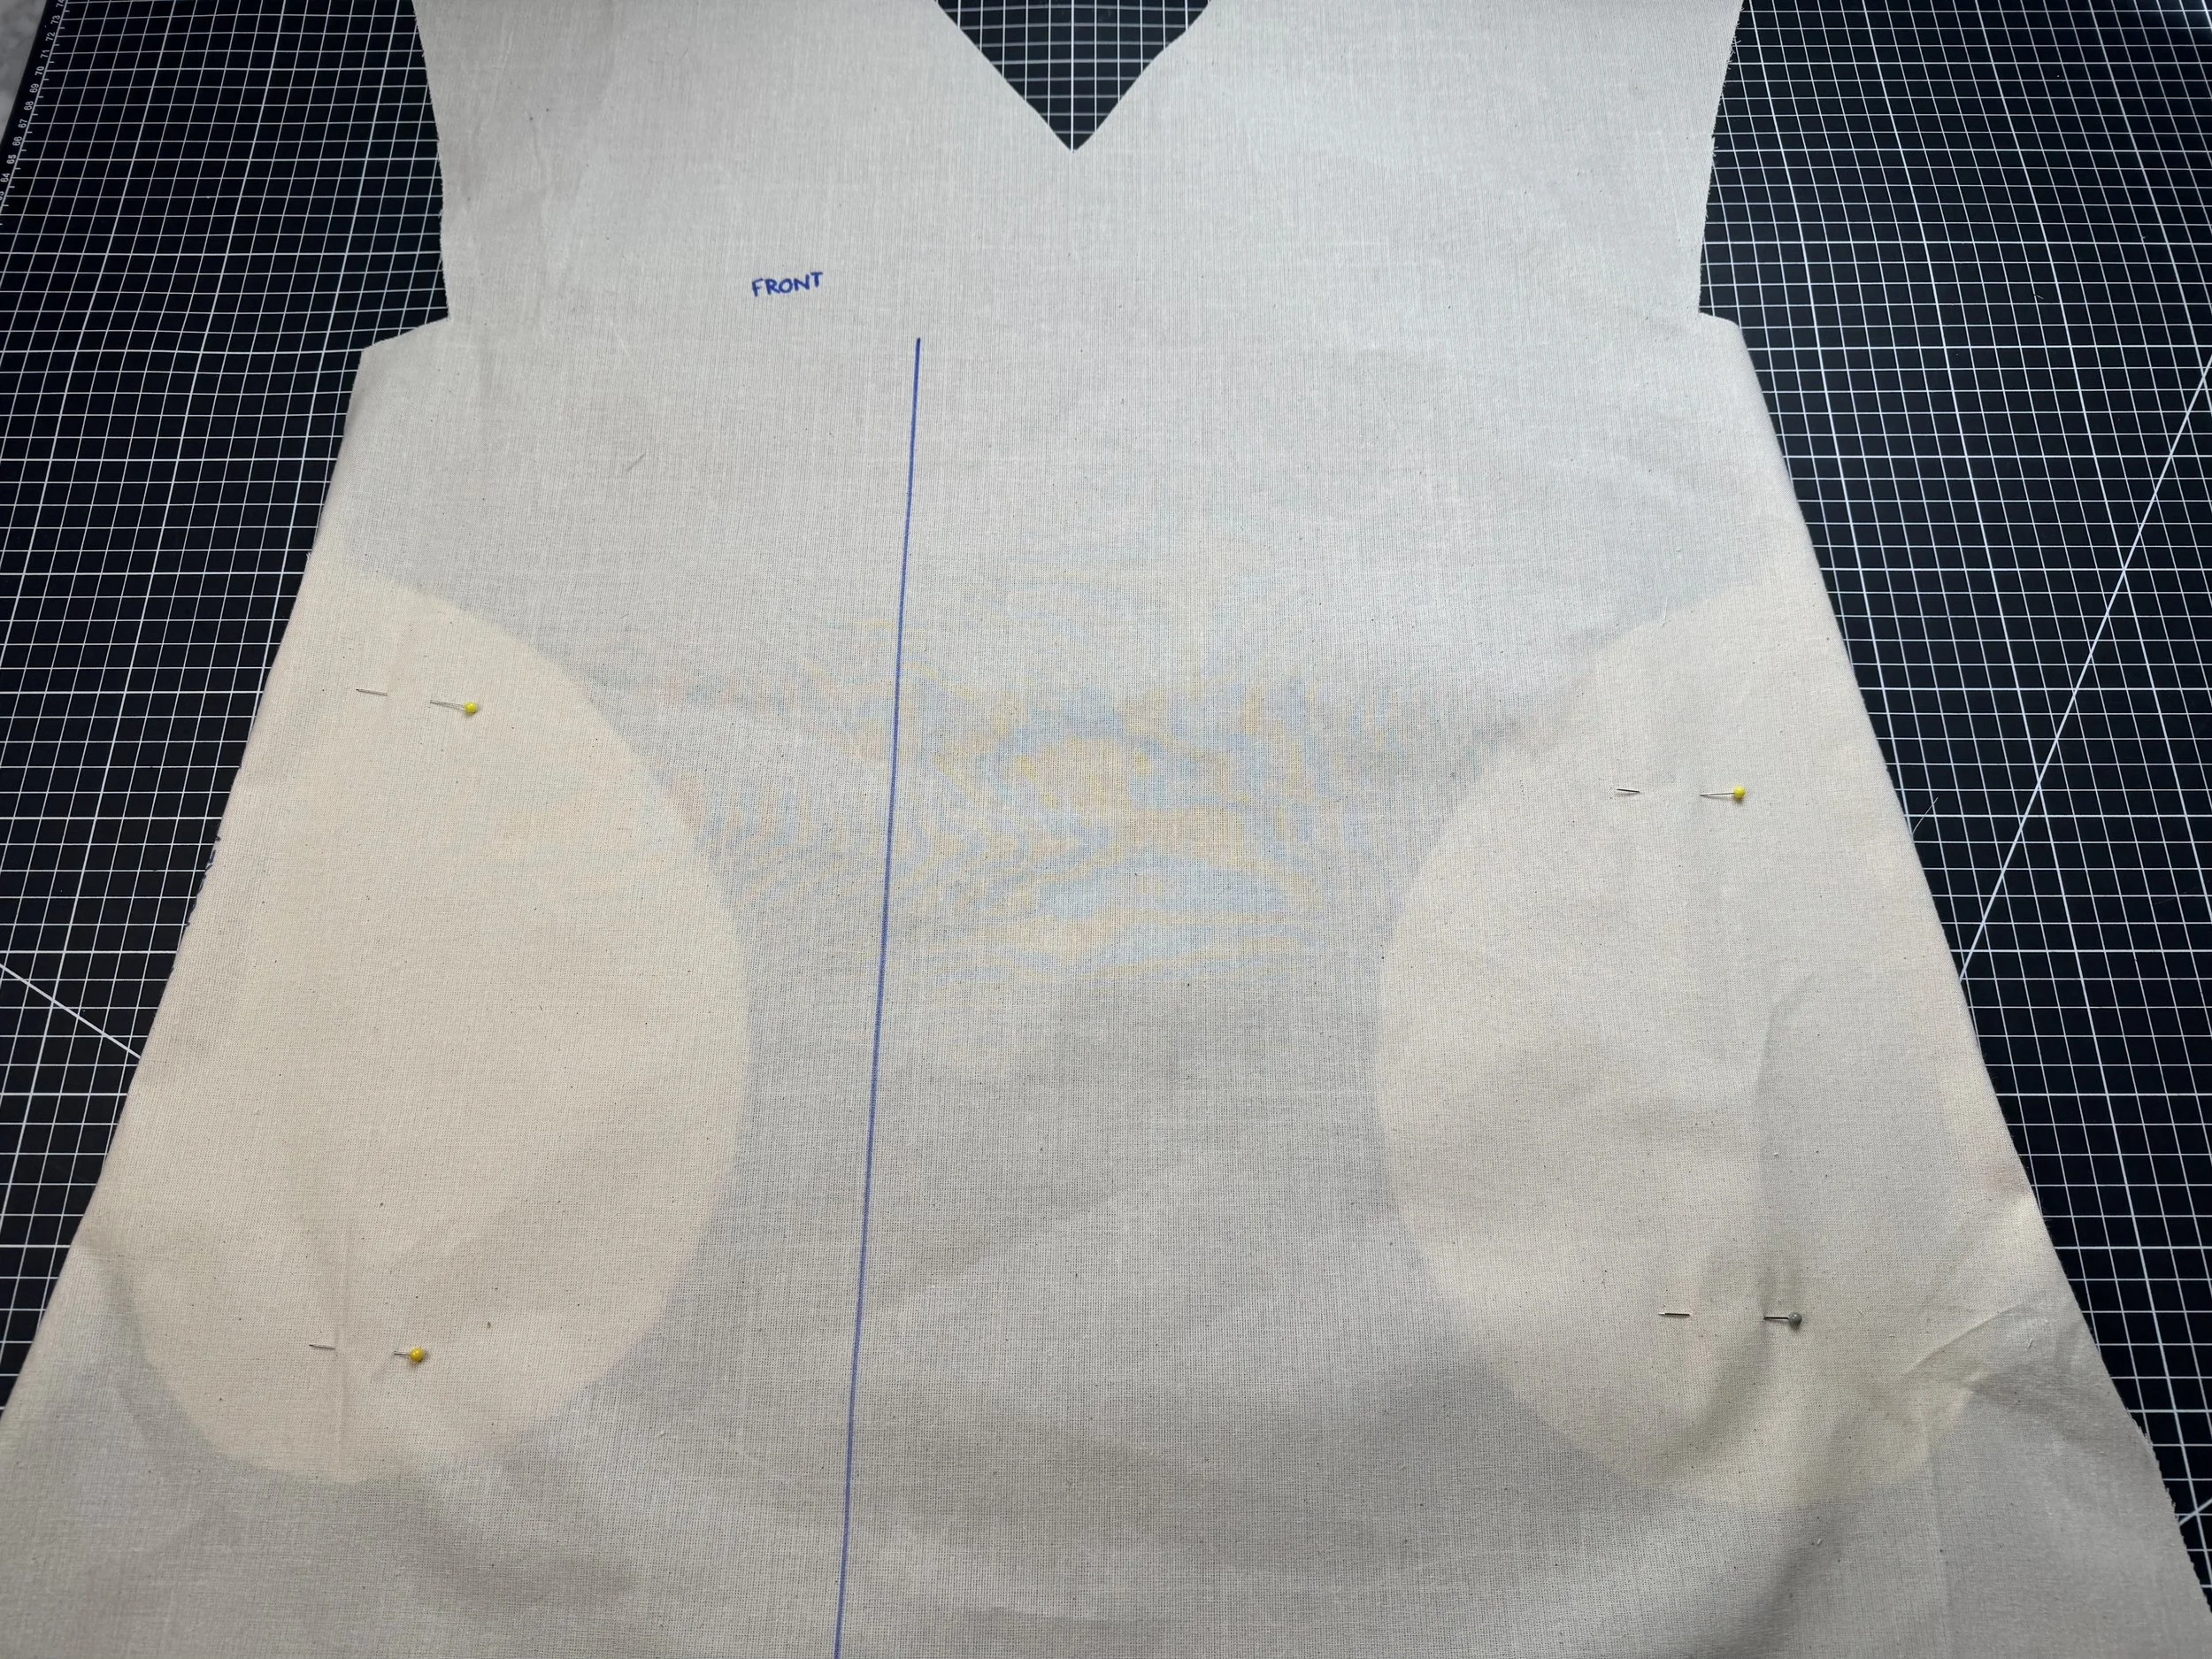 Flip your pockets to the wrong side and pin to hold. [/caption]
[caption id="" align="alignnone" width="2108"]
Flip your pockets to the wrong side and pin to hold. [/caption]
[caption id="" align="alignnone" width="2108"]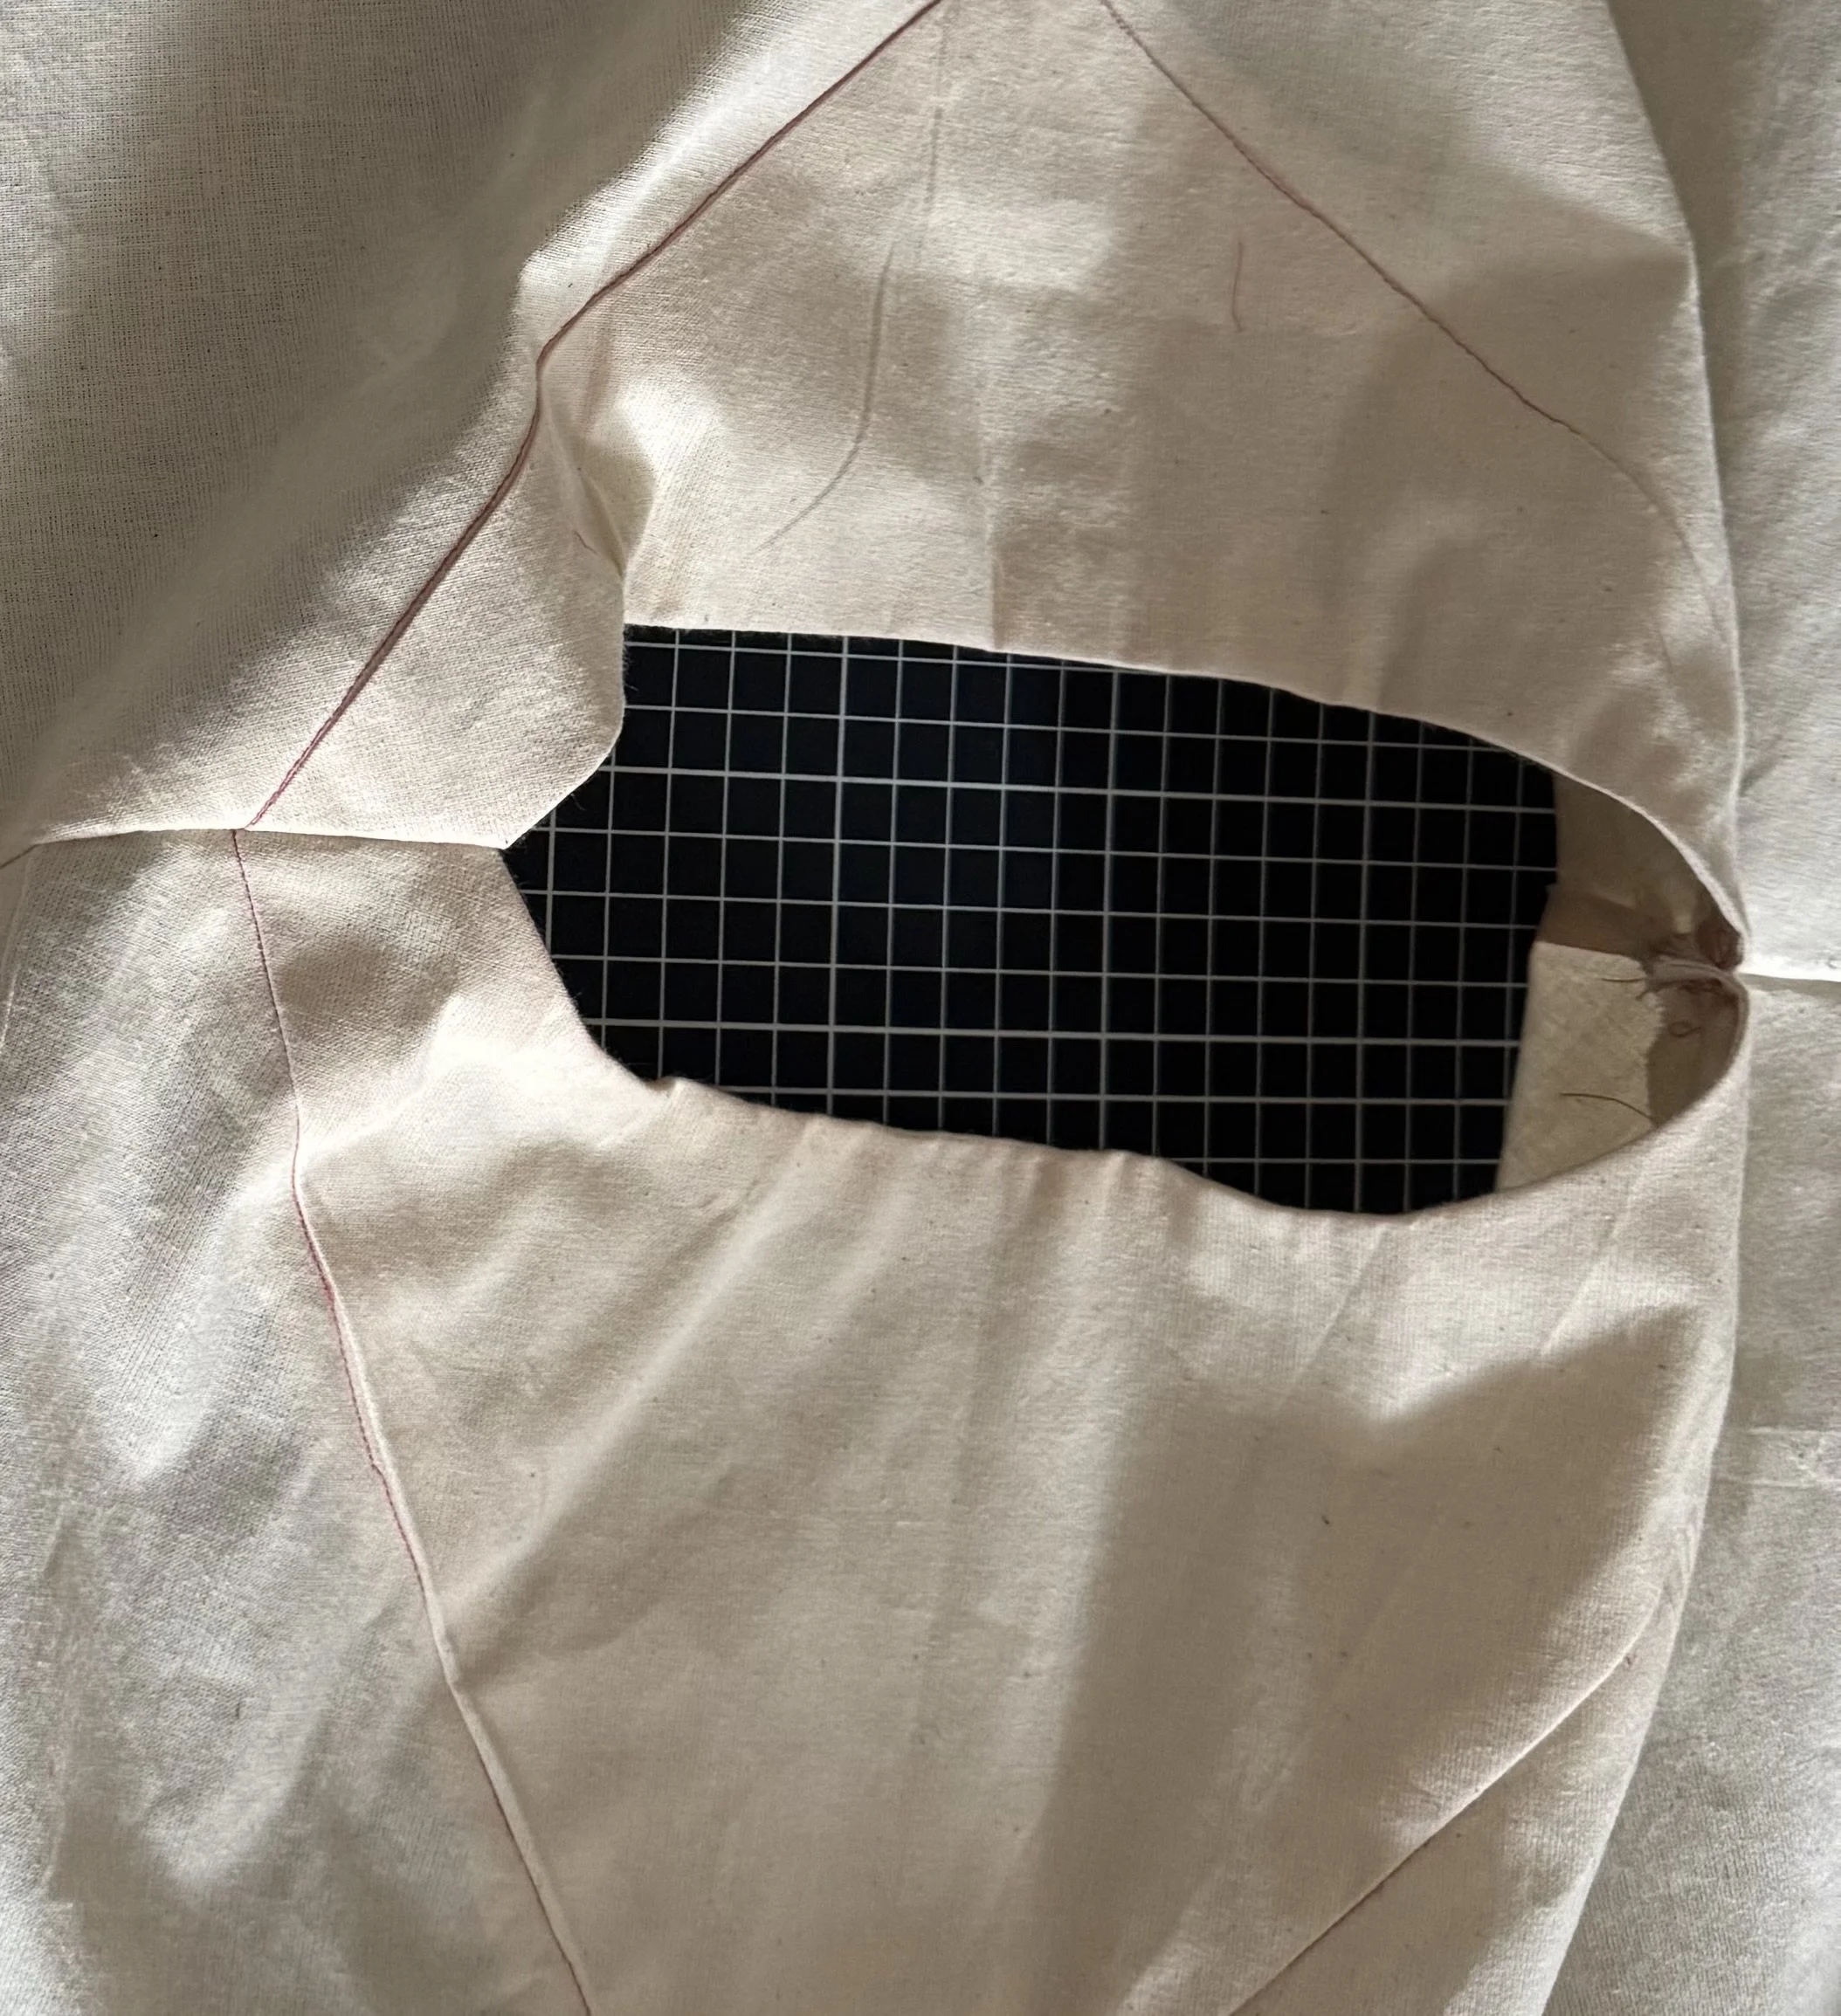 Next up: Back Yoke. *As you see above, the back yoke will join the front yoke at the shoulder seam. Before sewing the back yoke, measure the front yoke at the shoulder seam, and ensure you start your stitch in the same place on the back so they line up when you join the two together. [/caption]
[caption id="" align="alignnone" width="5712"]
Next up: Back Yoke. *As you see above, the back yoke will join the front yoke at the shoulder seam. Before sewing the back yoke, measure the front yoke at the shoulder seam, and ensure you start your stitch in the same place on the back so they line up when you join the two together. [/caption]
[caption id="" align="alignnone" width="5712"]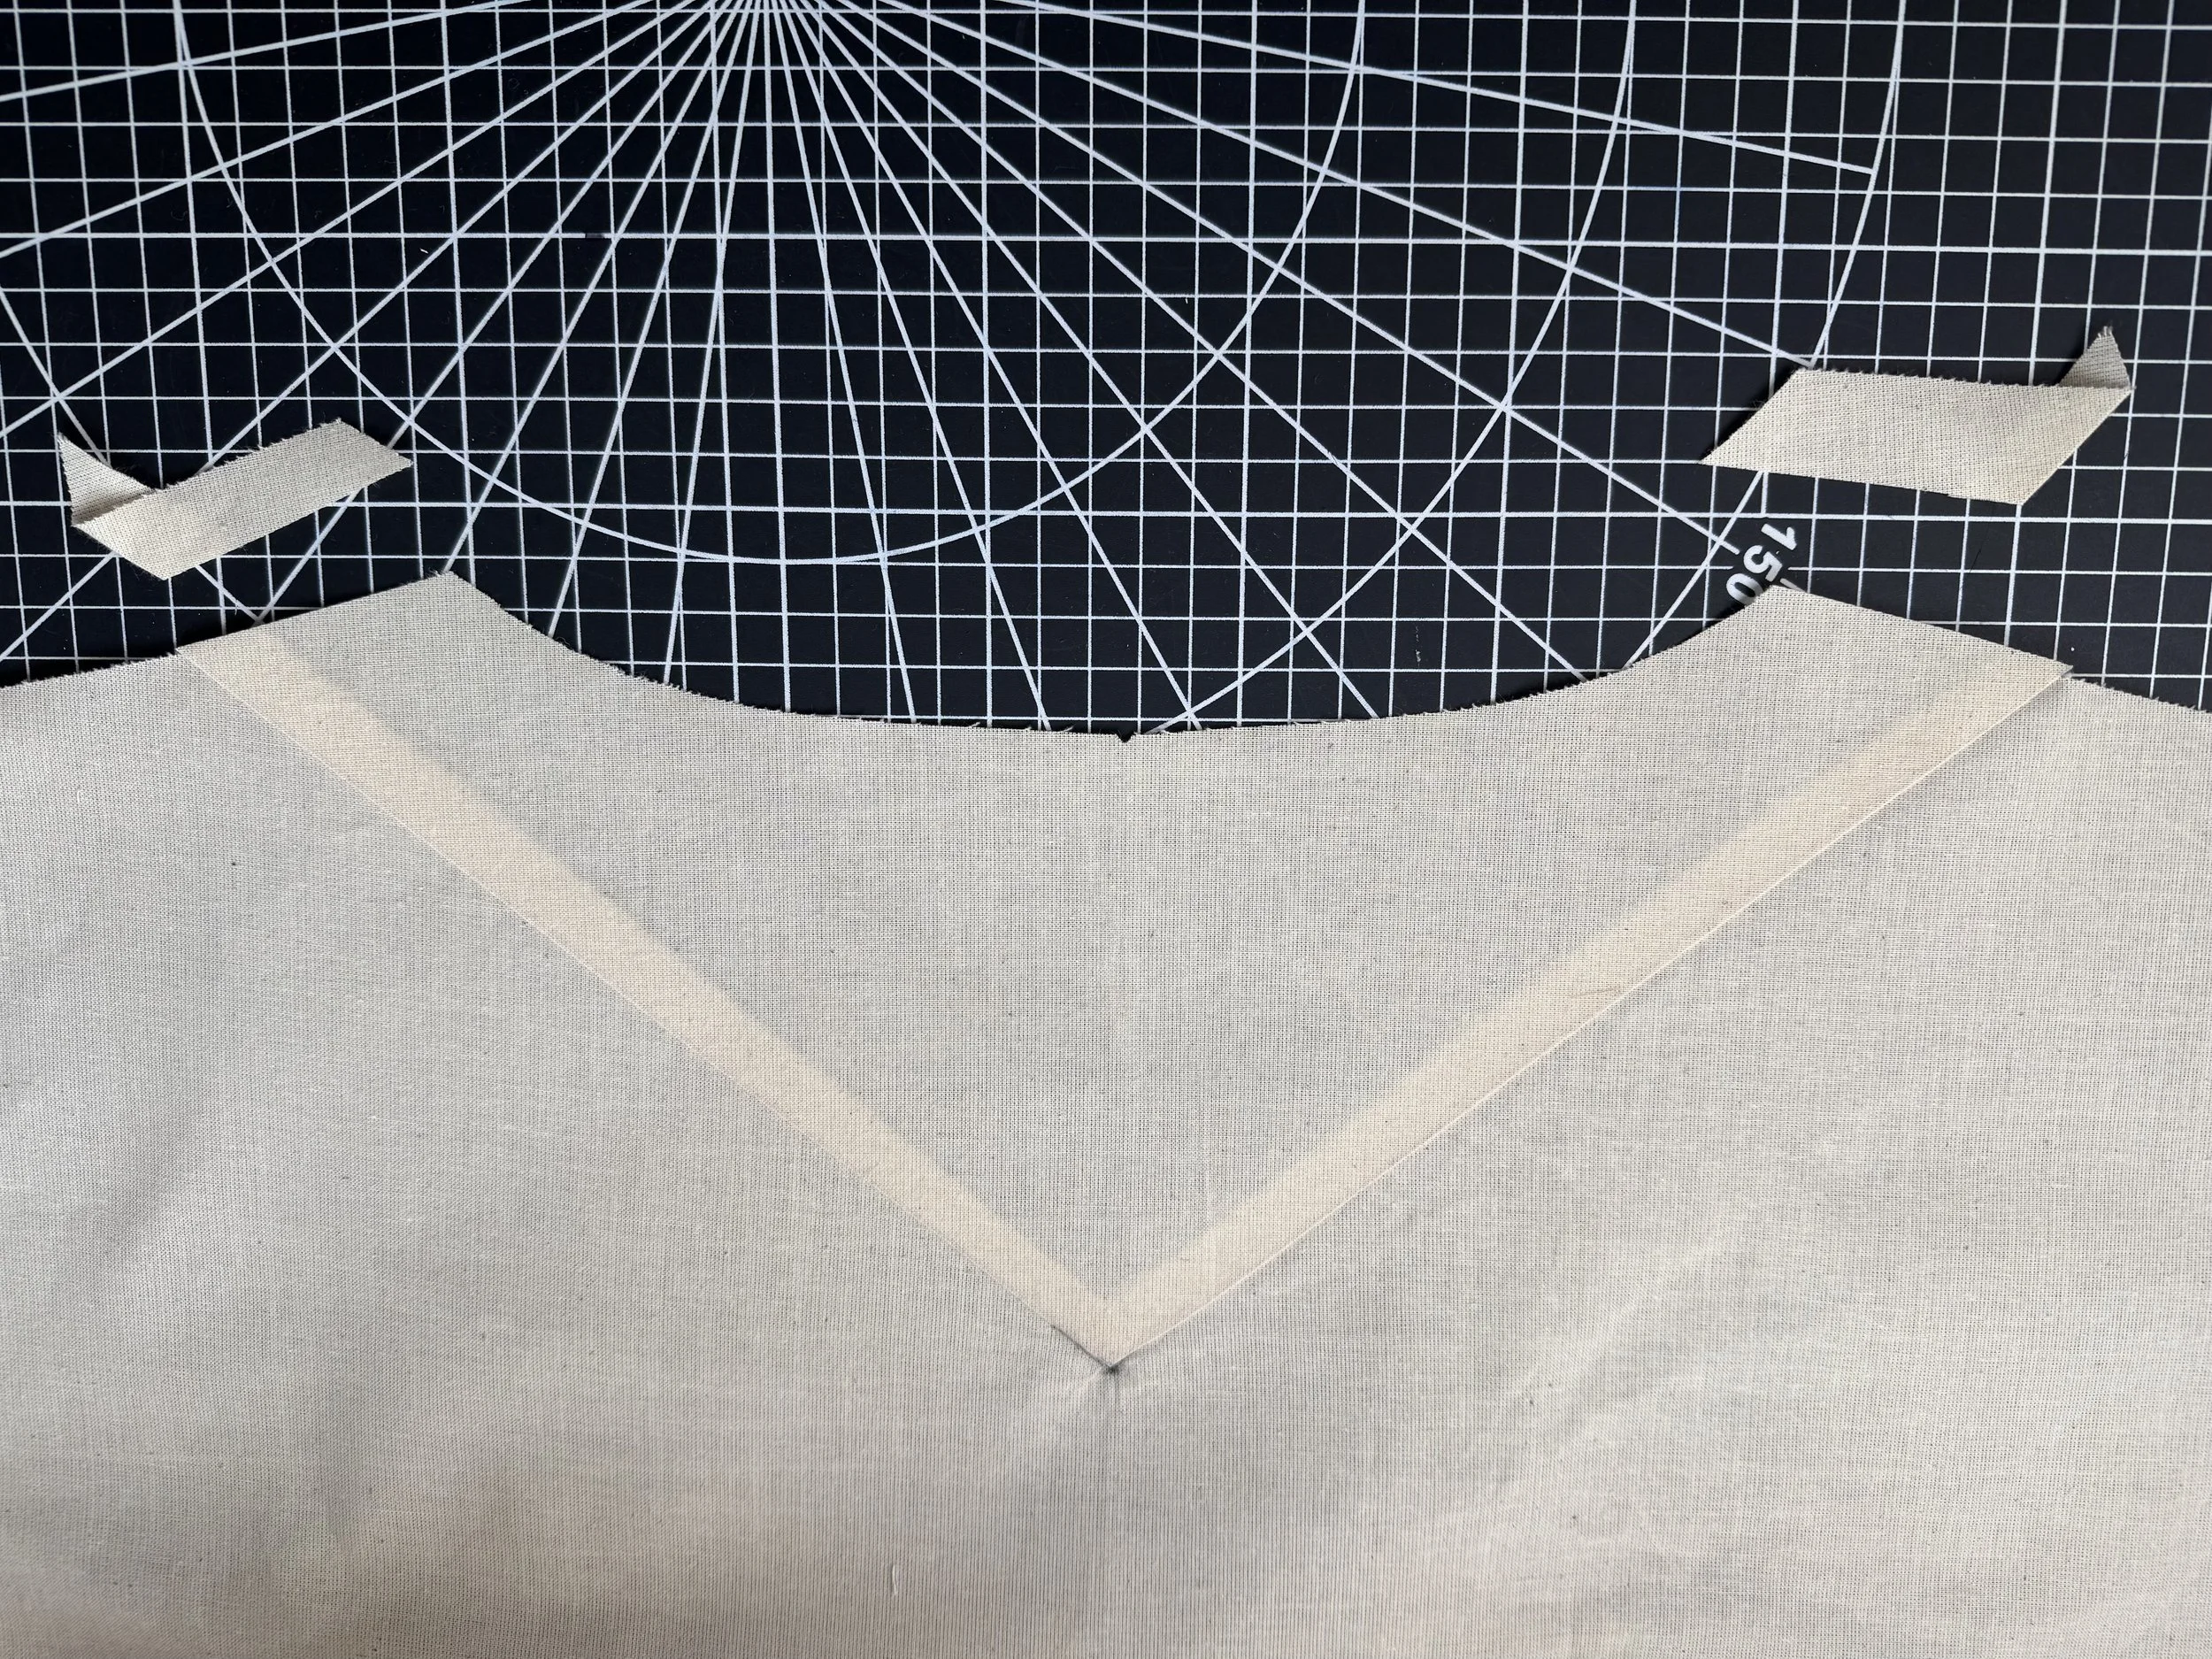 Sew your back yoke with the same method as the front. Trim the shoulders again. [/caption]
[caption id="" align="alignnone" width="5712"]
Sew your back yoke with the same method as the front. Trim the shoulders again. [/caption]
[caption id="" align="alignnone" width="5712"]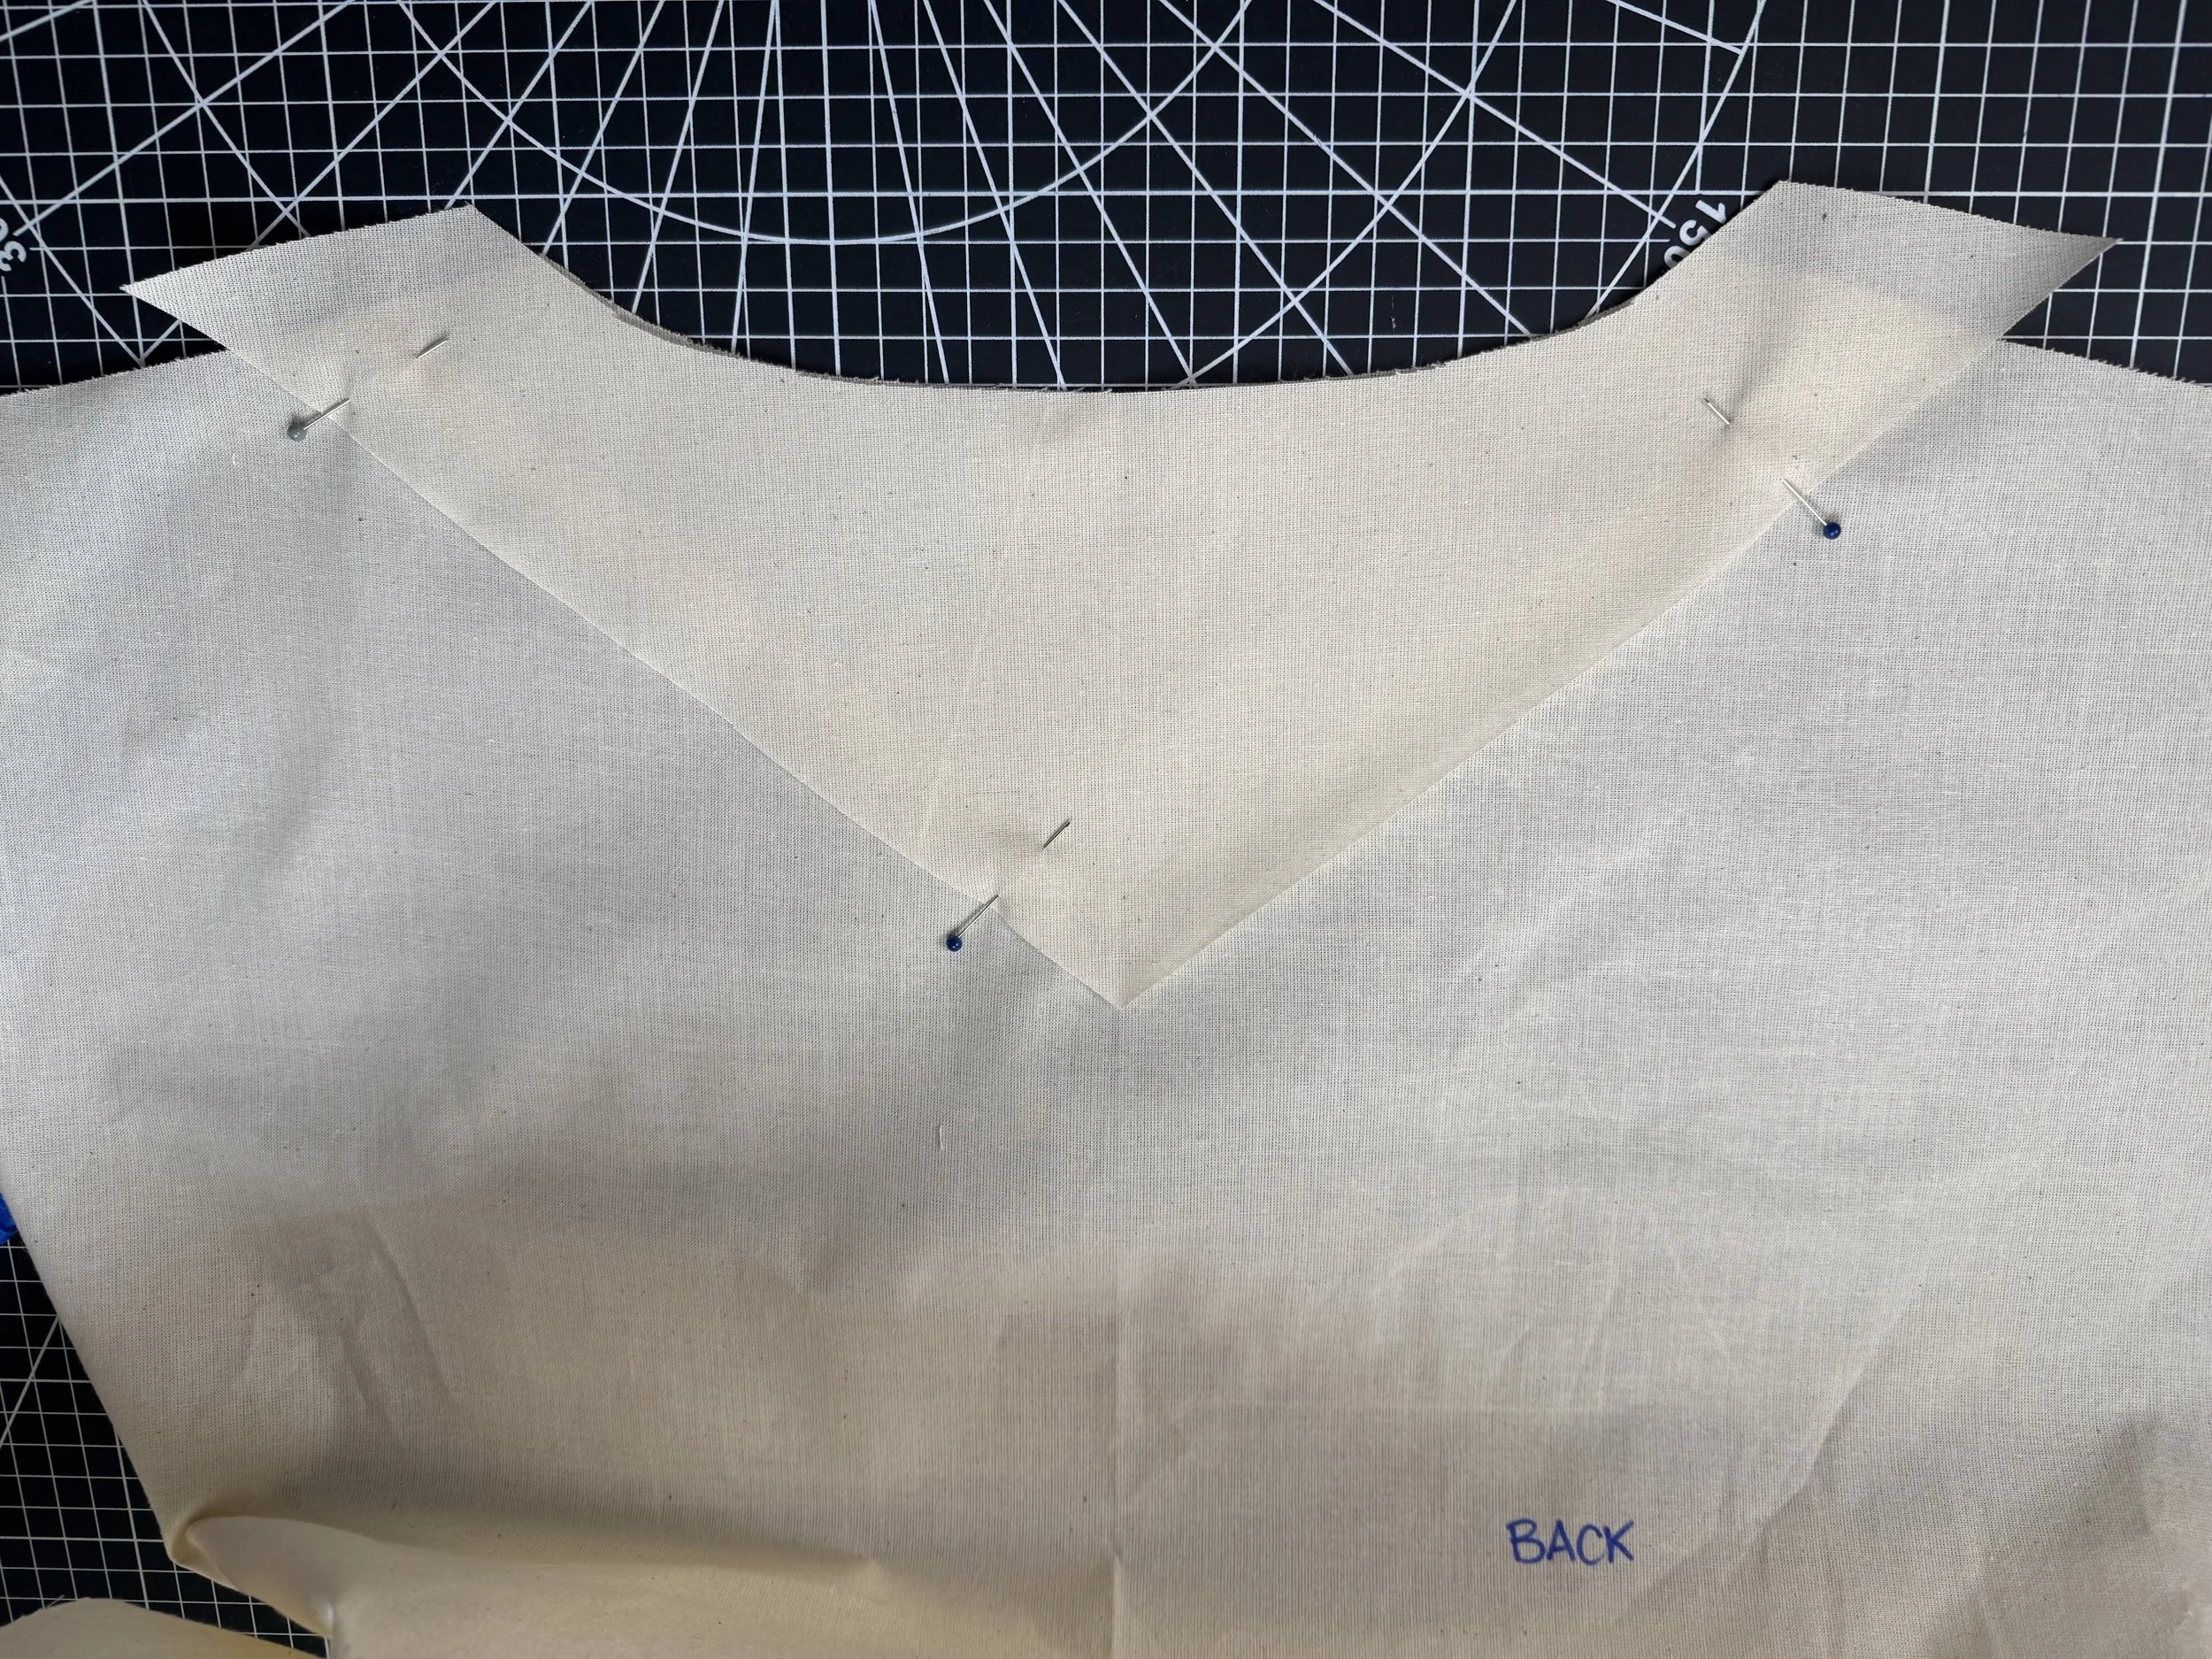 Pin the back yoke to the back bodice, right side to right side. [/caption]
[caption id="" align="alignnone" width="5712"]
Pin the back yoke to the back bodice, right side to right side. [/caption]
[caption id="" align="alignnone" width="5712"]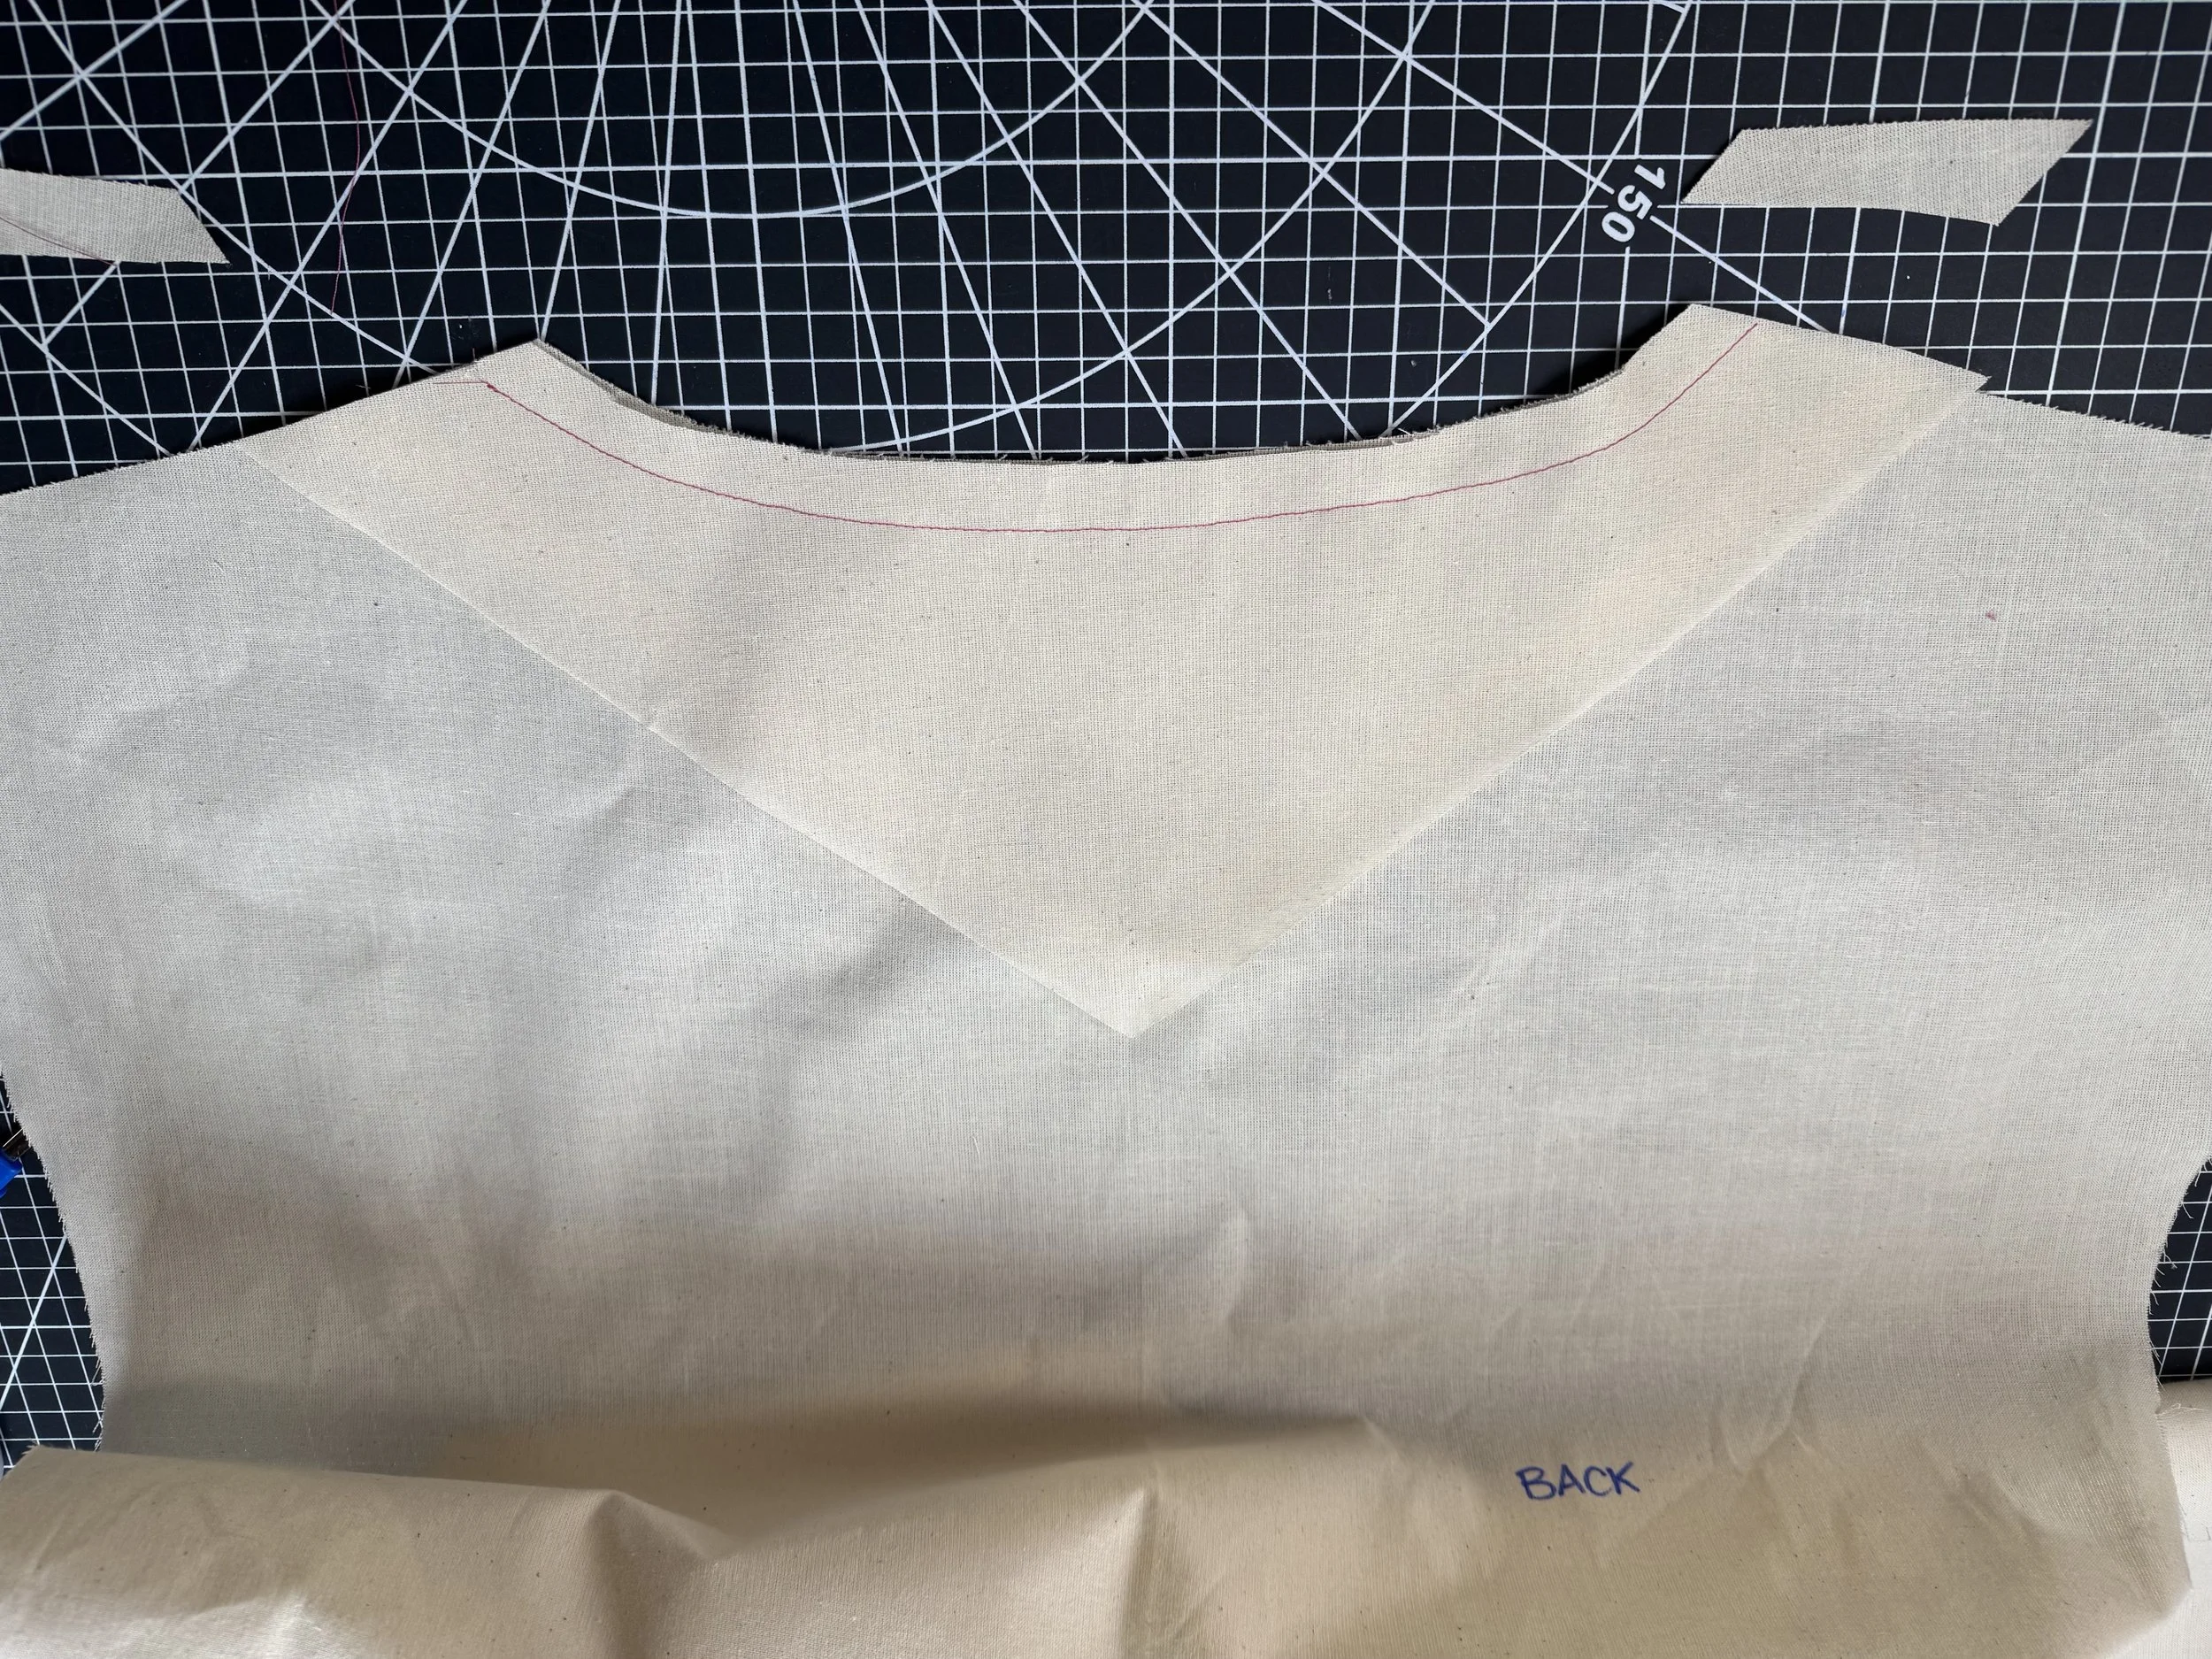 Sew your neckline at a seam allowance of 5/8” [/caption]
[caption id="" align="alignnone" width="5712"]
Sew your neckline at a seam allowance of 5/8” [/caption]
[caption id="" align="alignnone" width="5712"]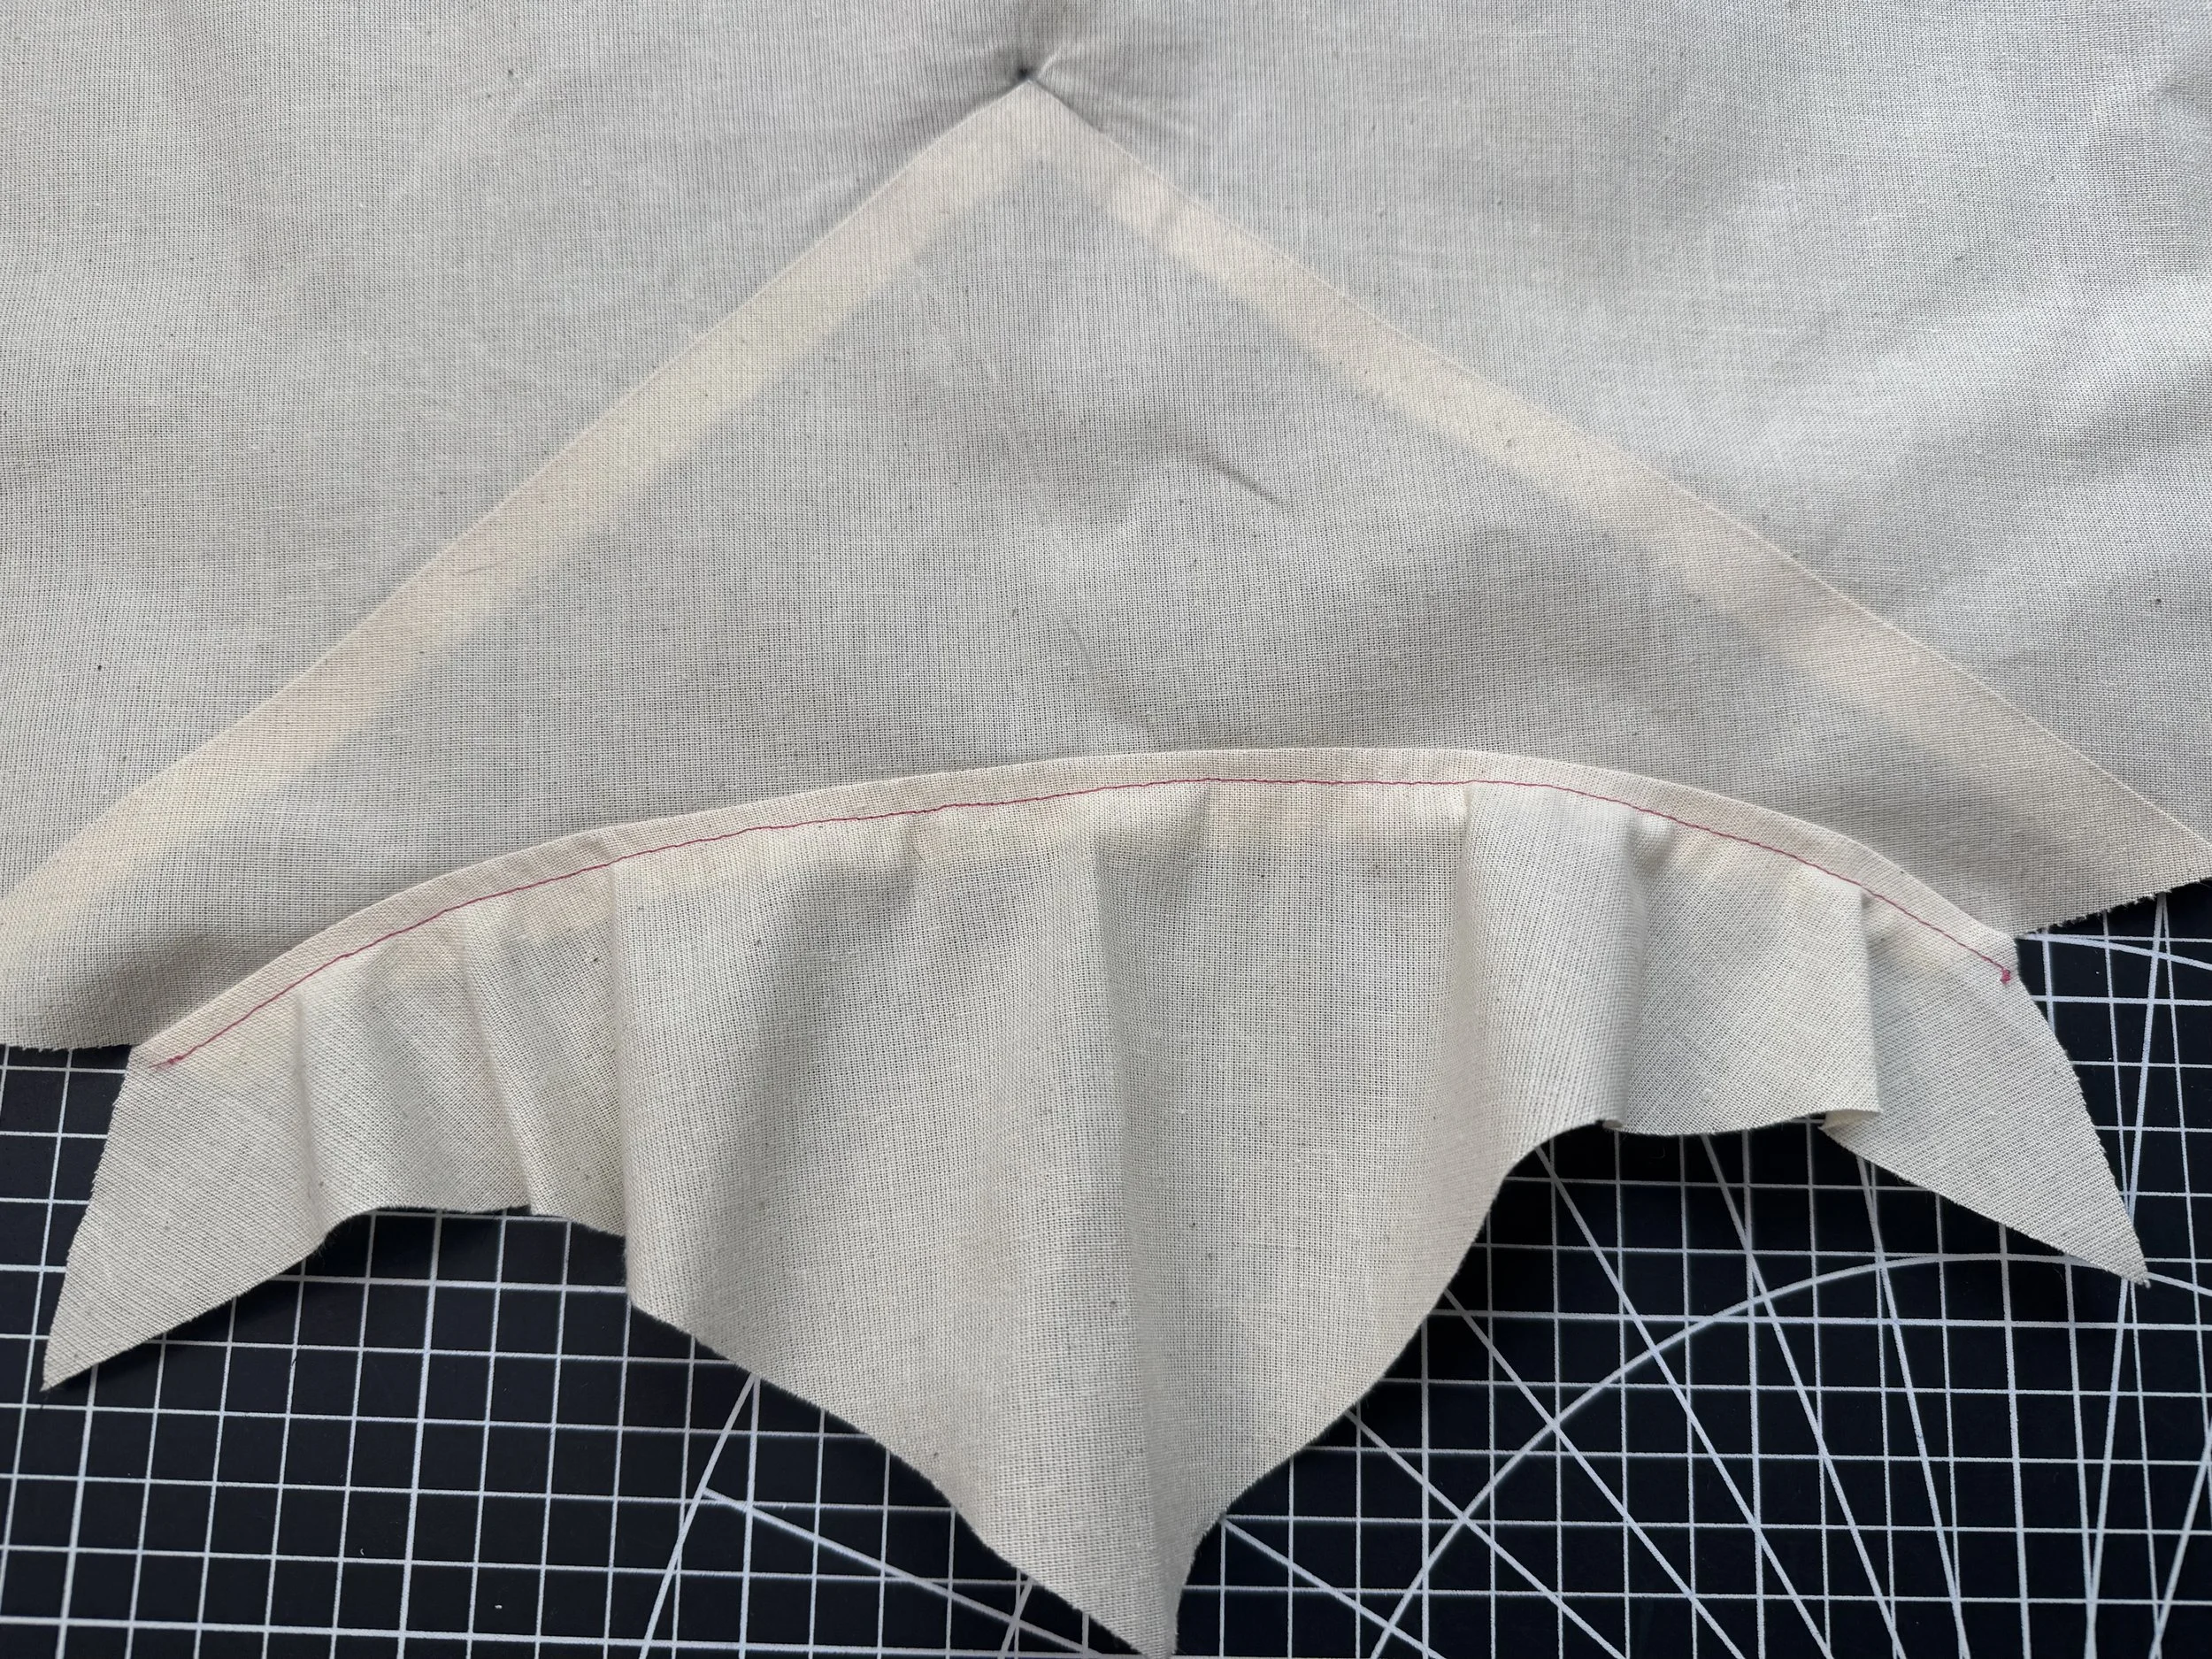 Flip your seams to the facing again, and understitch. The neckline has a minimal curve, and snipping should not be necessary. [/caption]
[caption id="" align="alignnone" width="5712"]
Flip your seams to the facing again, and understitch. The neckline has a minimal curve, and snipping should not be necessary. [/caption]
[caption id="" align="alignnone" width="5712"]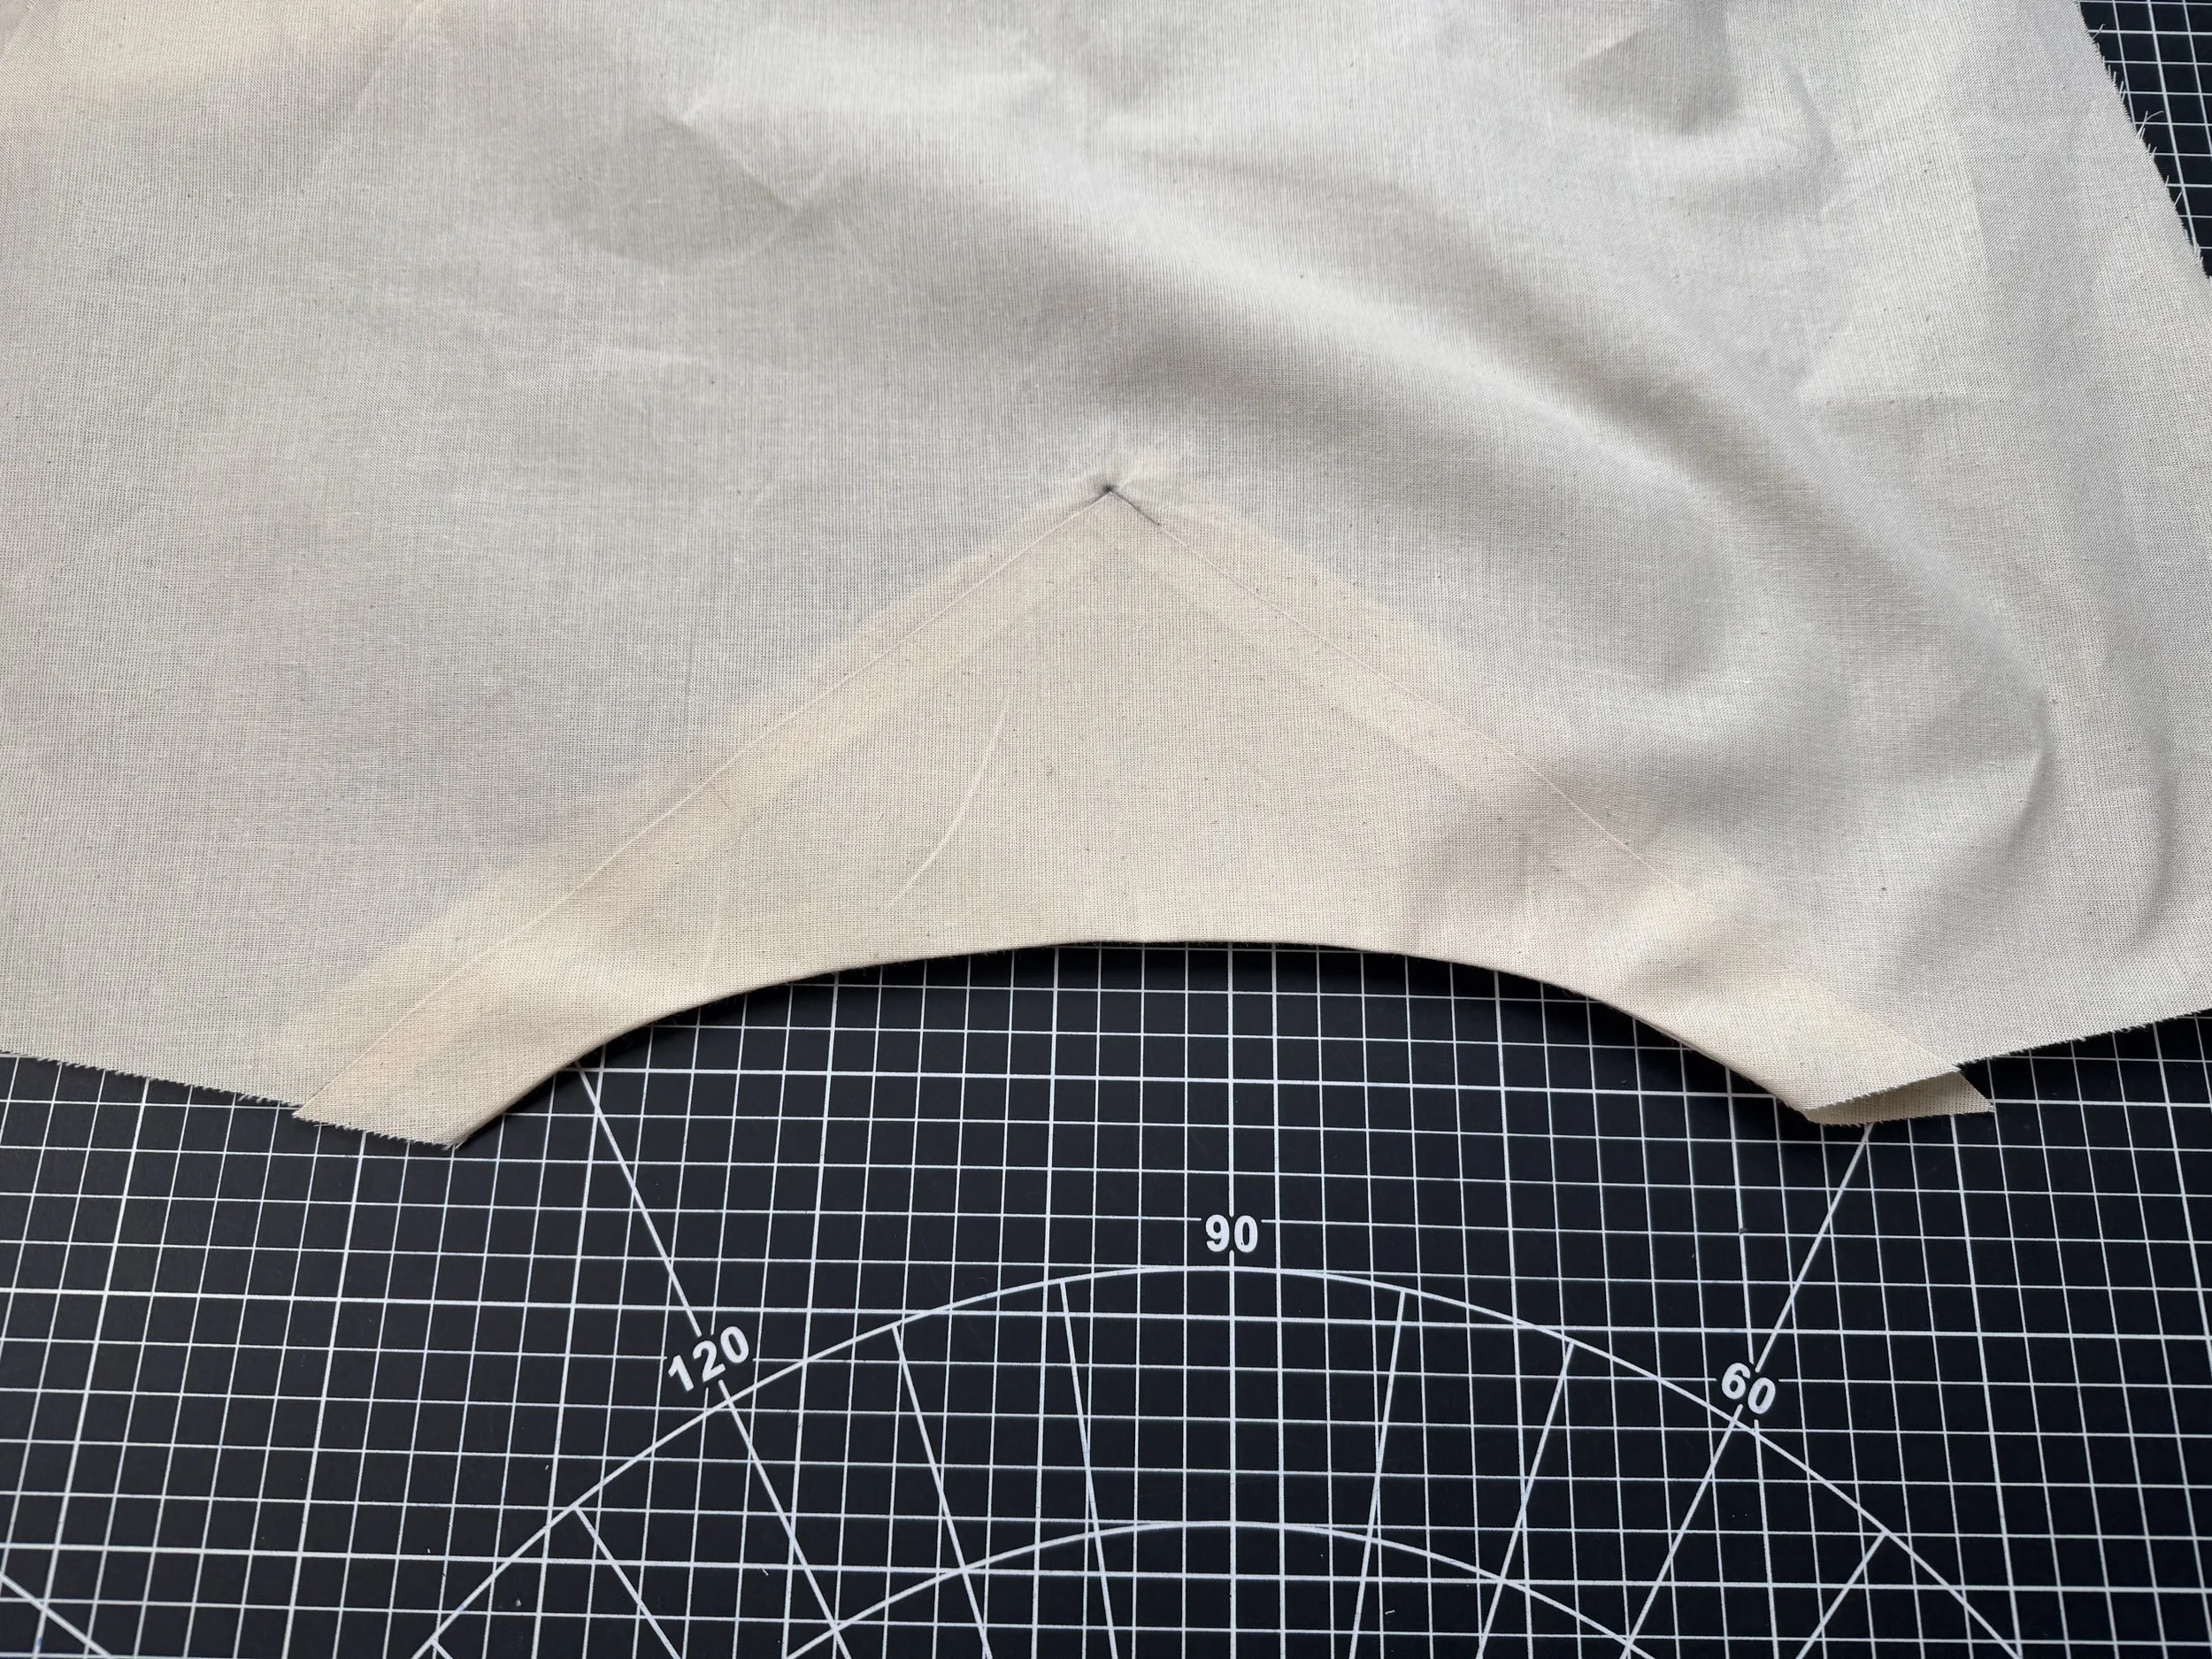 Press the facing to the wrong side. [/caption]
[caption id="" align="alignnone" width="4032"]
Press the facing to the wrong side. [/caption]
[caption id="" align="alignnone" width="4032"]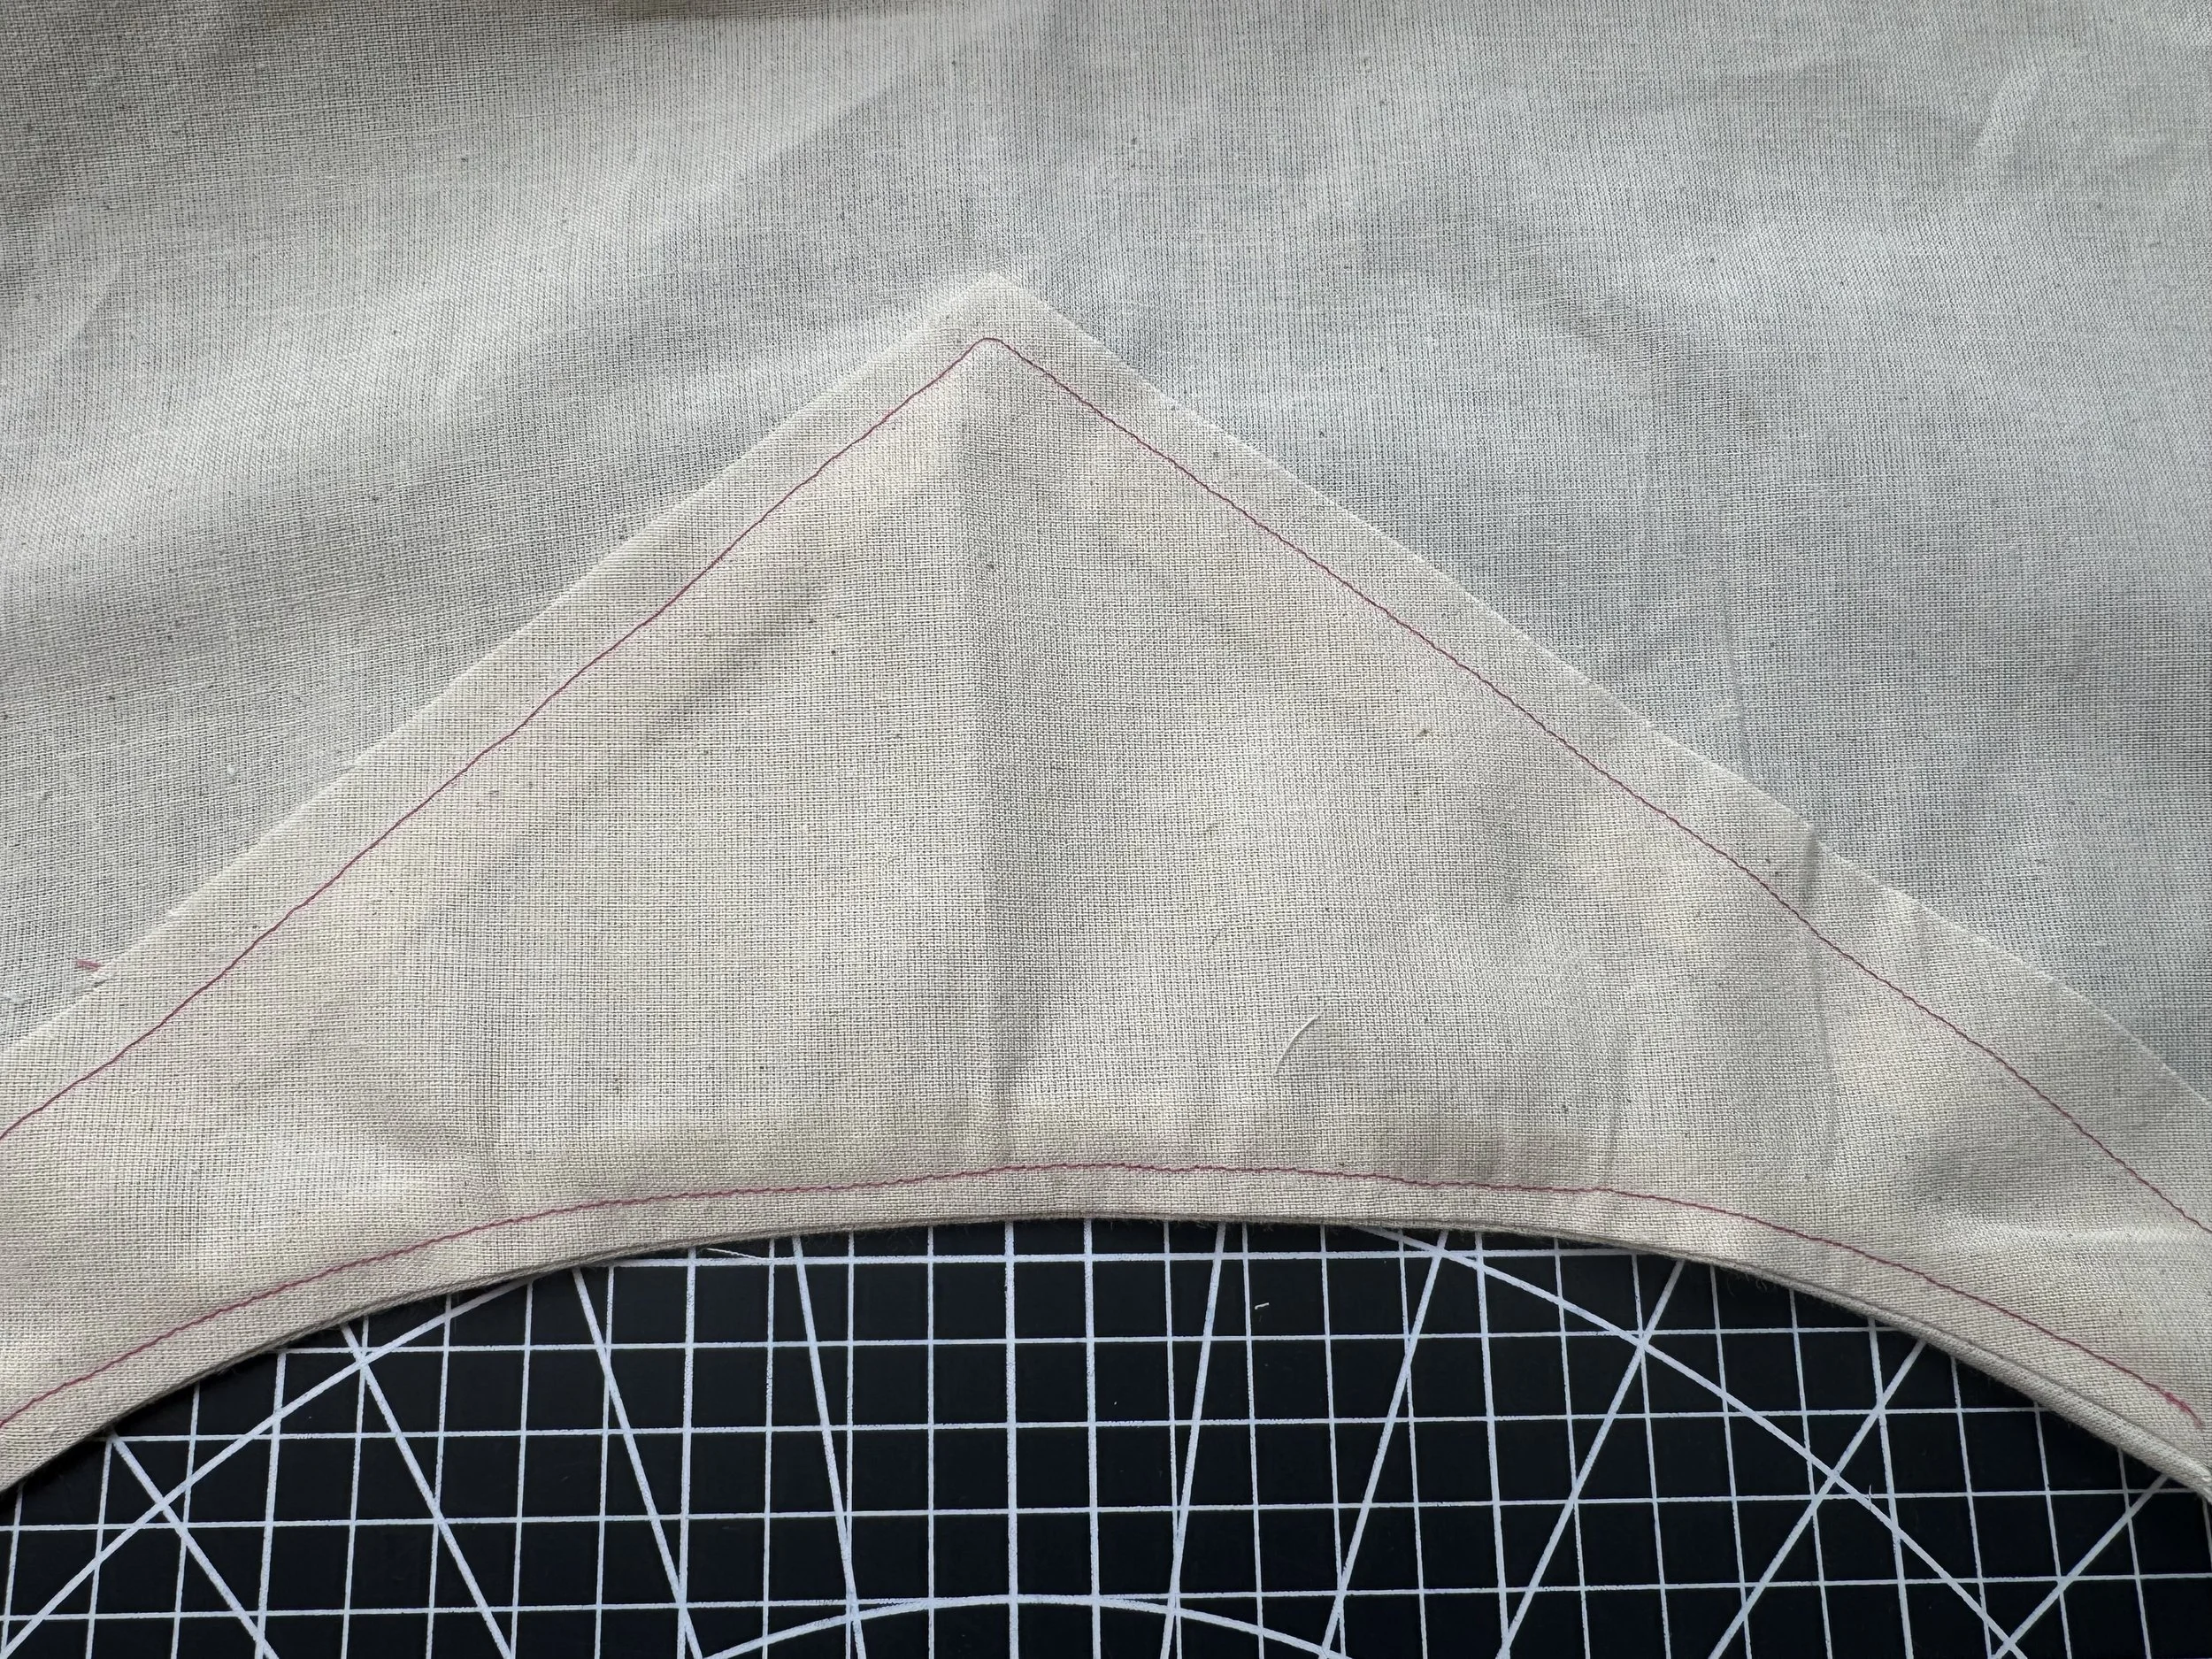 Stitch in the ditch from the right side. [/caption]
[caption id="" align="alignnone" width="5712"]
Stitch in the ditch from the right side. [/caption]
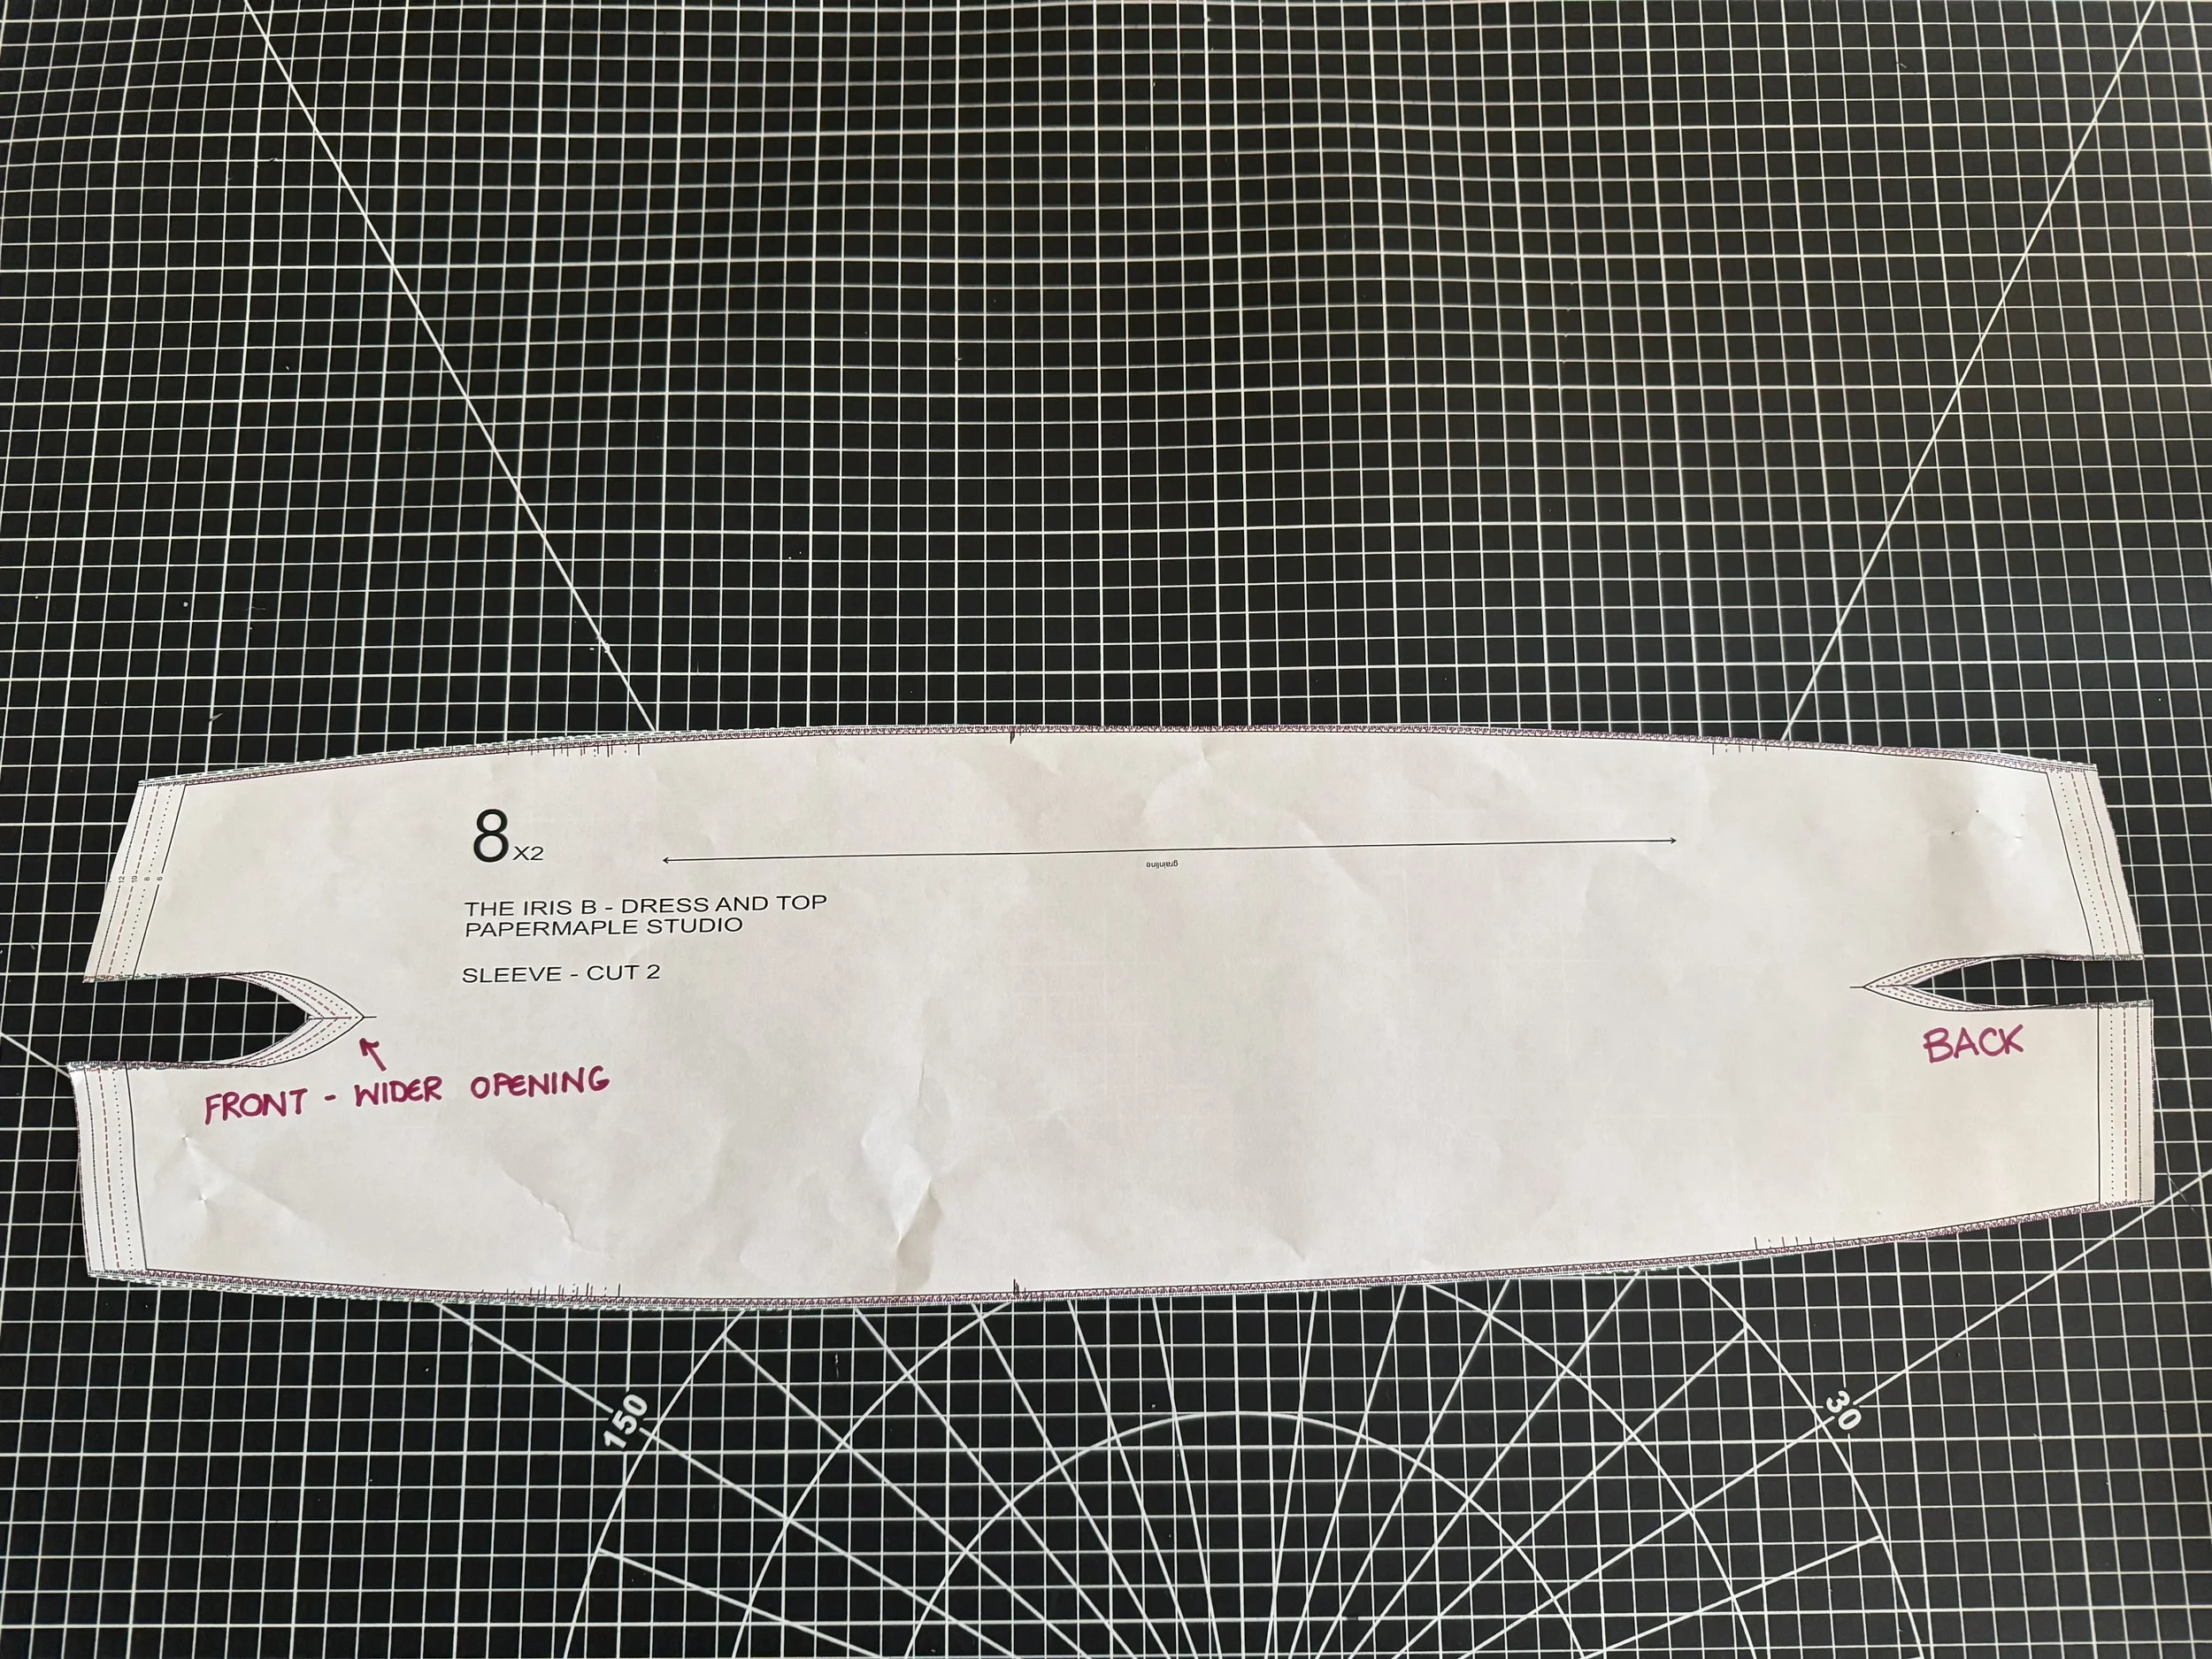
[caption id="" align="alignnone" width="5712"]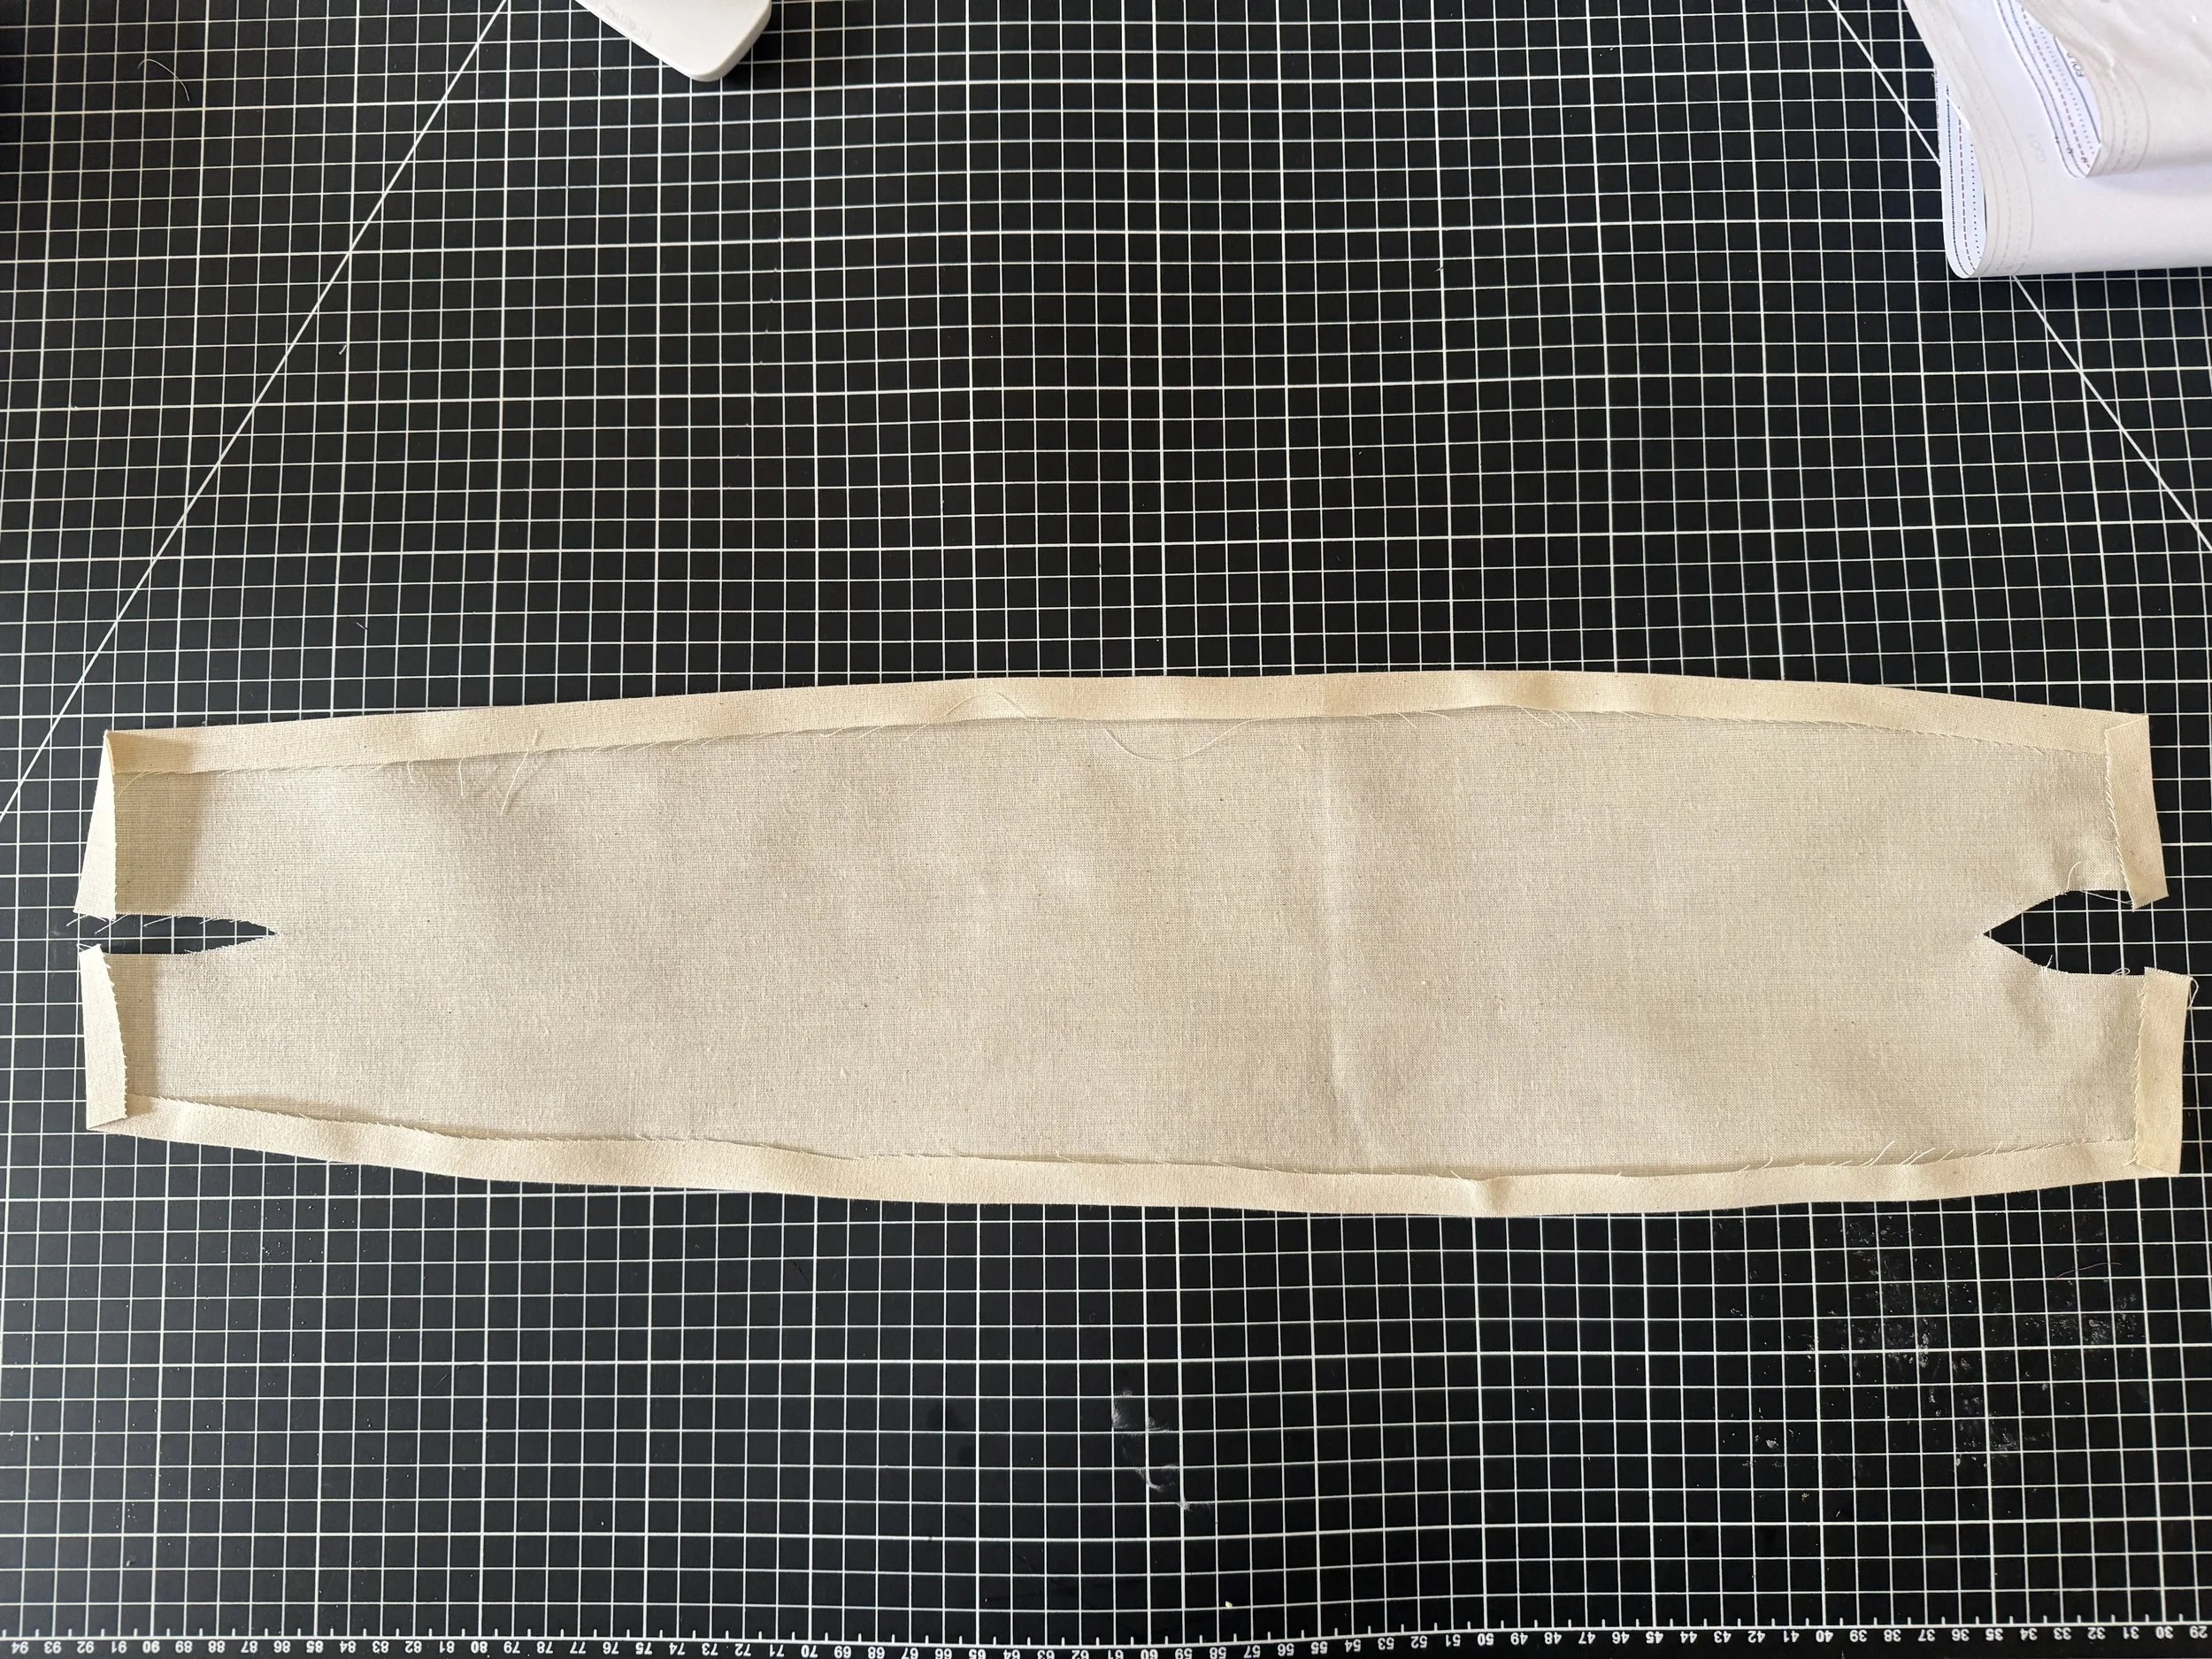 Sleeves next! These are a little different and so much easier than a standard sleeve…… Press the seam allowances in on all edges, at 1/2” The larger curve is the front of the sleeve. [/caption]
 [caption id="" align="alignnone" width="5712"]
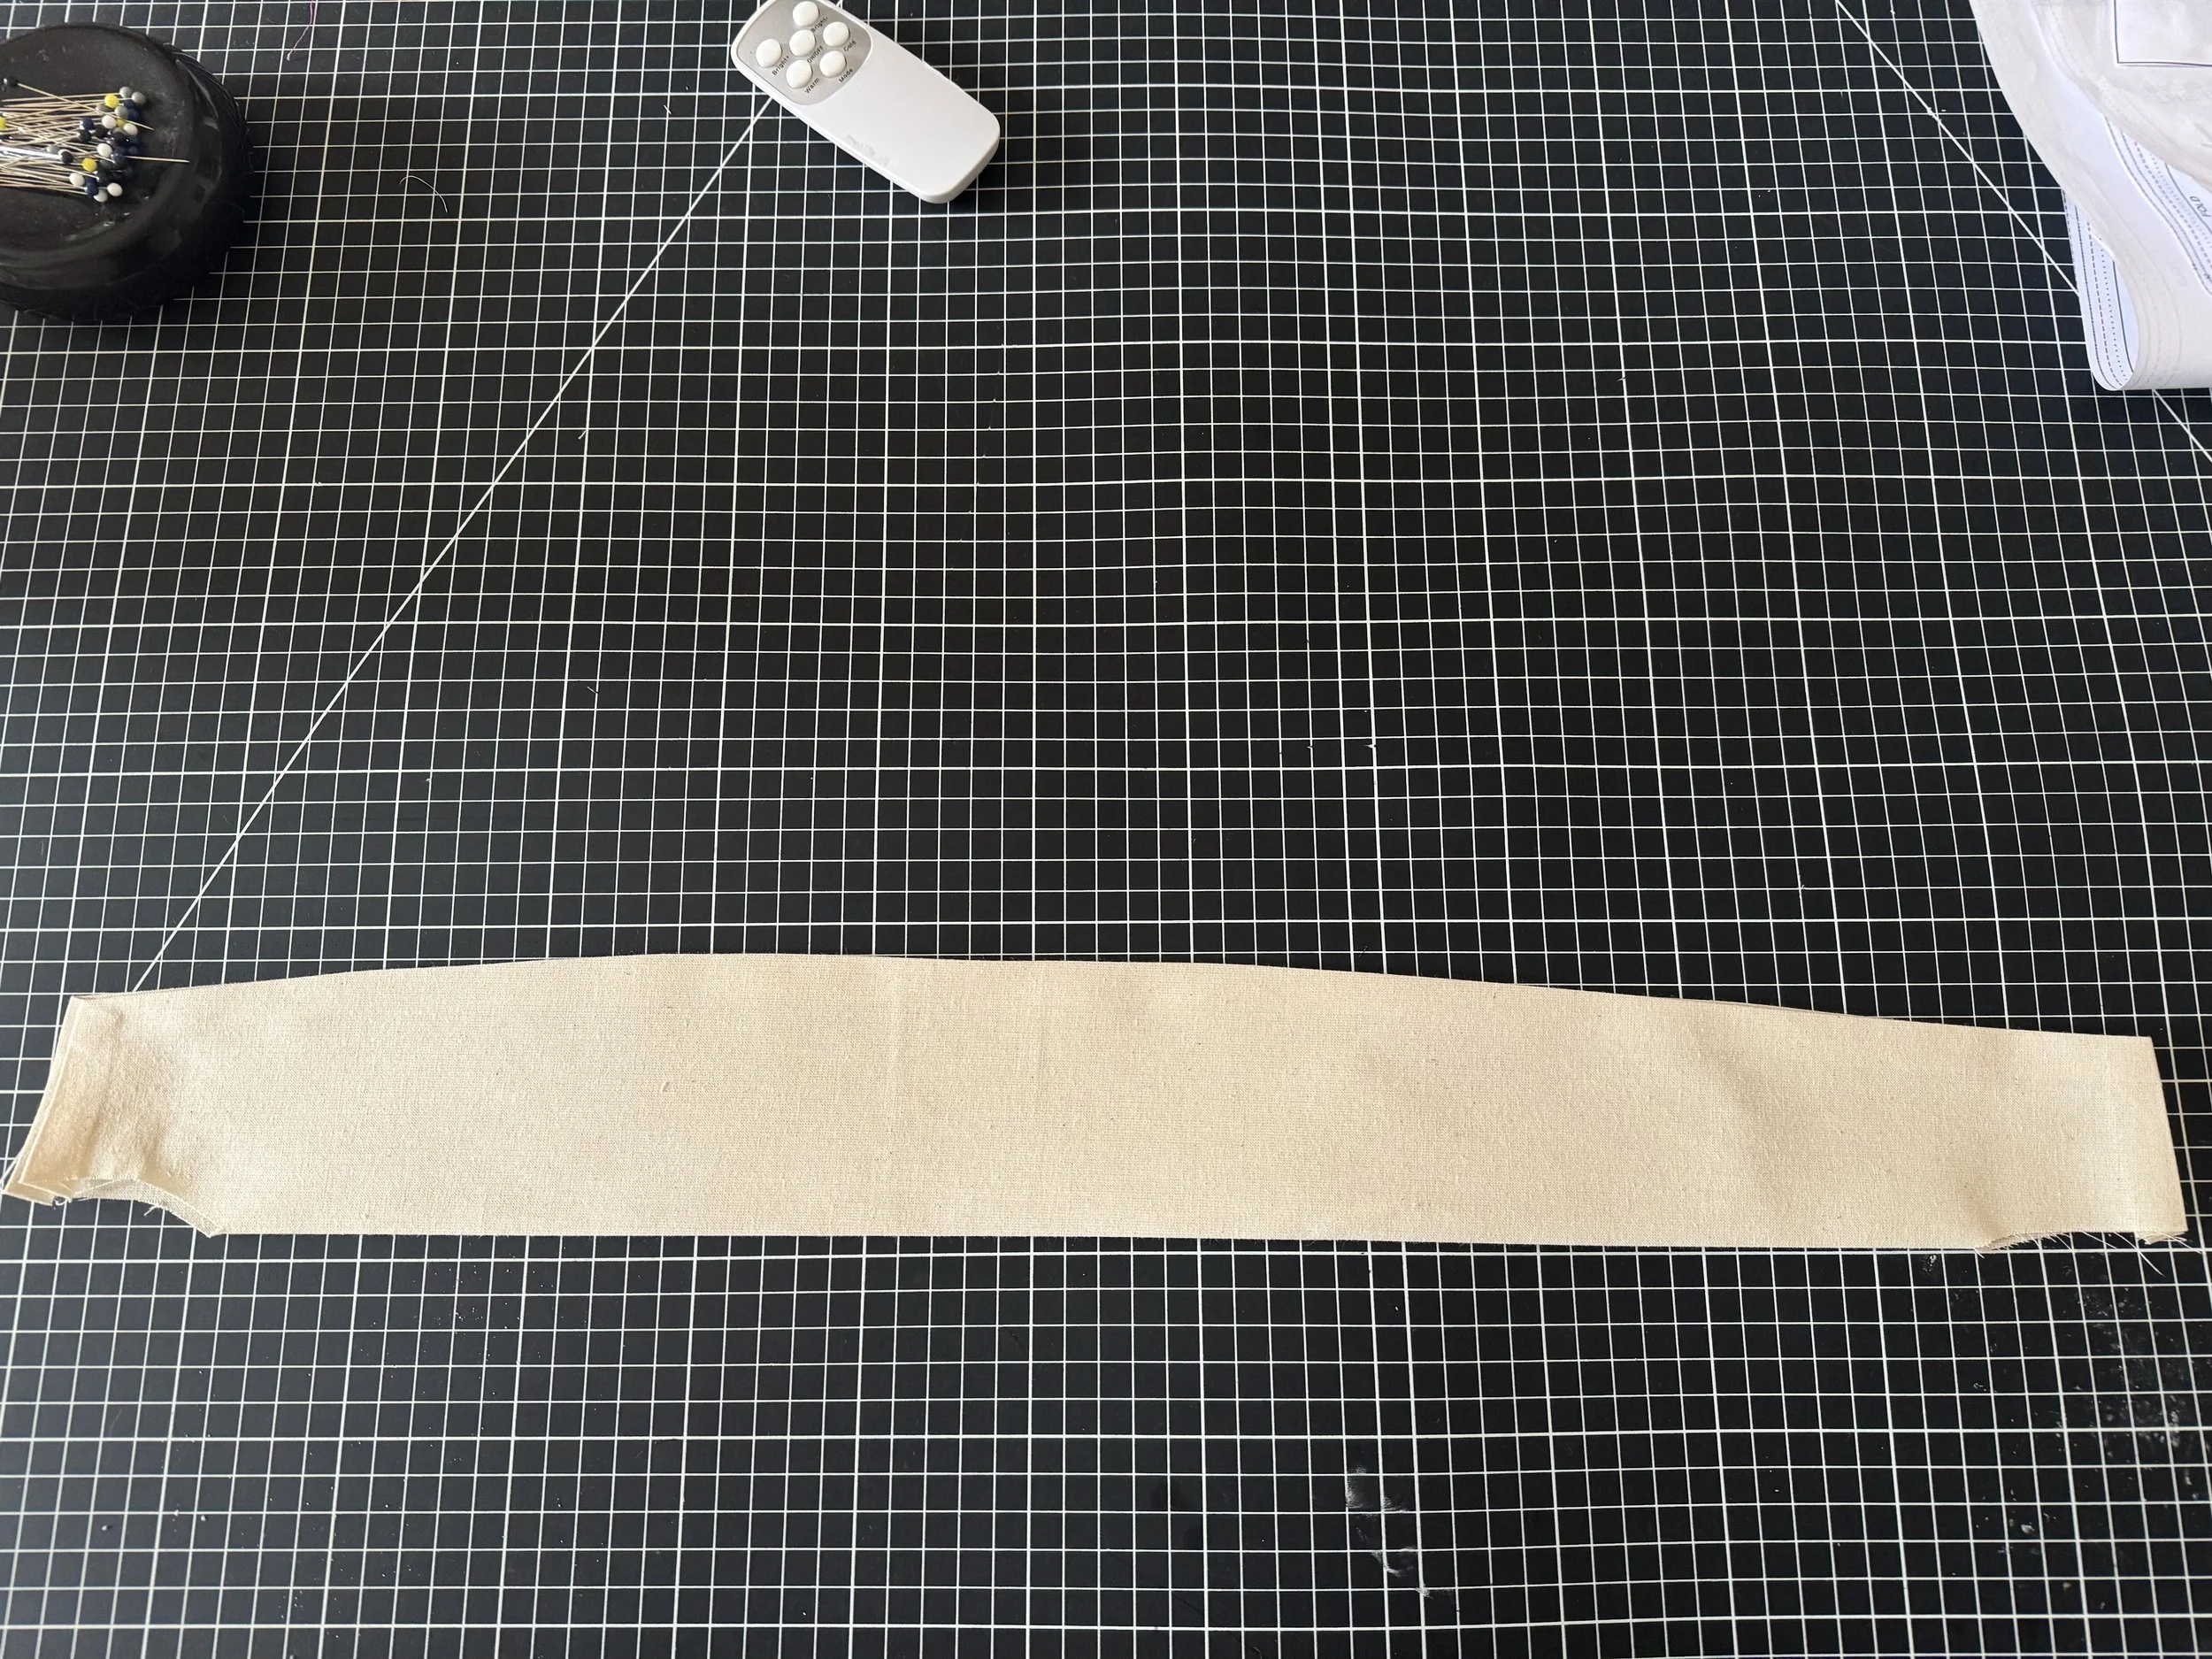 Fold the sleeve in half and press well. [/caption]
[caption id="" align="alignnone" width="5712"]
Fold the sleeve in half and press well. [/caption]
[caption id="" align="alignnone" width="5712"]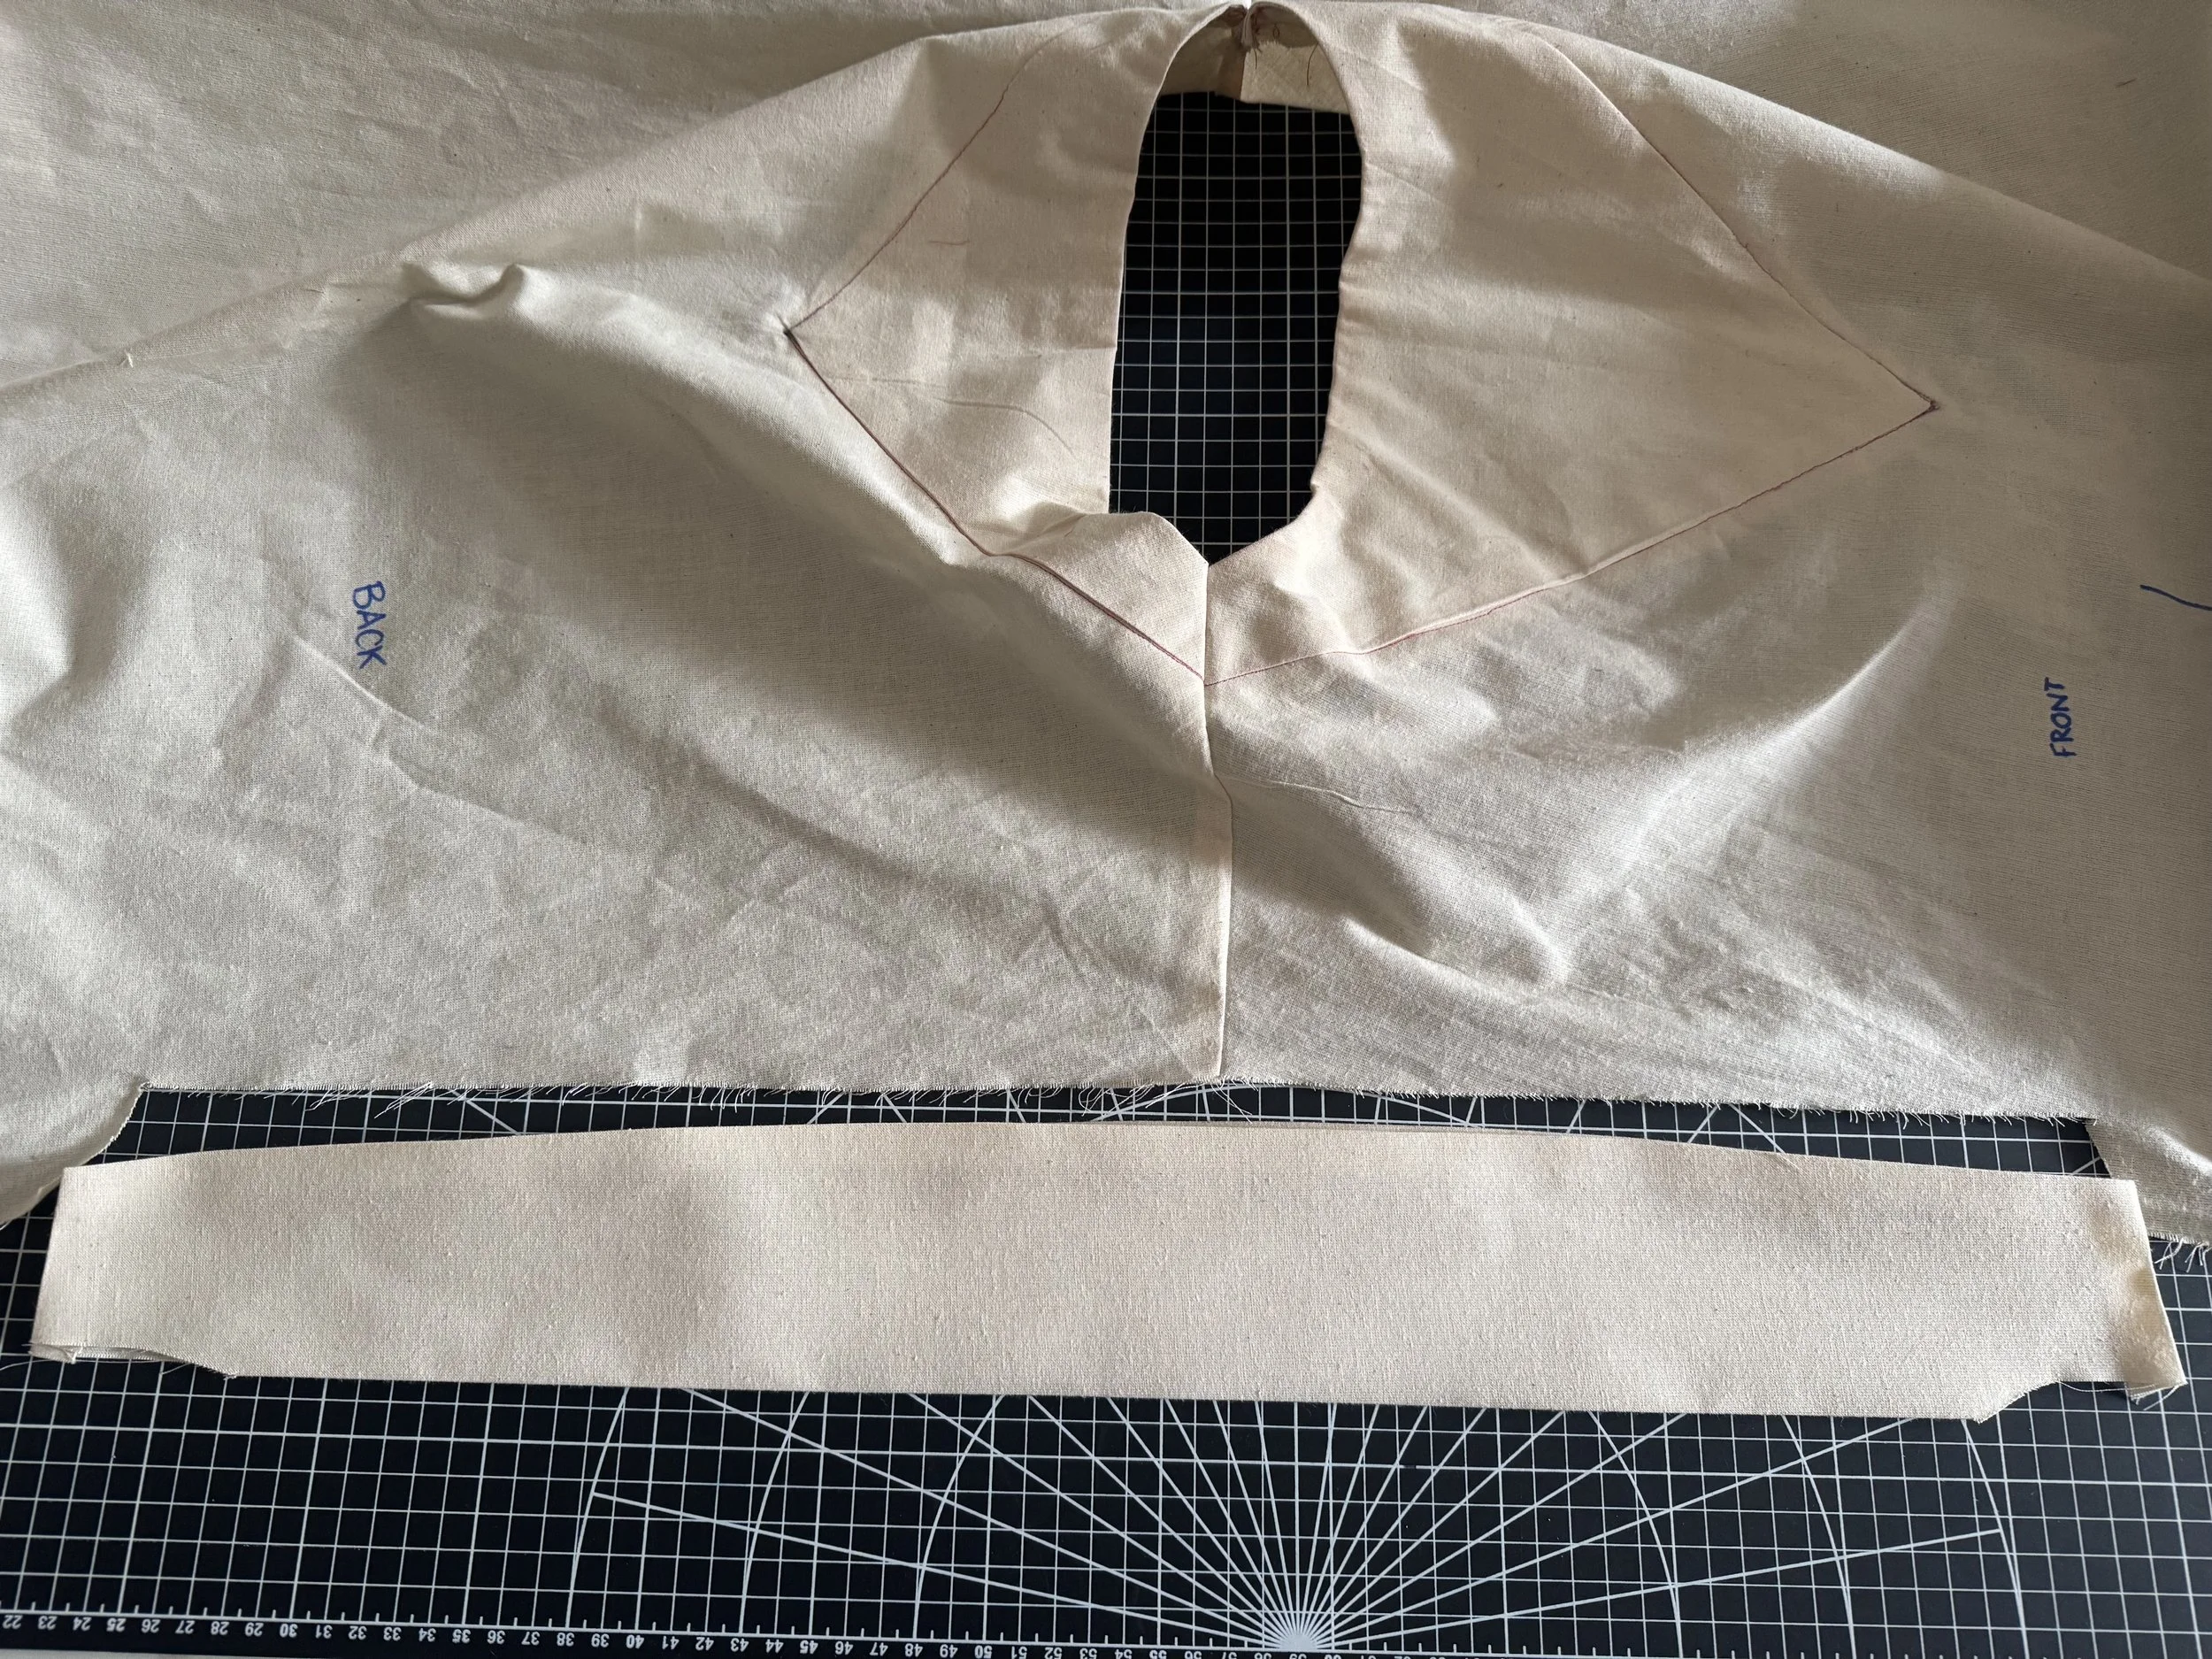 Line your sleeve to the bodice. Slide the sleeve onto the bodice, encasing the bodice seam. [/caption]
[caption id="" align="alignnone" width="5712"]
Line your sleeve to the bodice. Slide the sleeve onto the bodice, encasing the bodice seam. [/caption]
[caption id="" align="alignnone" width="5712"]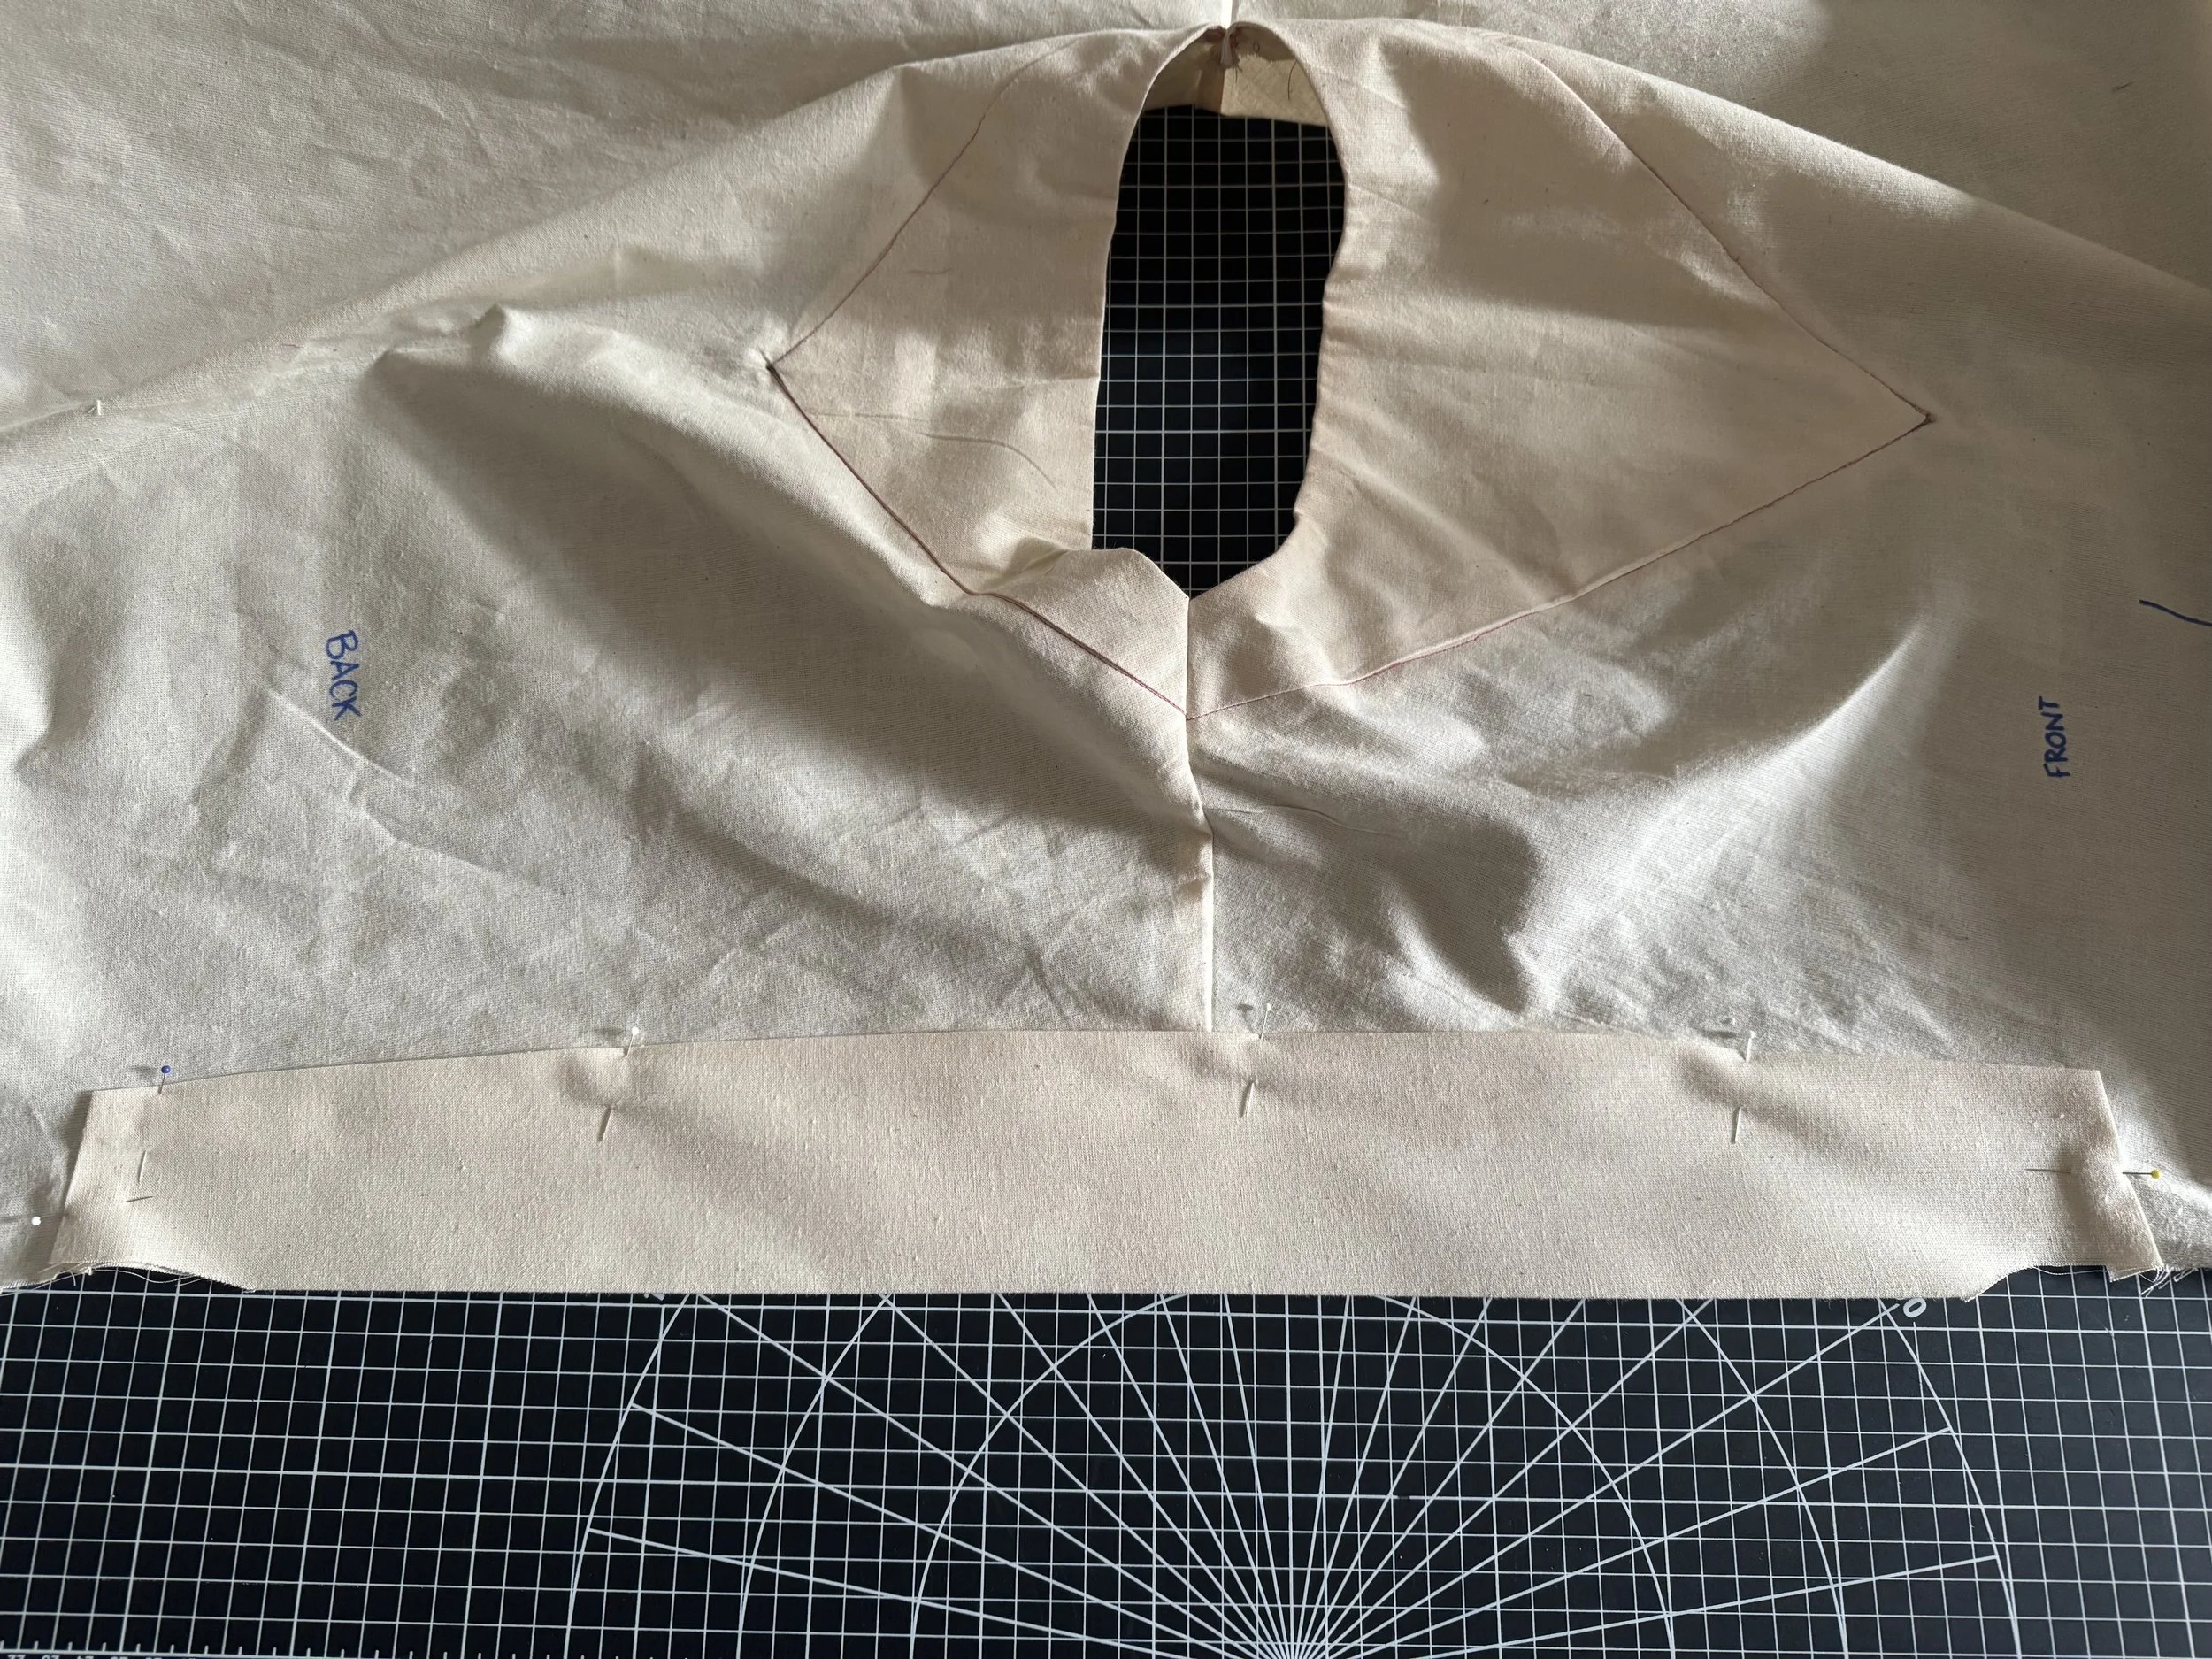 Pin. [/caption]
 [caption id="" align="alignnone" width="5712"]
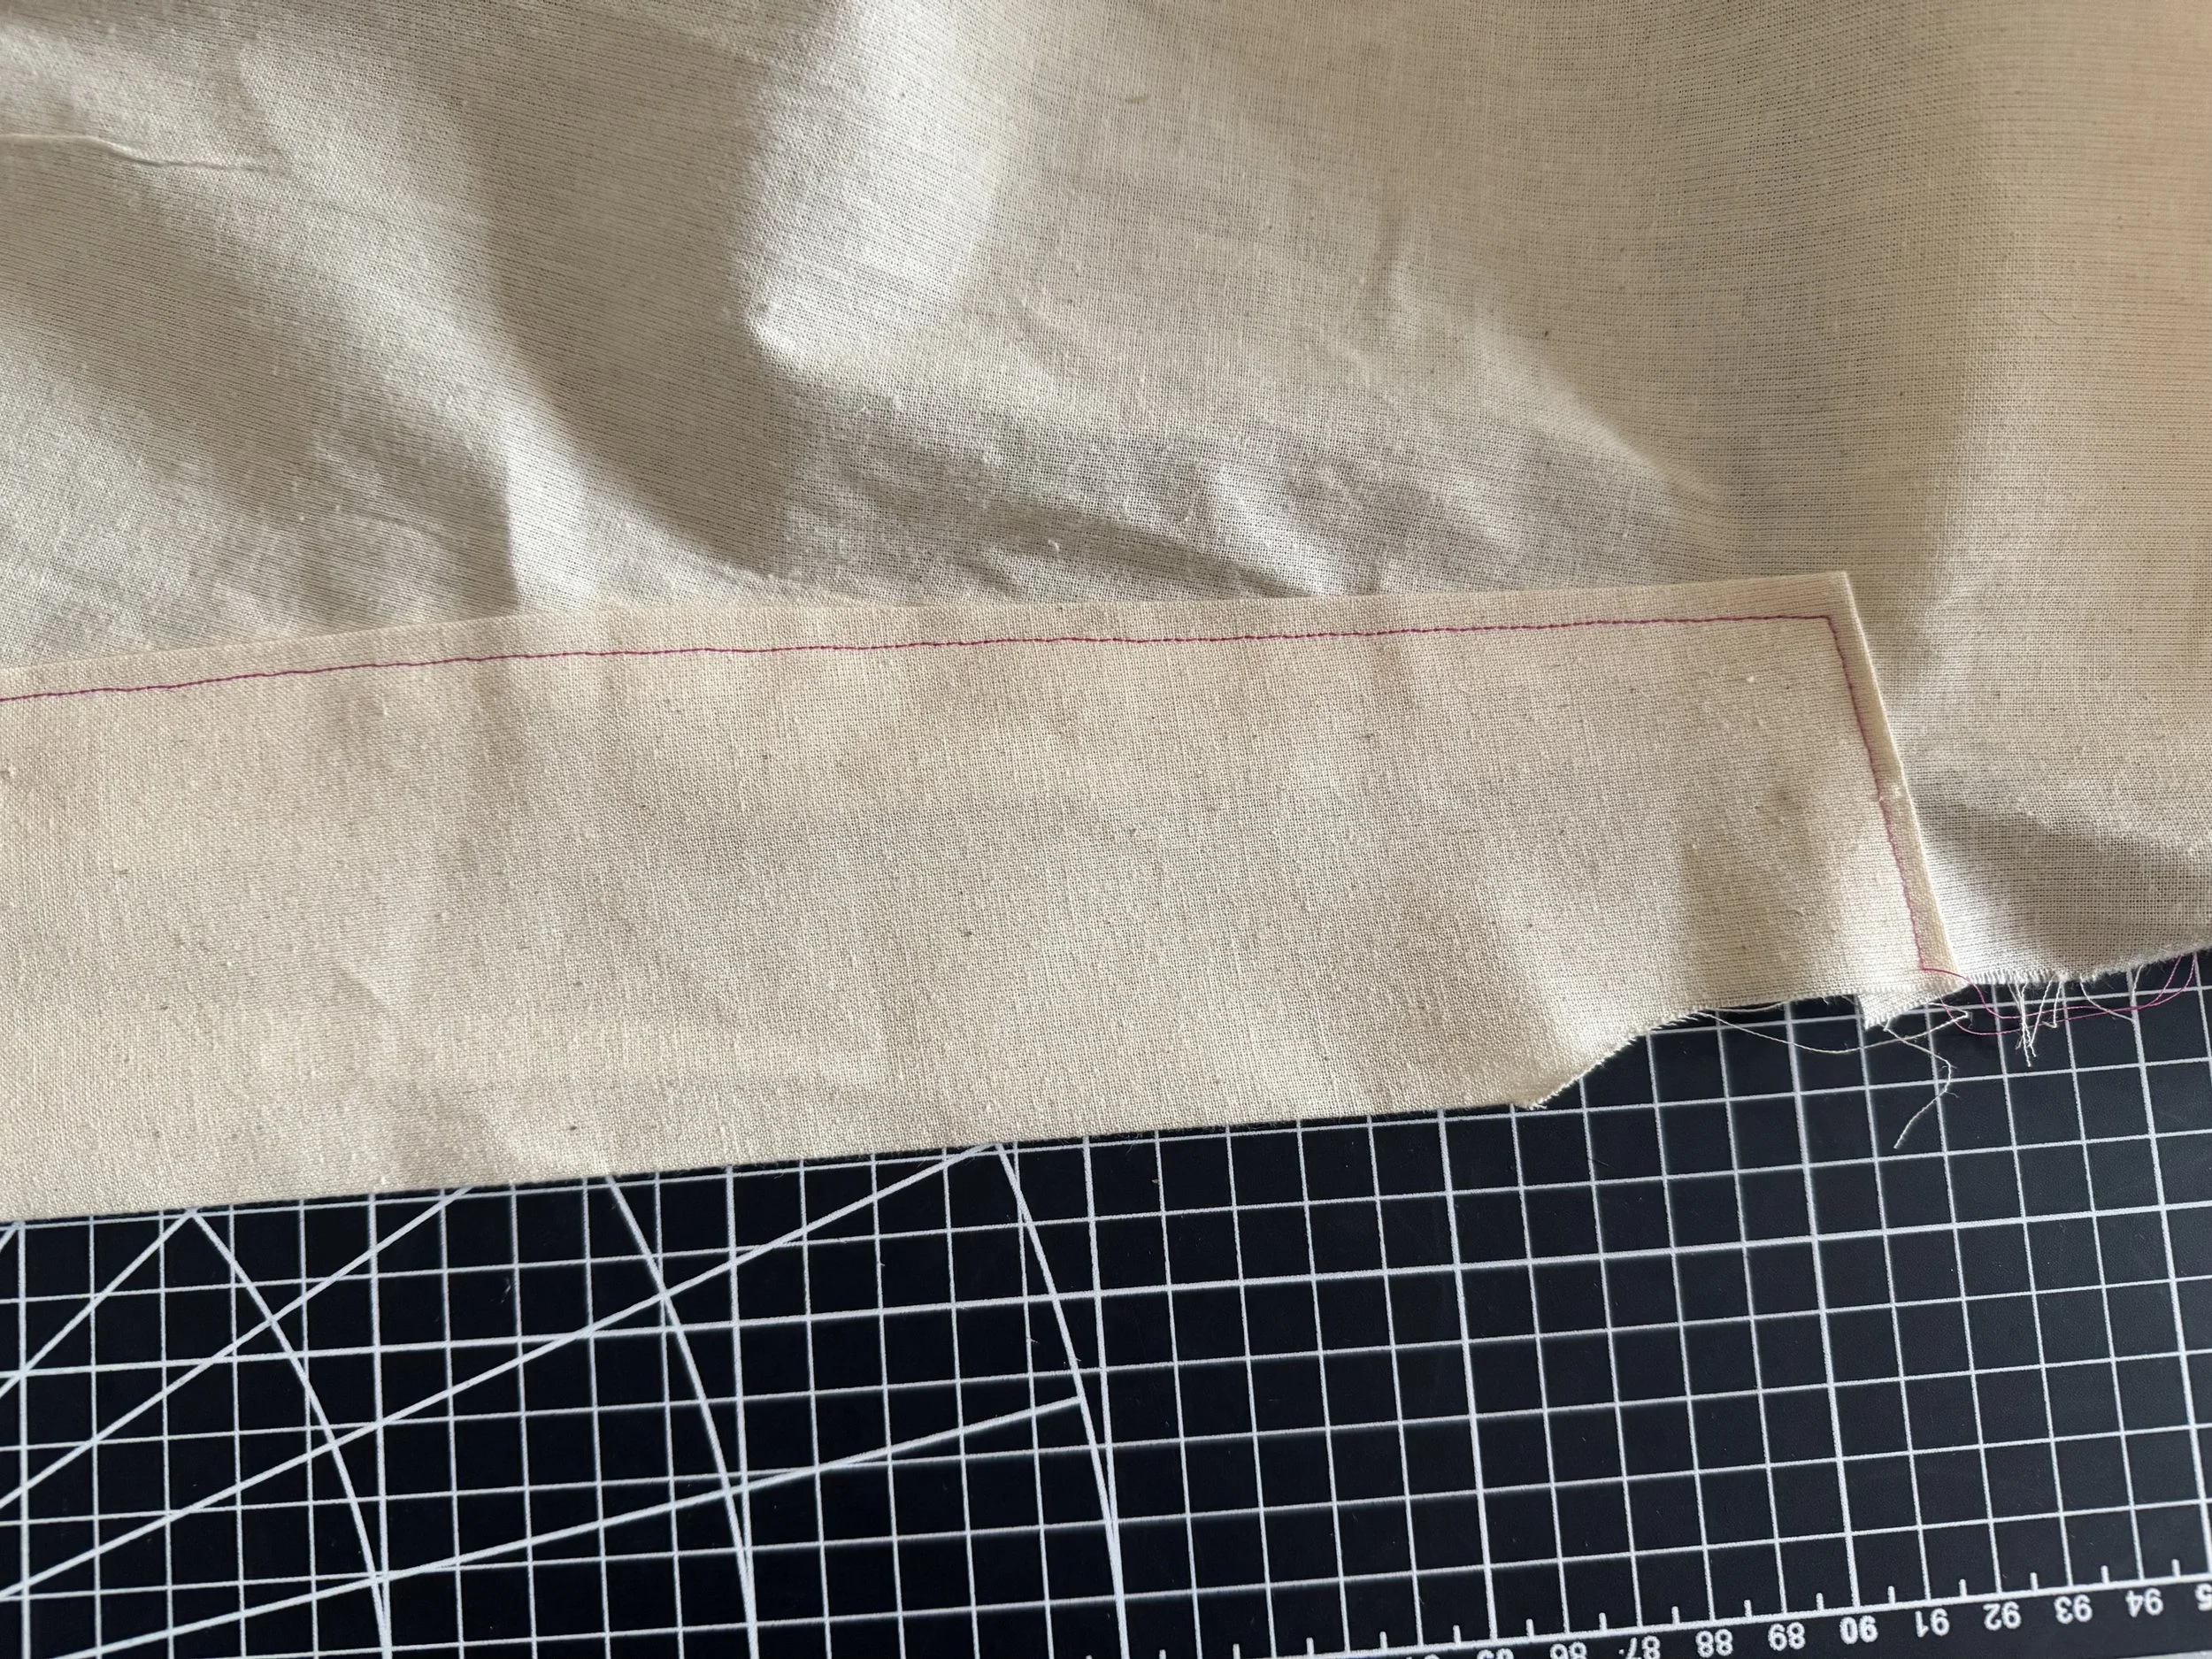
 Sew the sleeve, keeping the stitch close to the edge. Press. [/caption]
 [caption id="" align="alignnone" width="5712"]
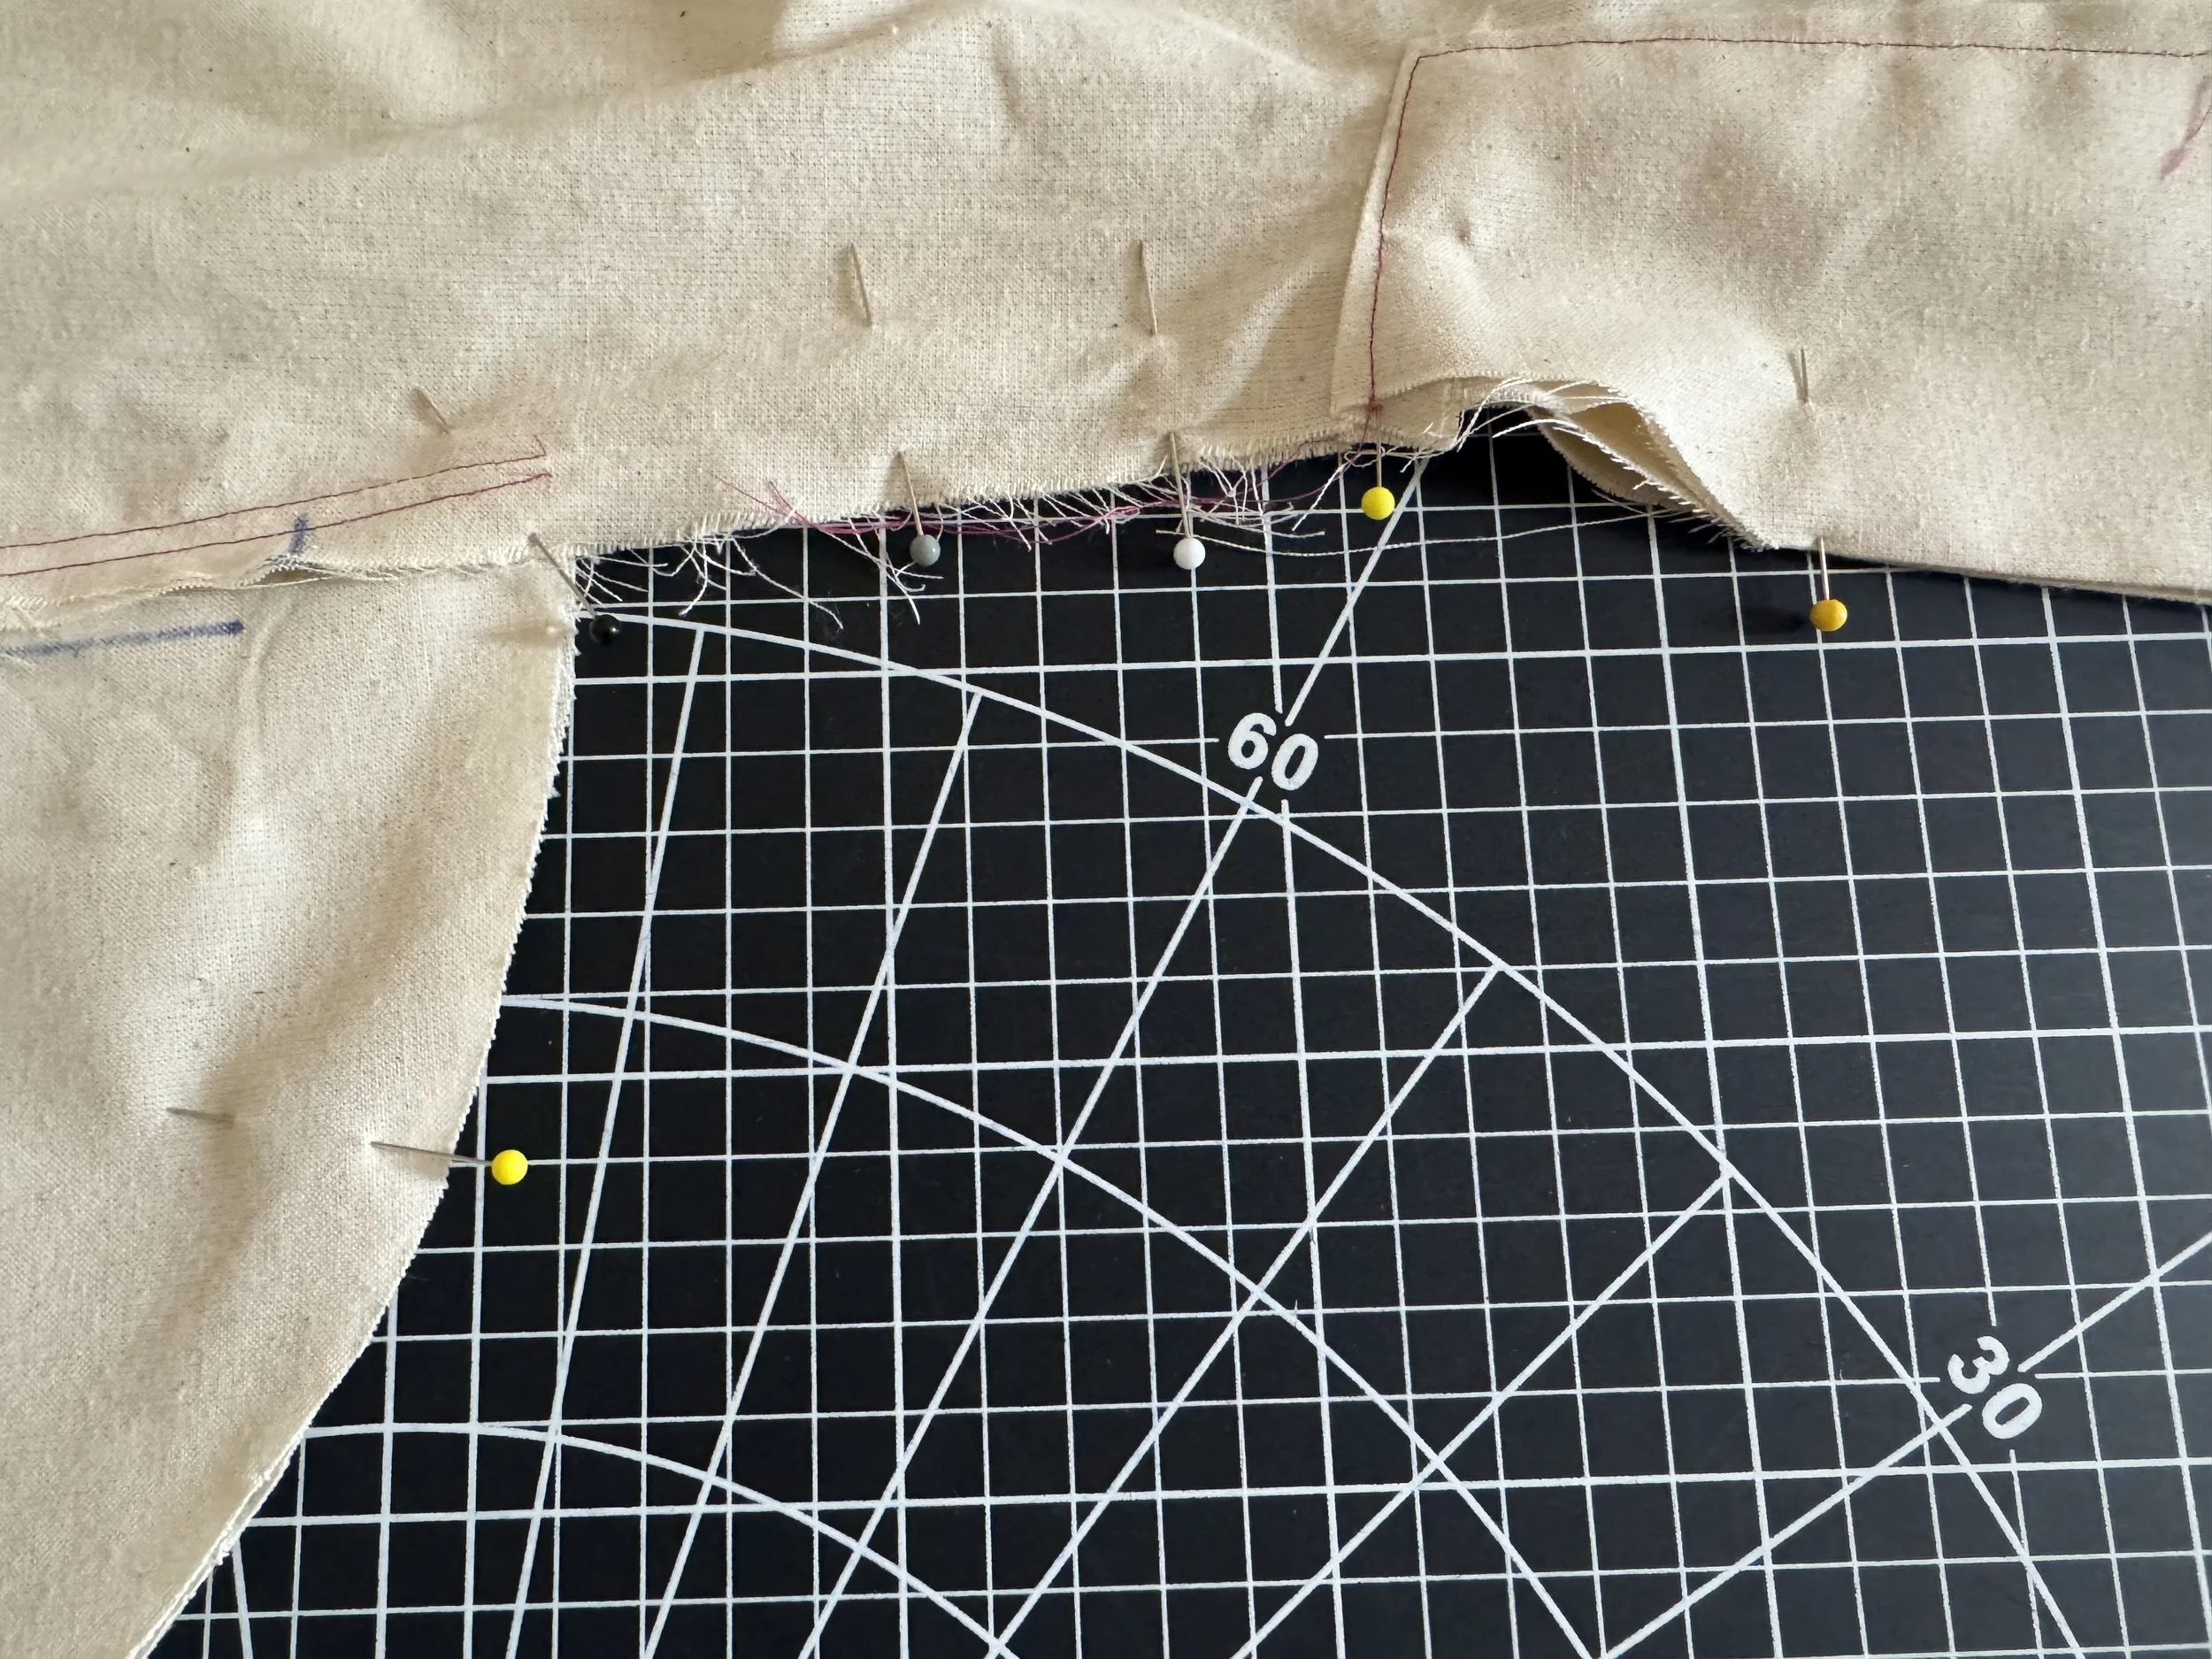
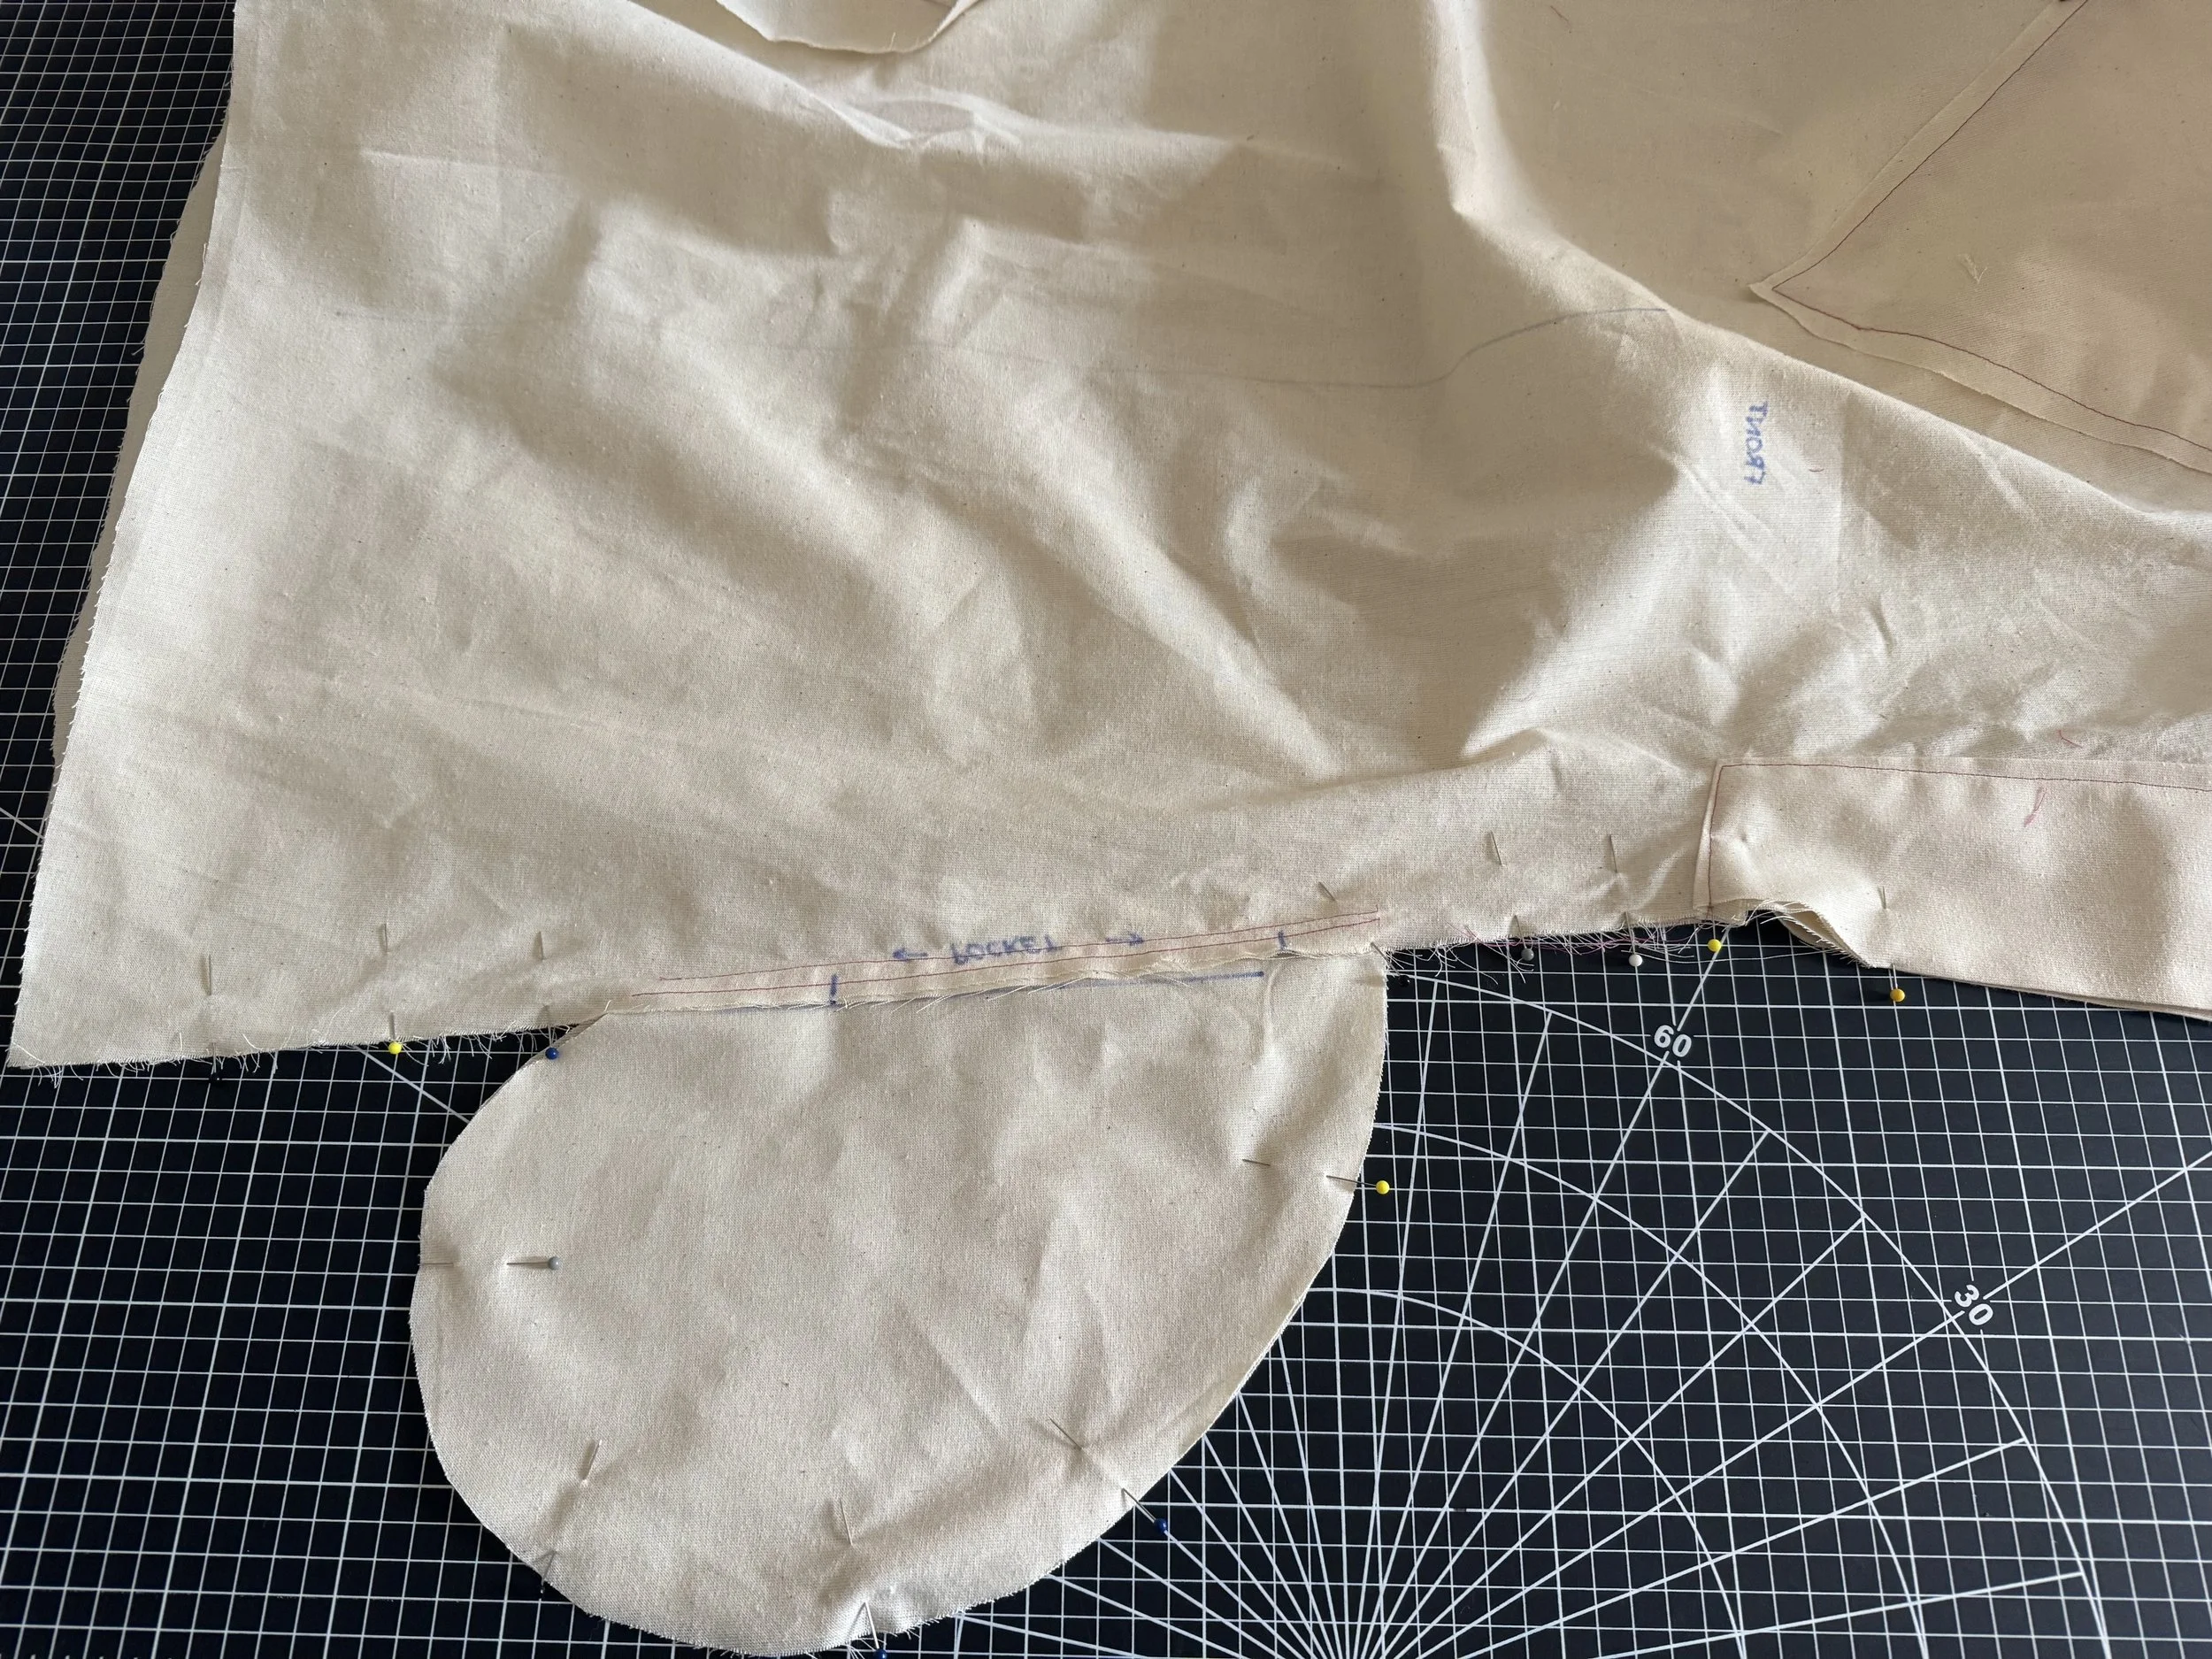 Lay the front right side of your bodice, to the right side of the back, lining up your sleeves, and pockets. [/caption]
 [caption id="" align="alignnone" width="5712"]
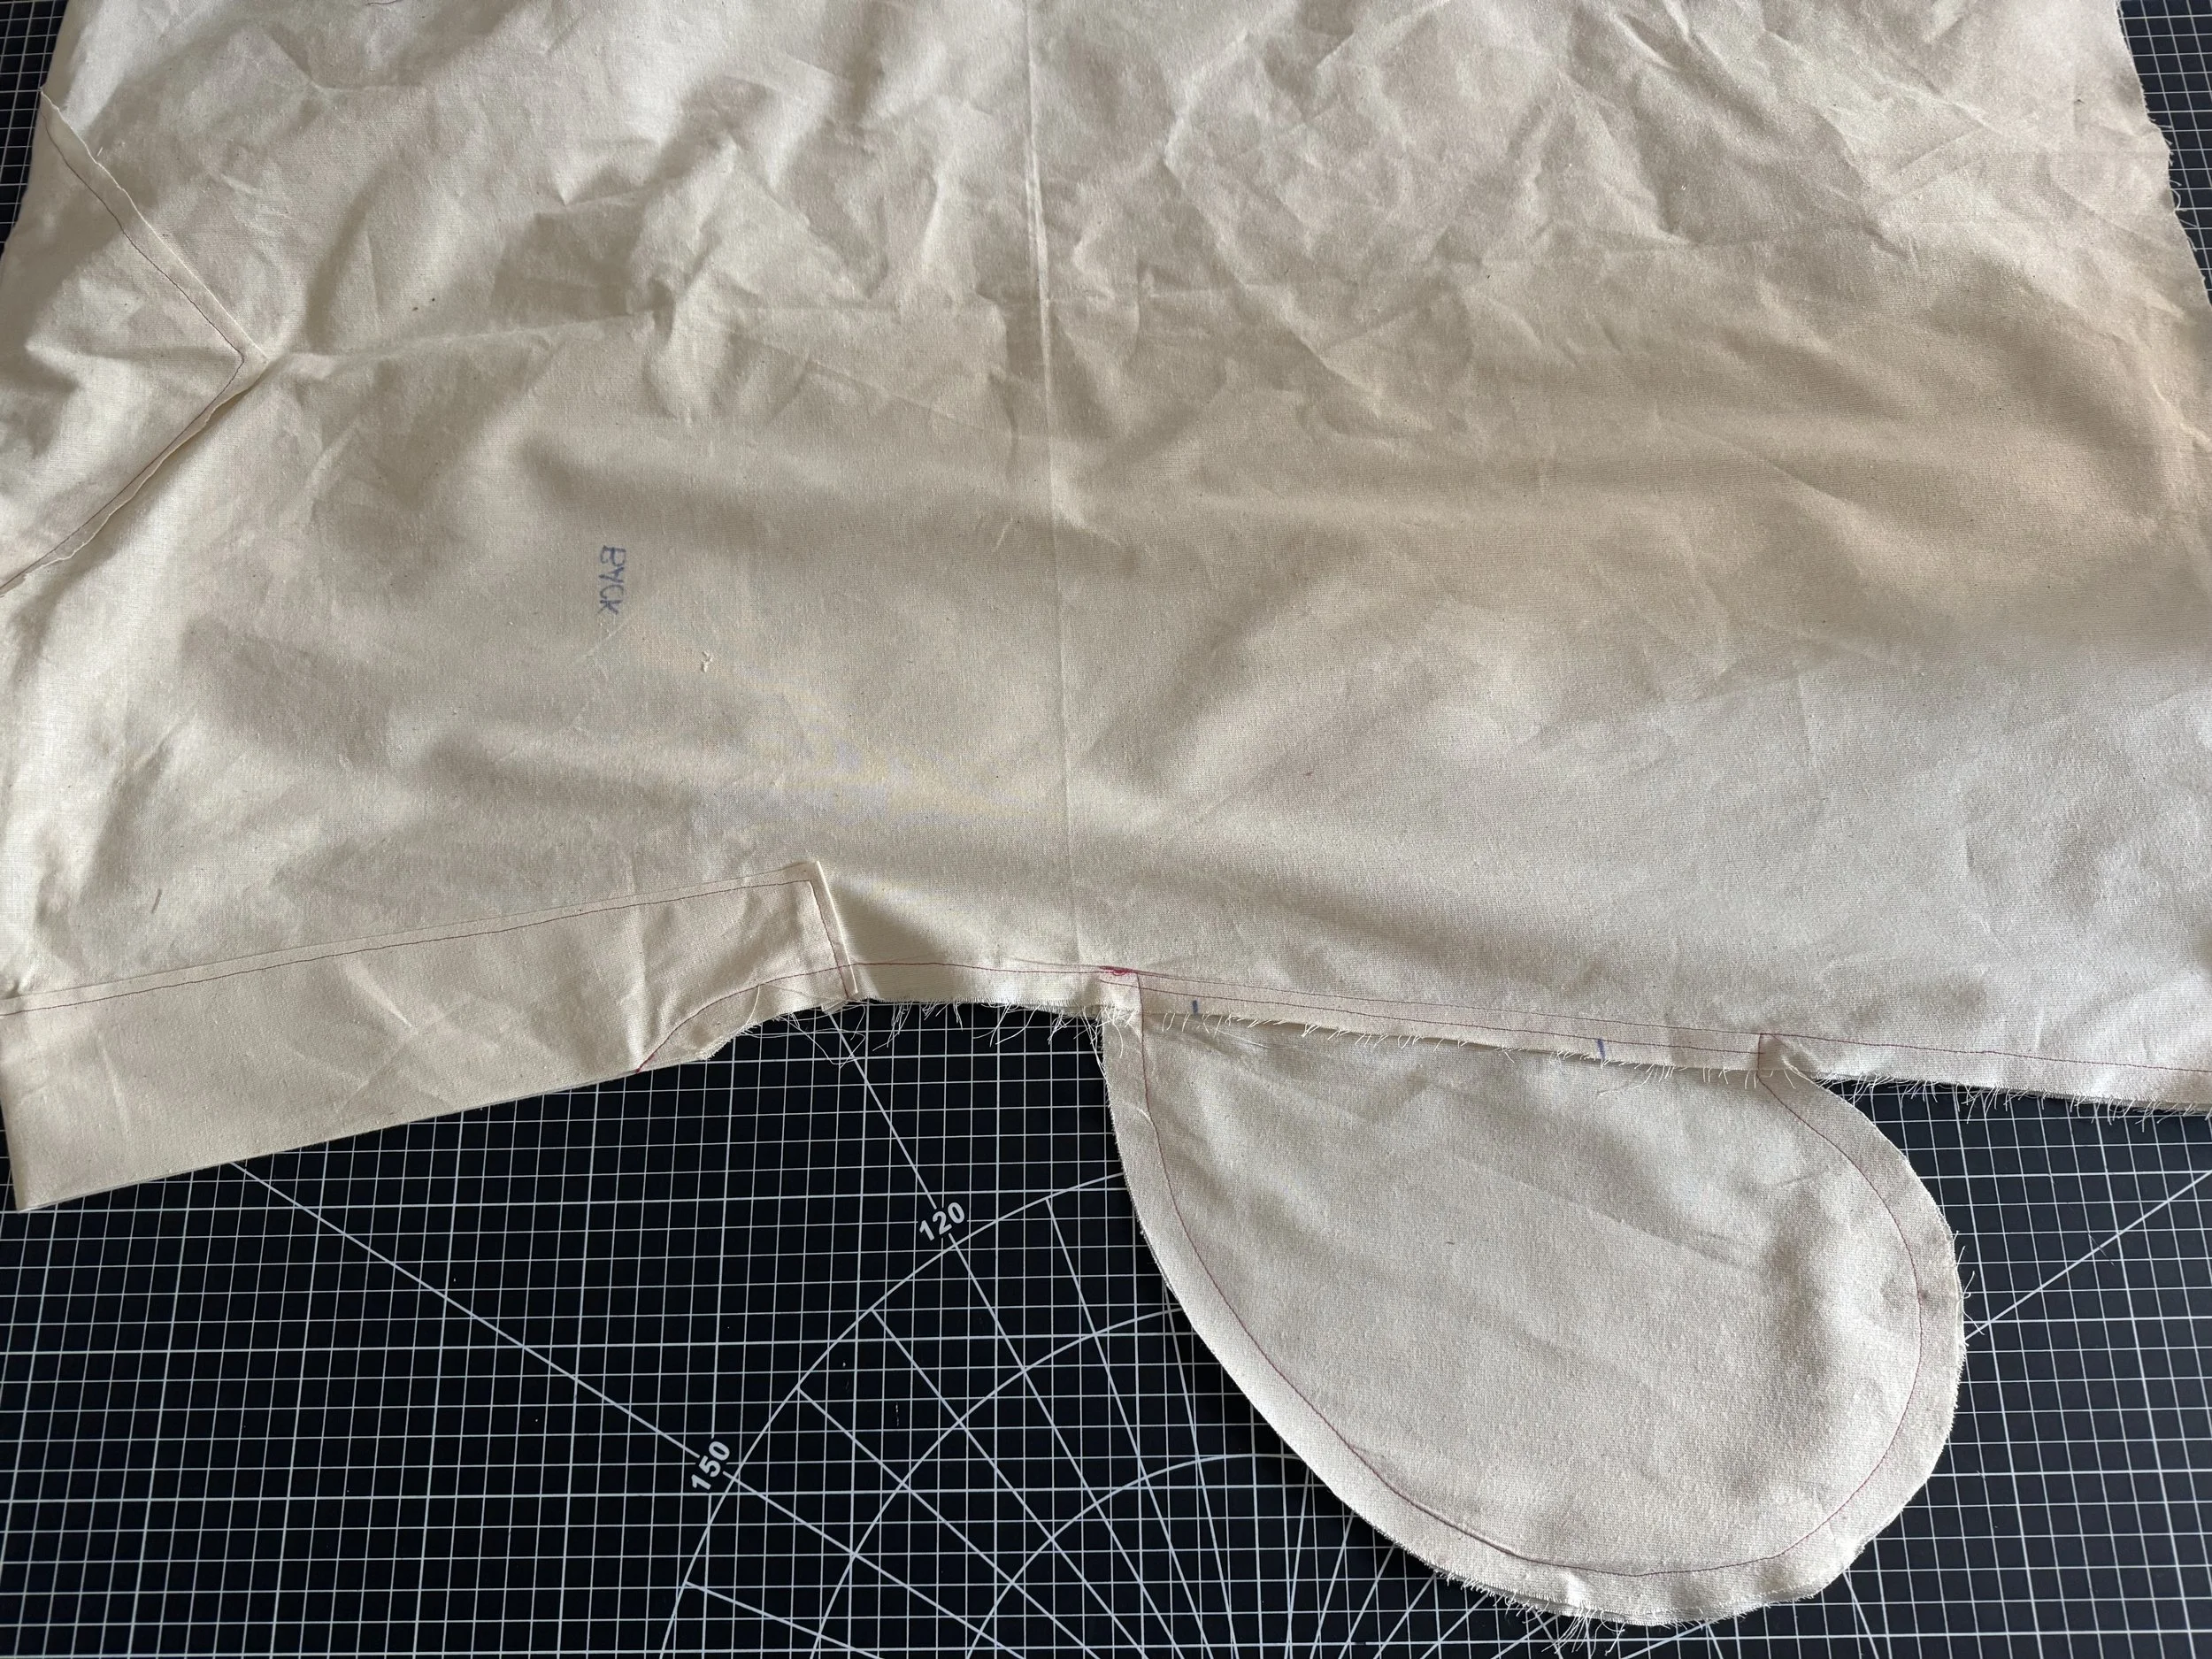 Sew your side seams at 5/8” *START SEWING FROM THE HEM TO THE SLEEVE ON BOTH SIDES [/caption]
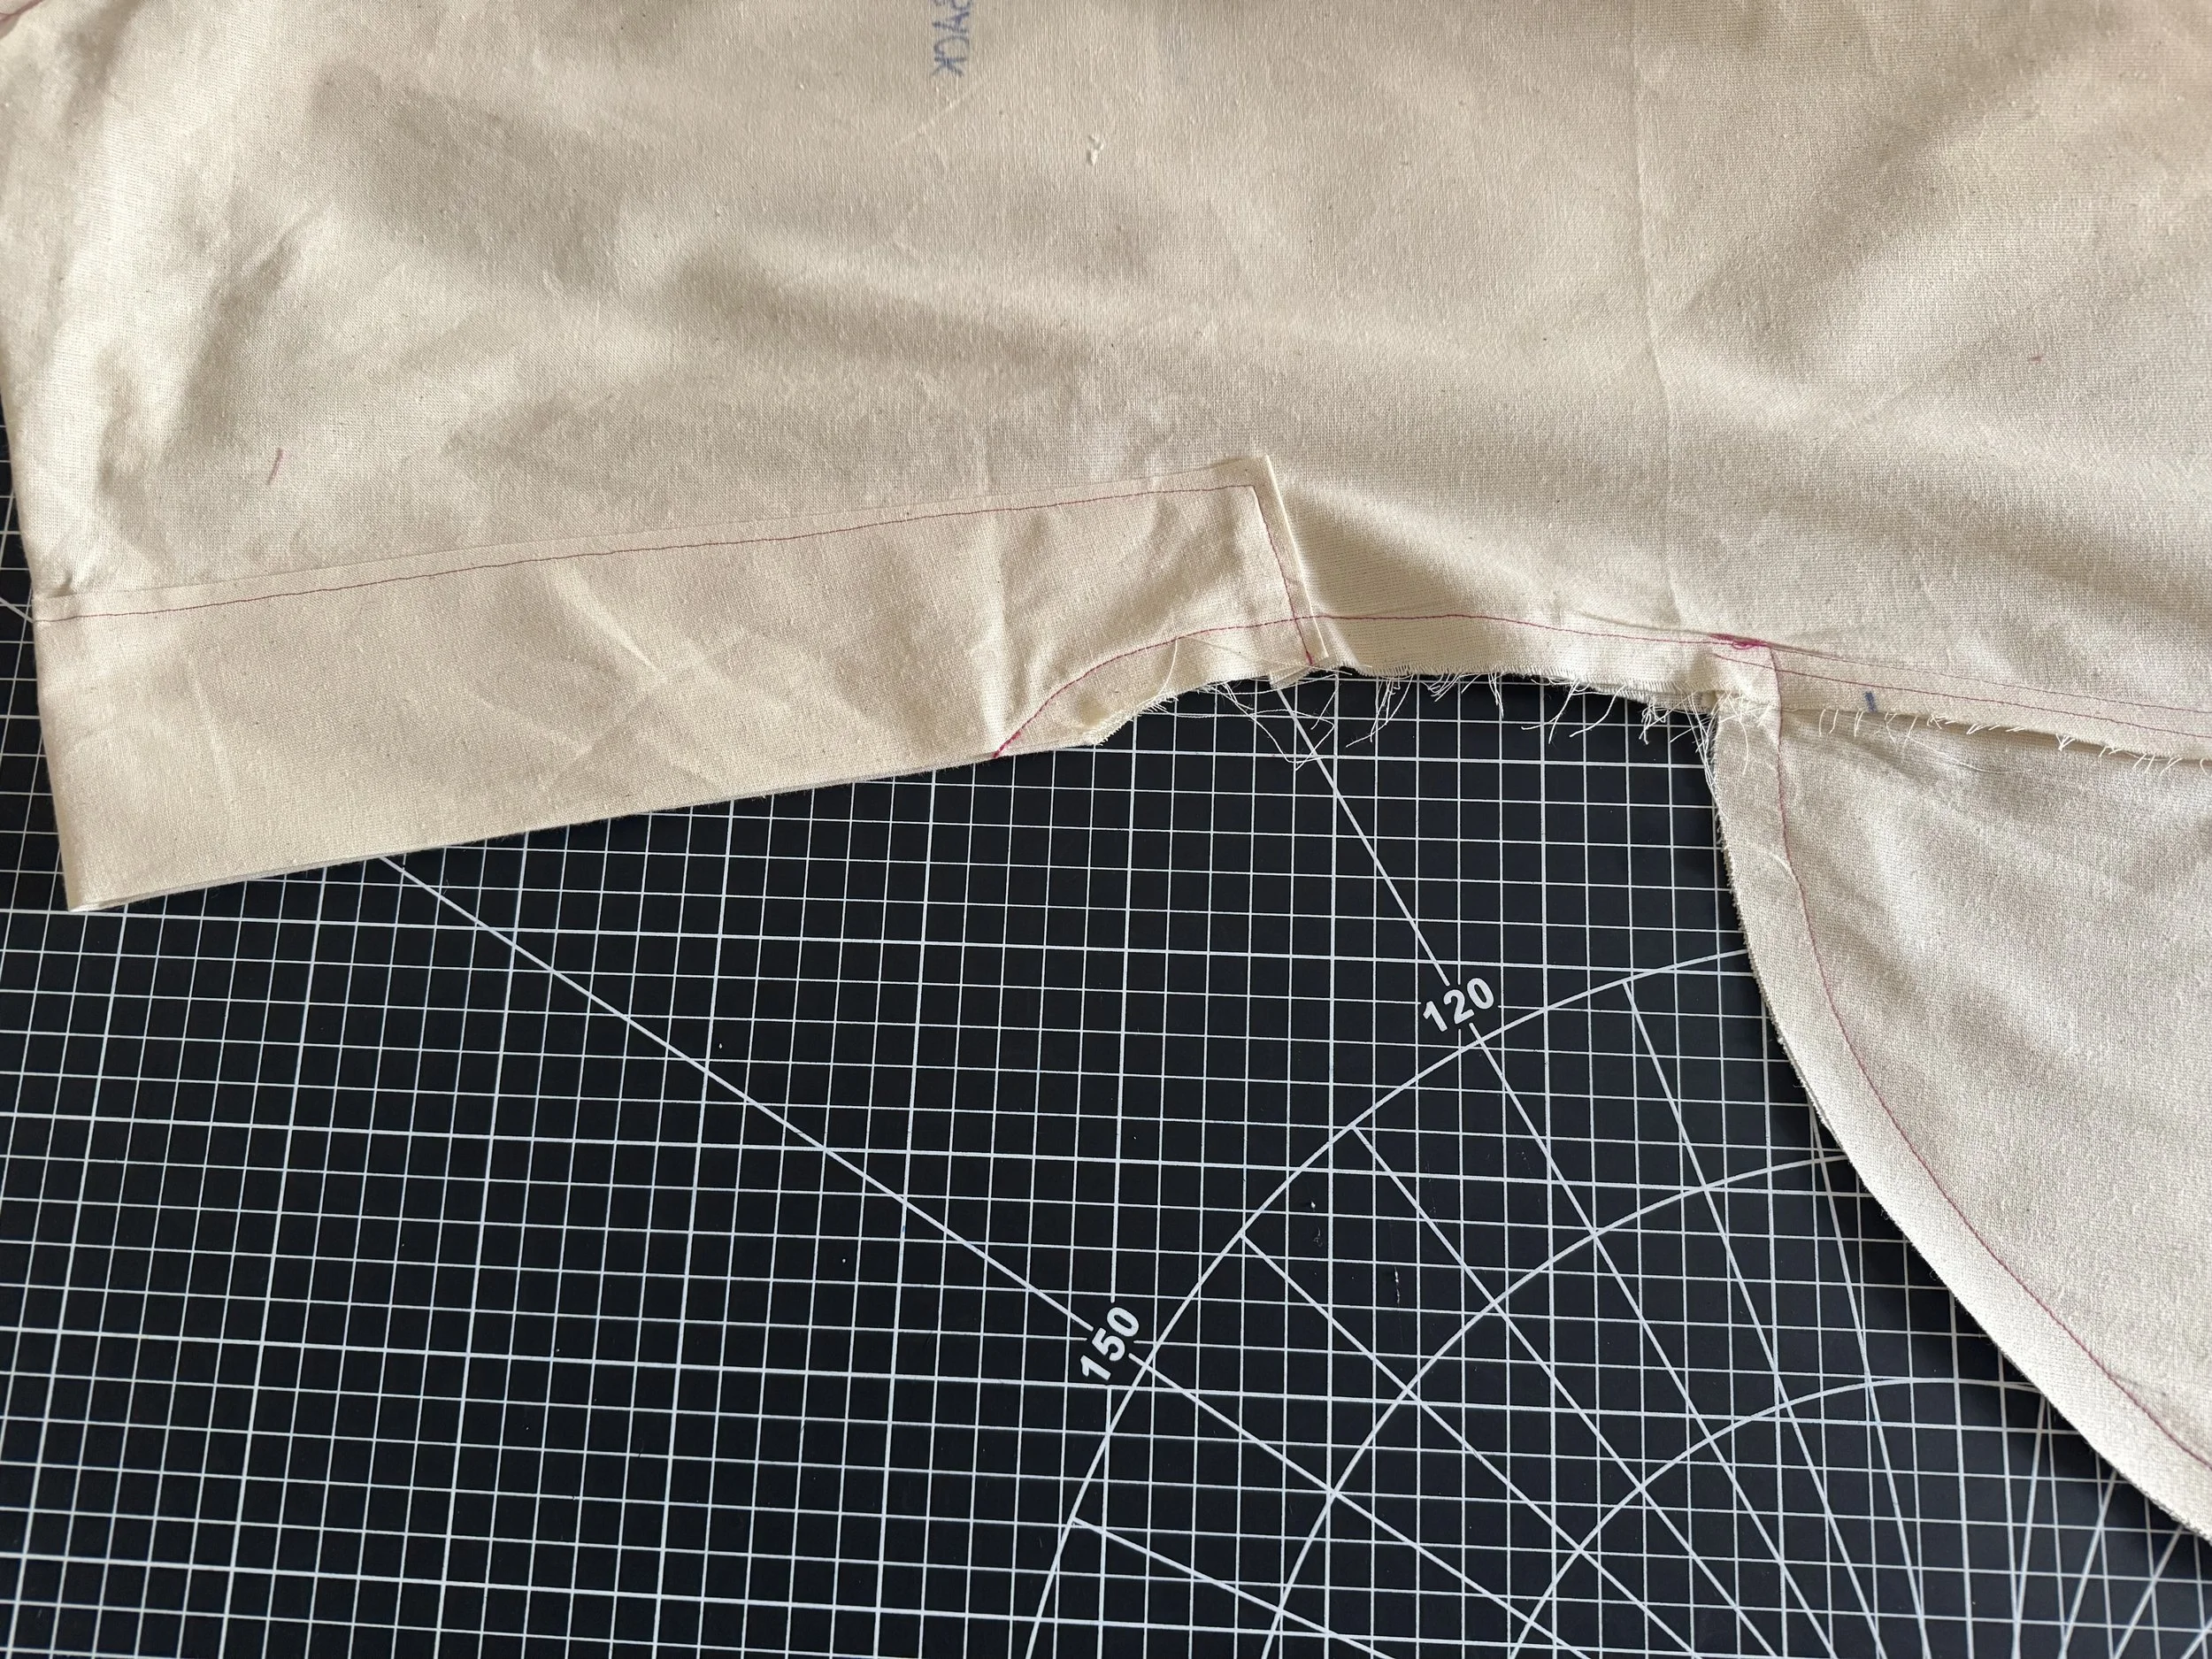
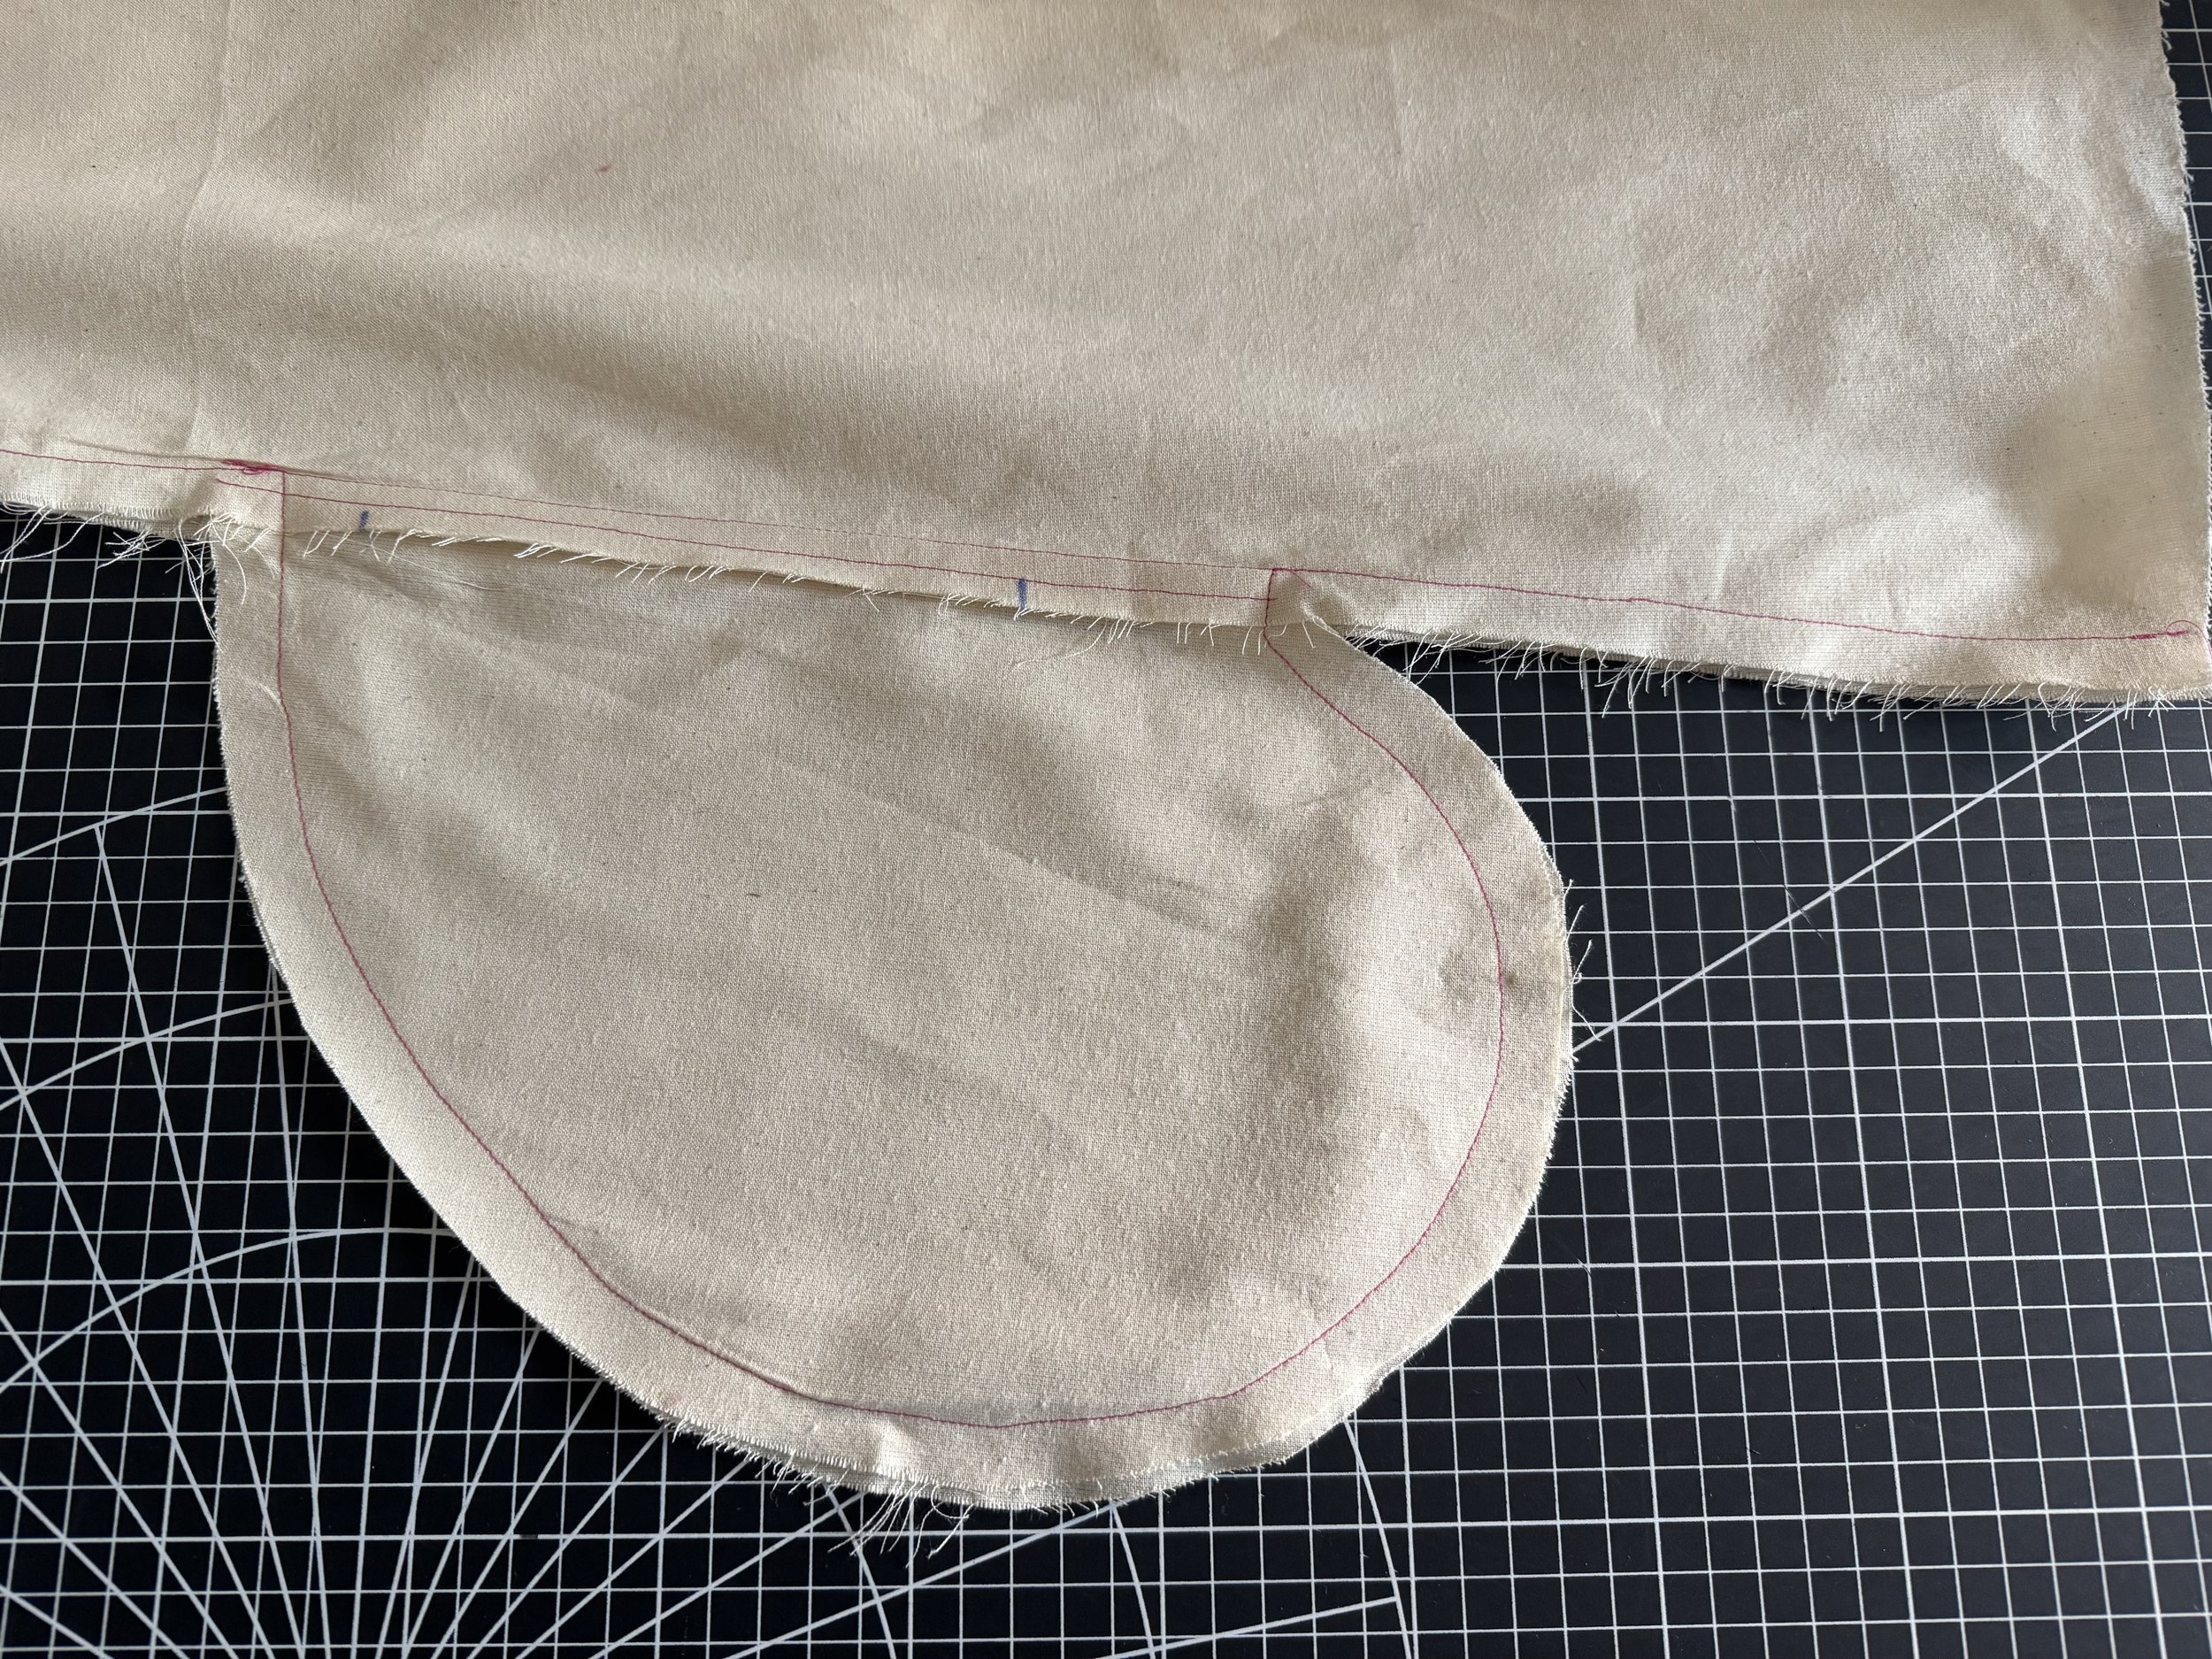
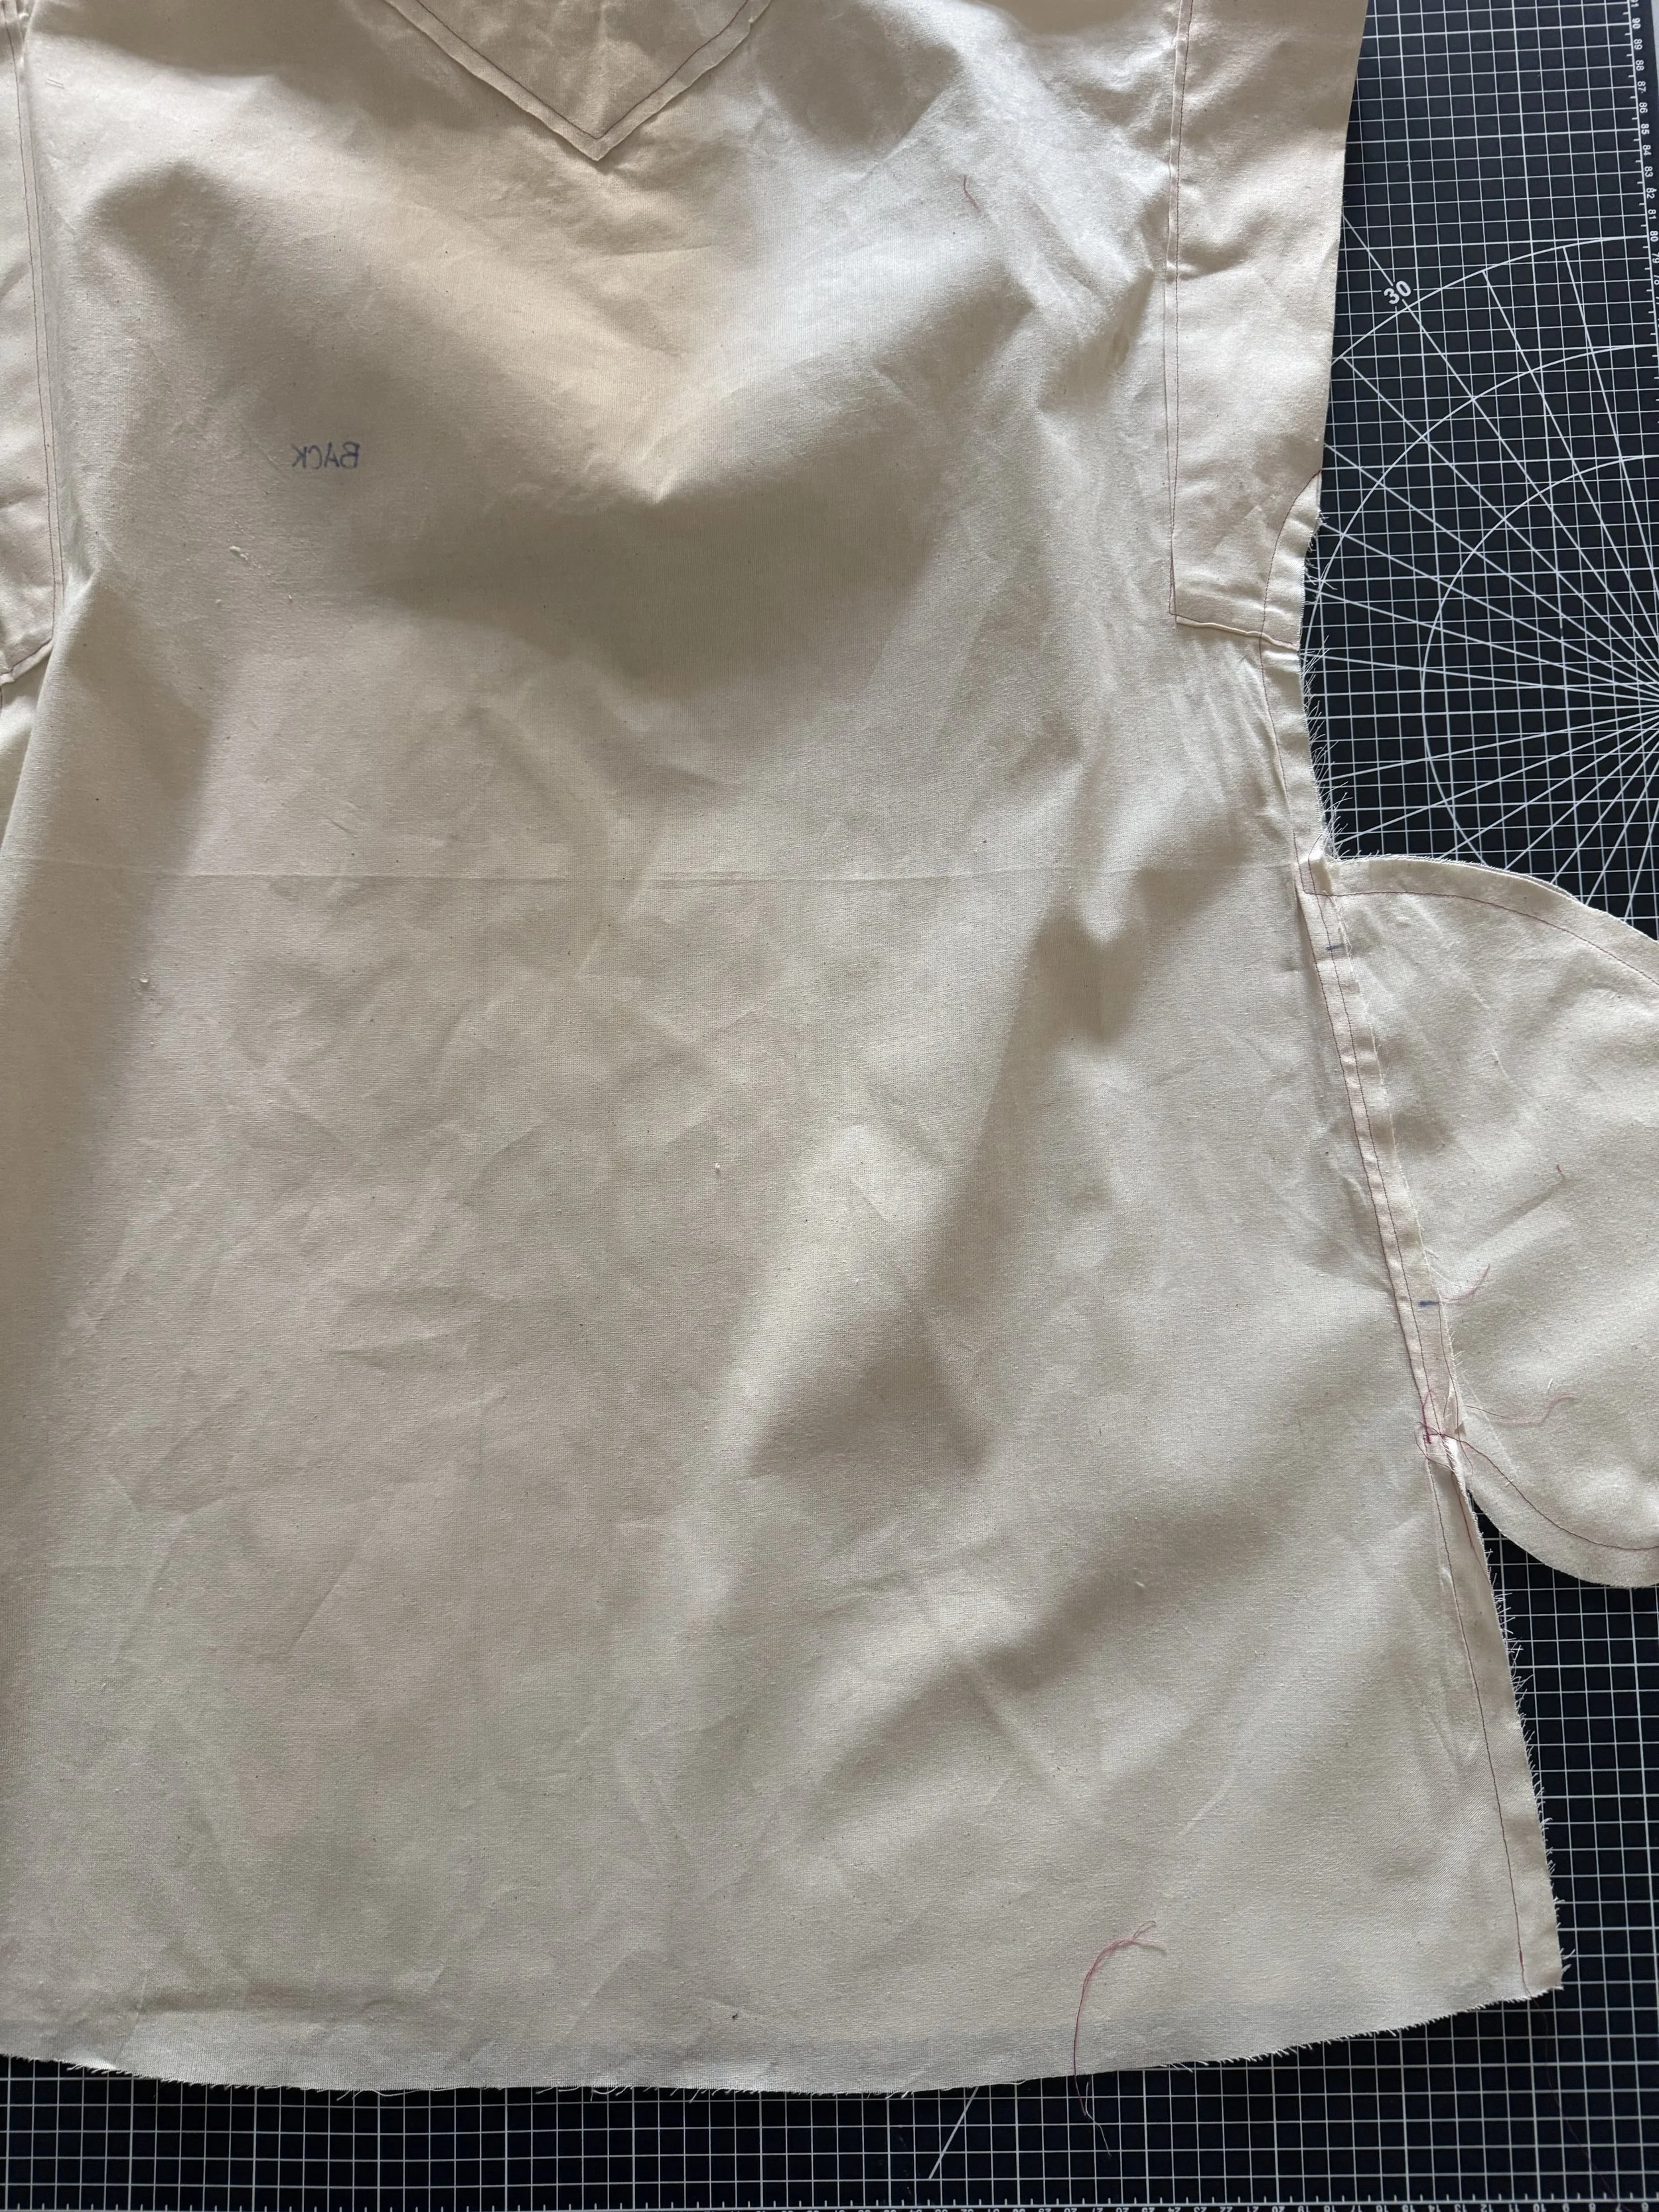 [caption id="" align="alignnone" width="5712"]
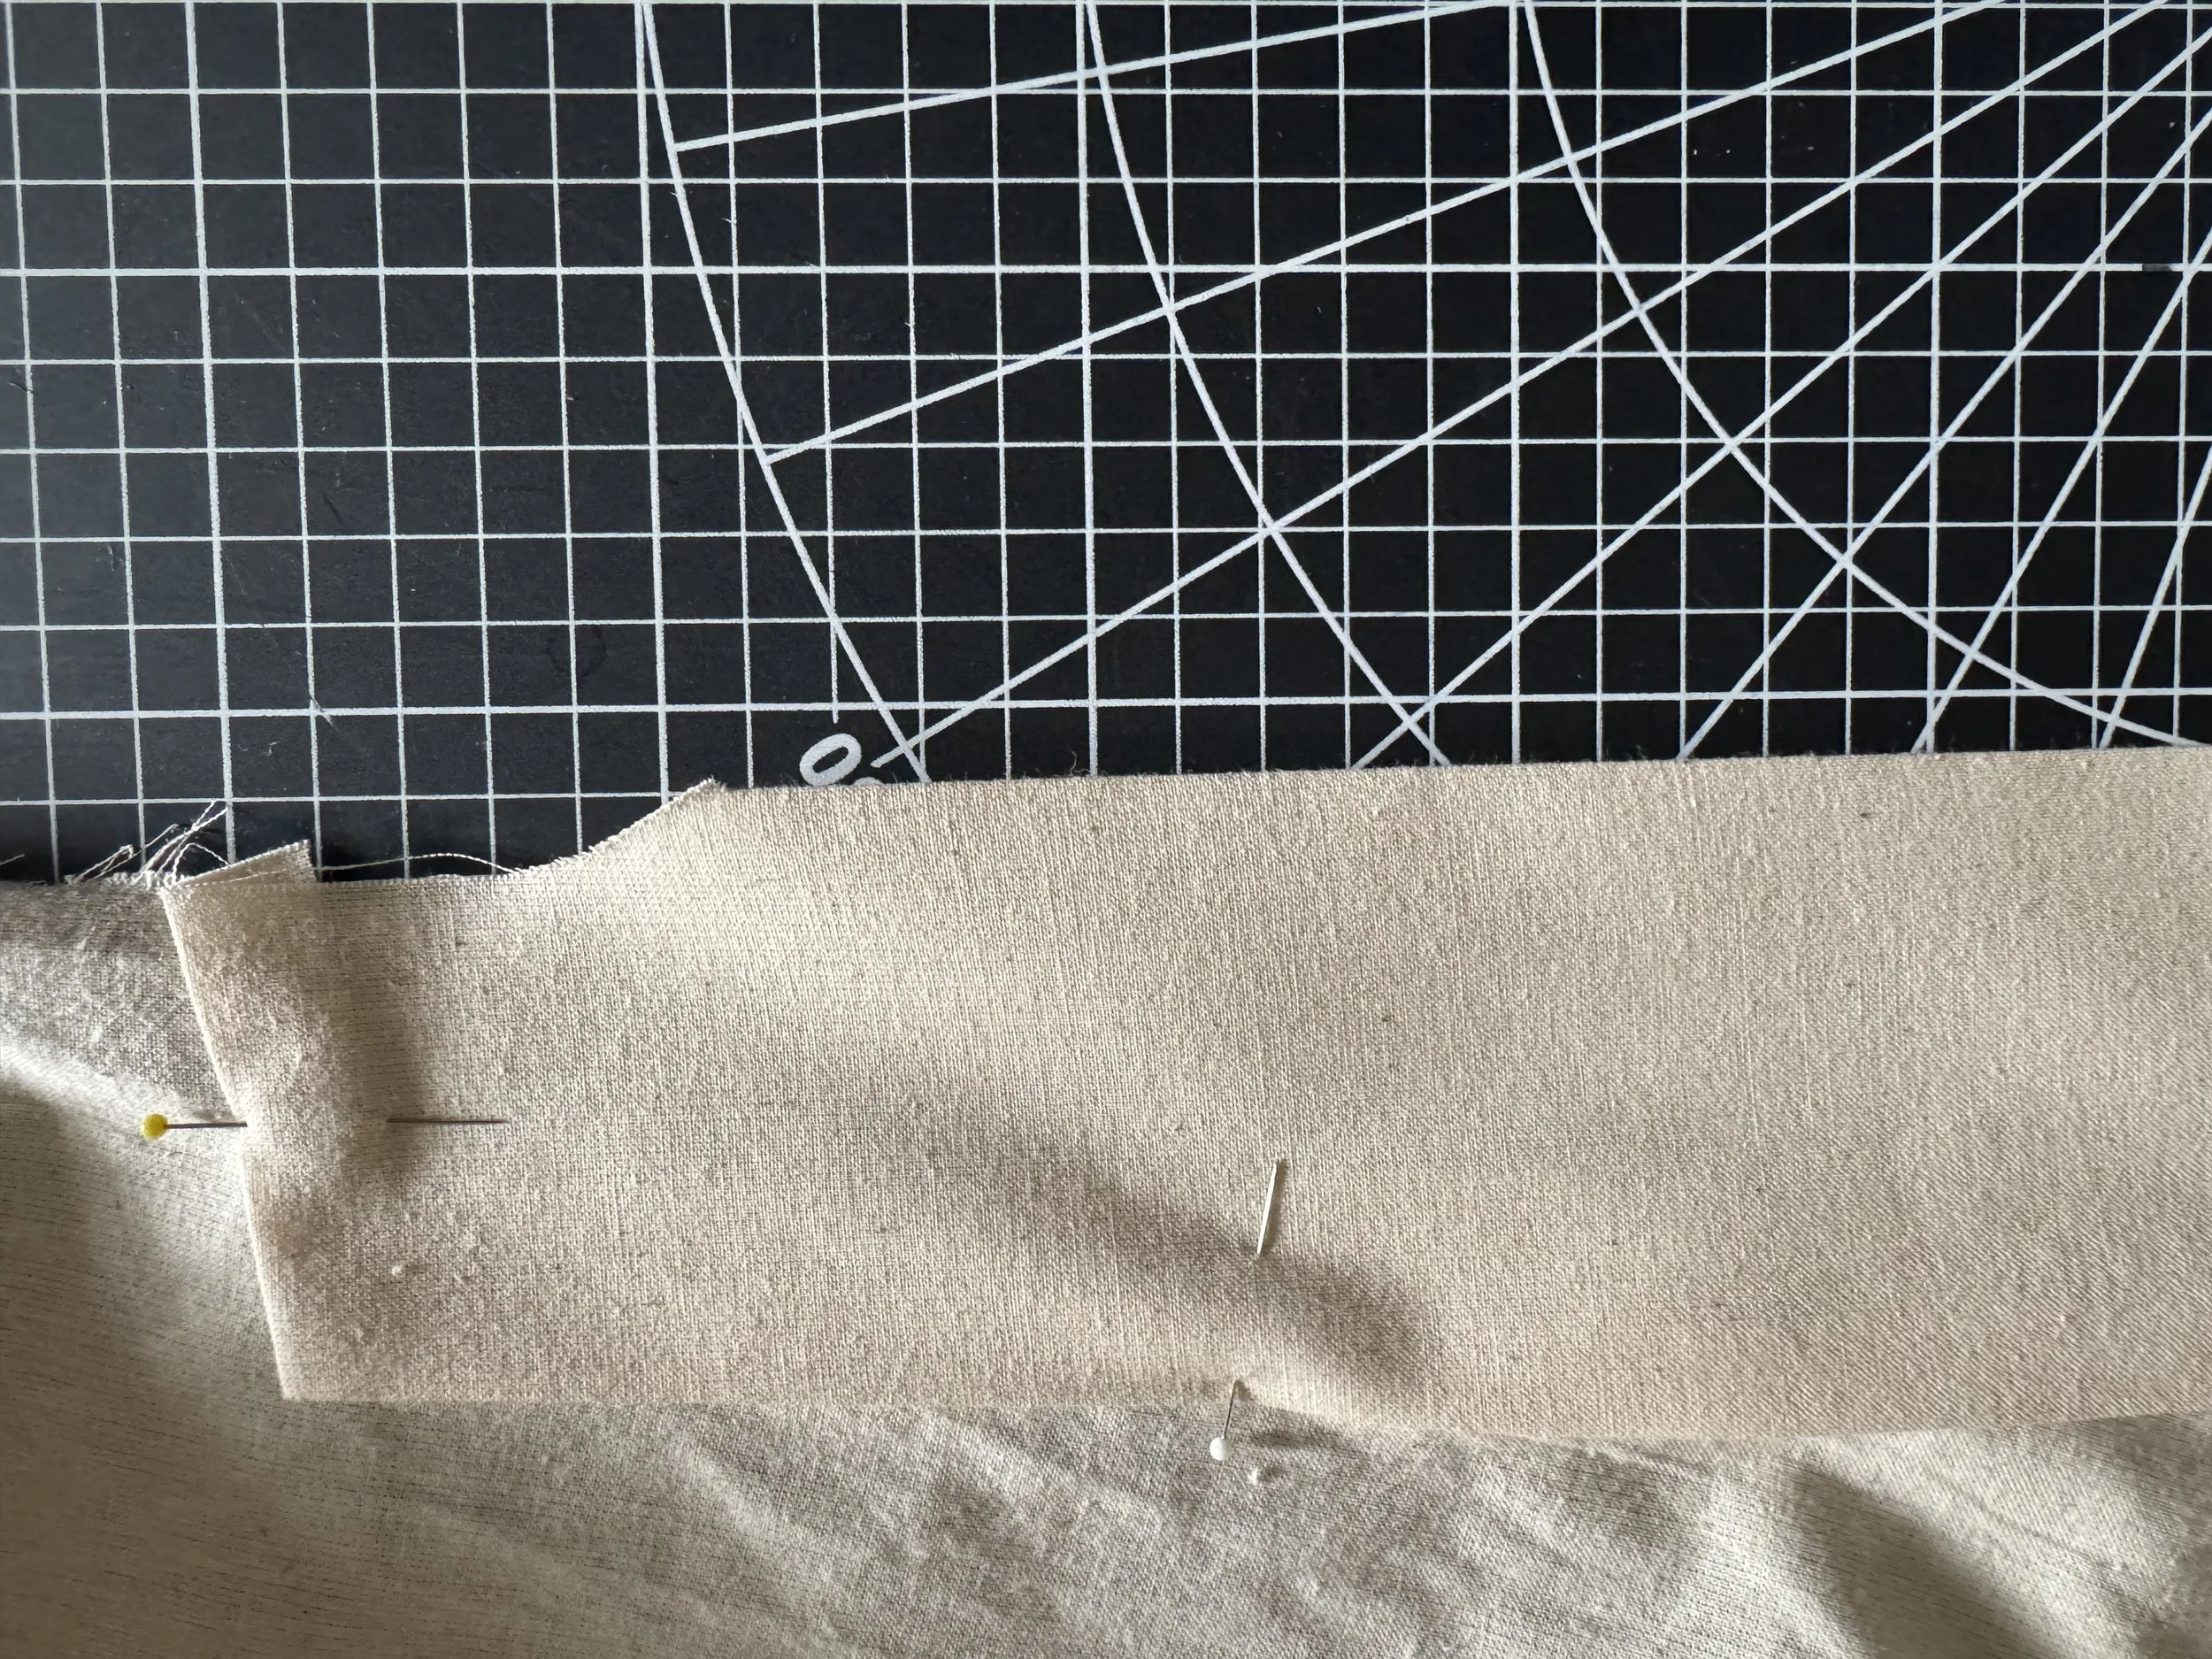
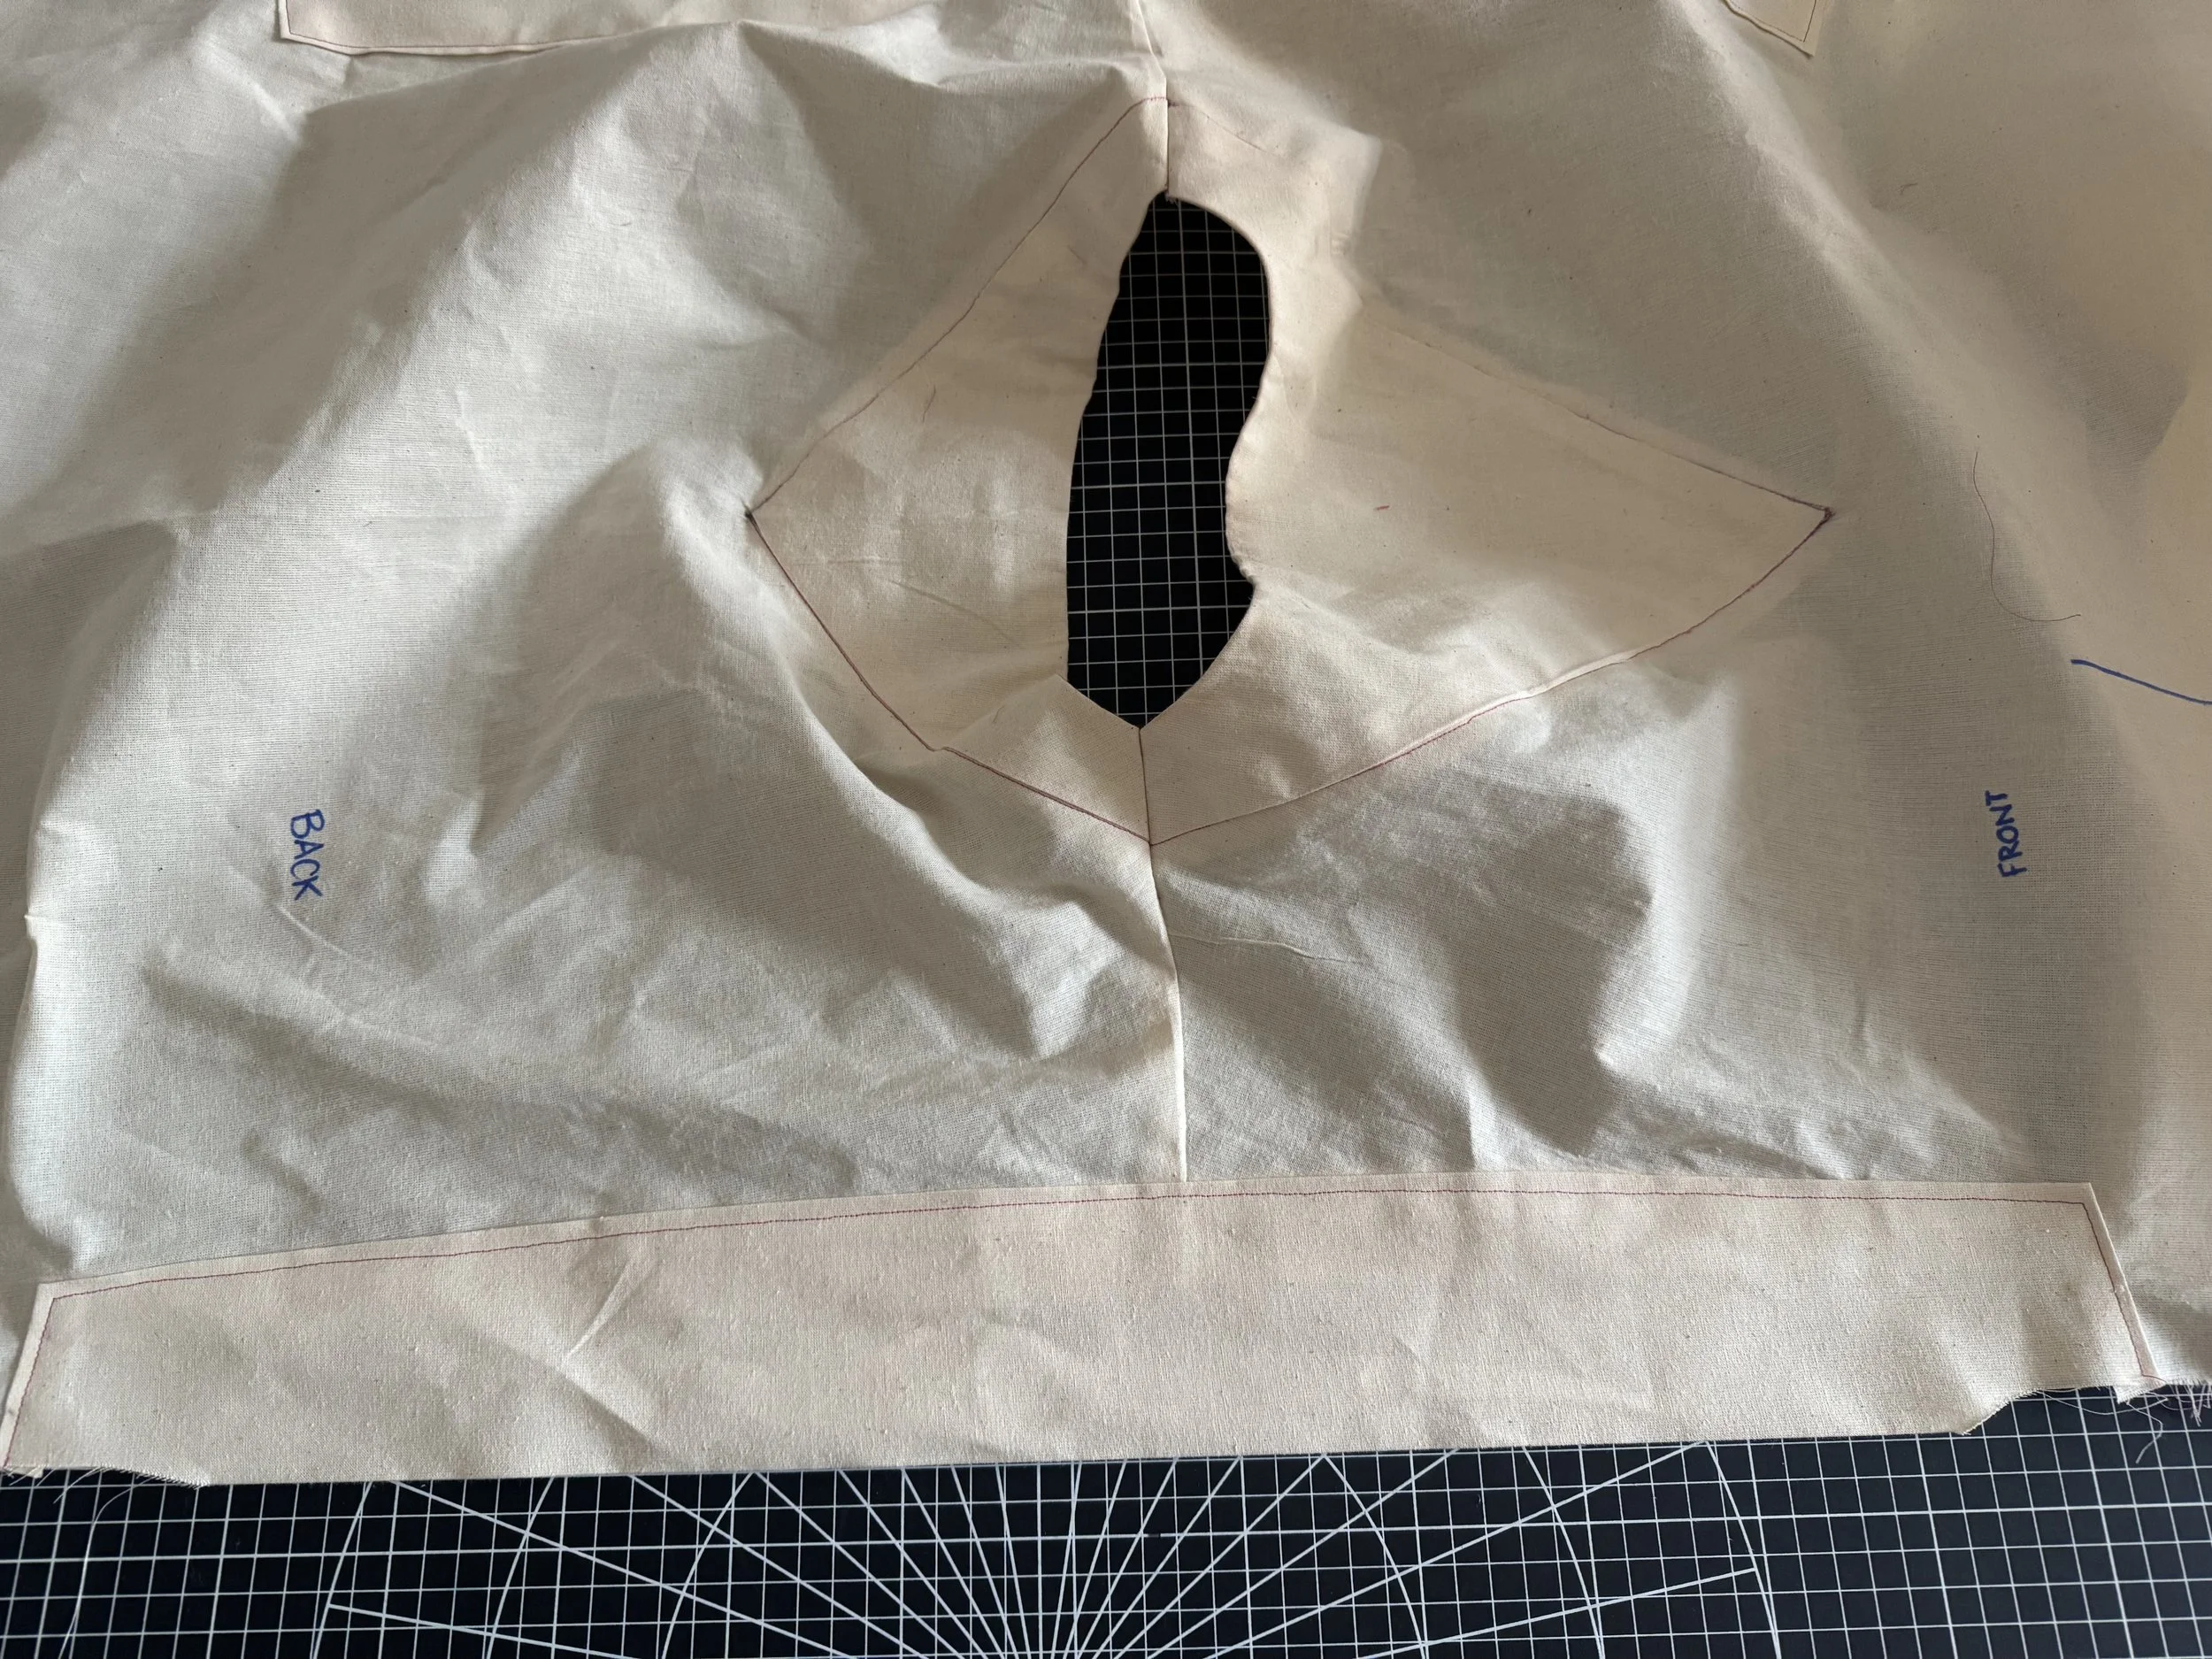
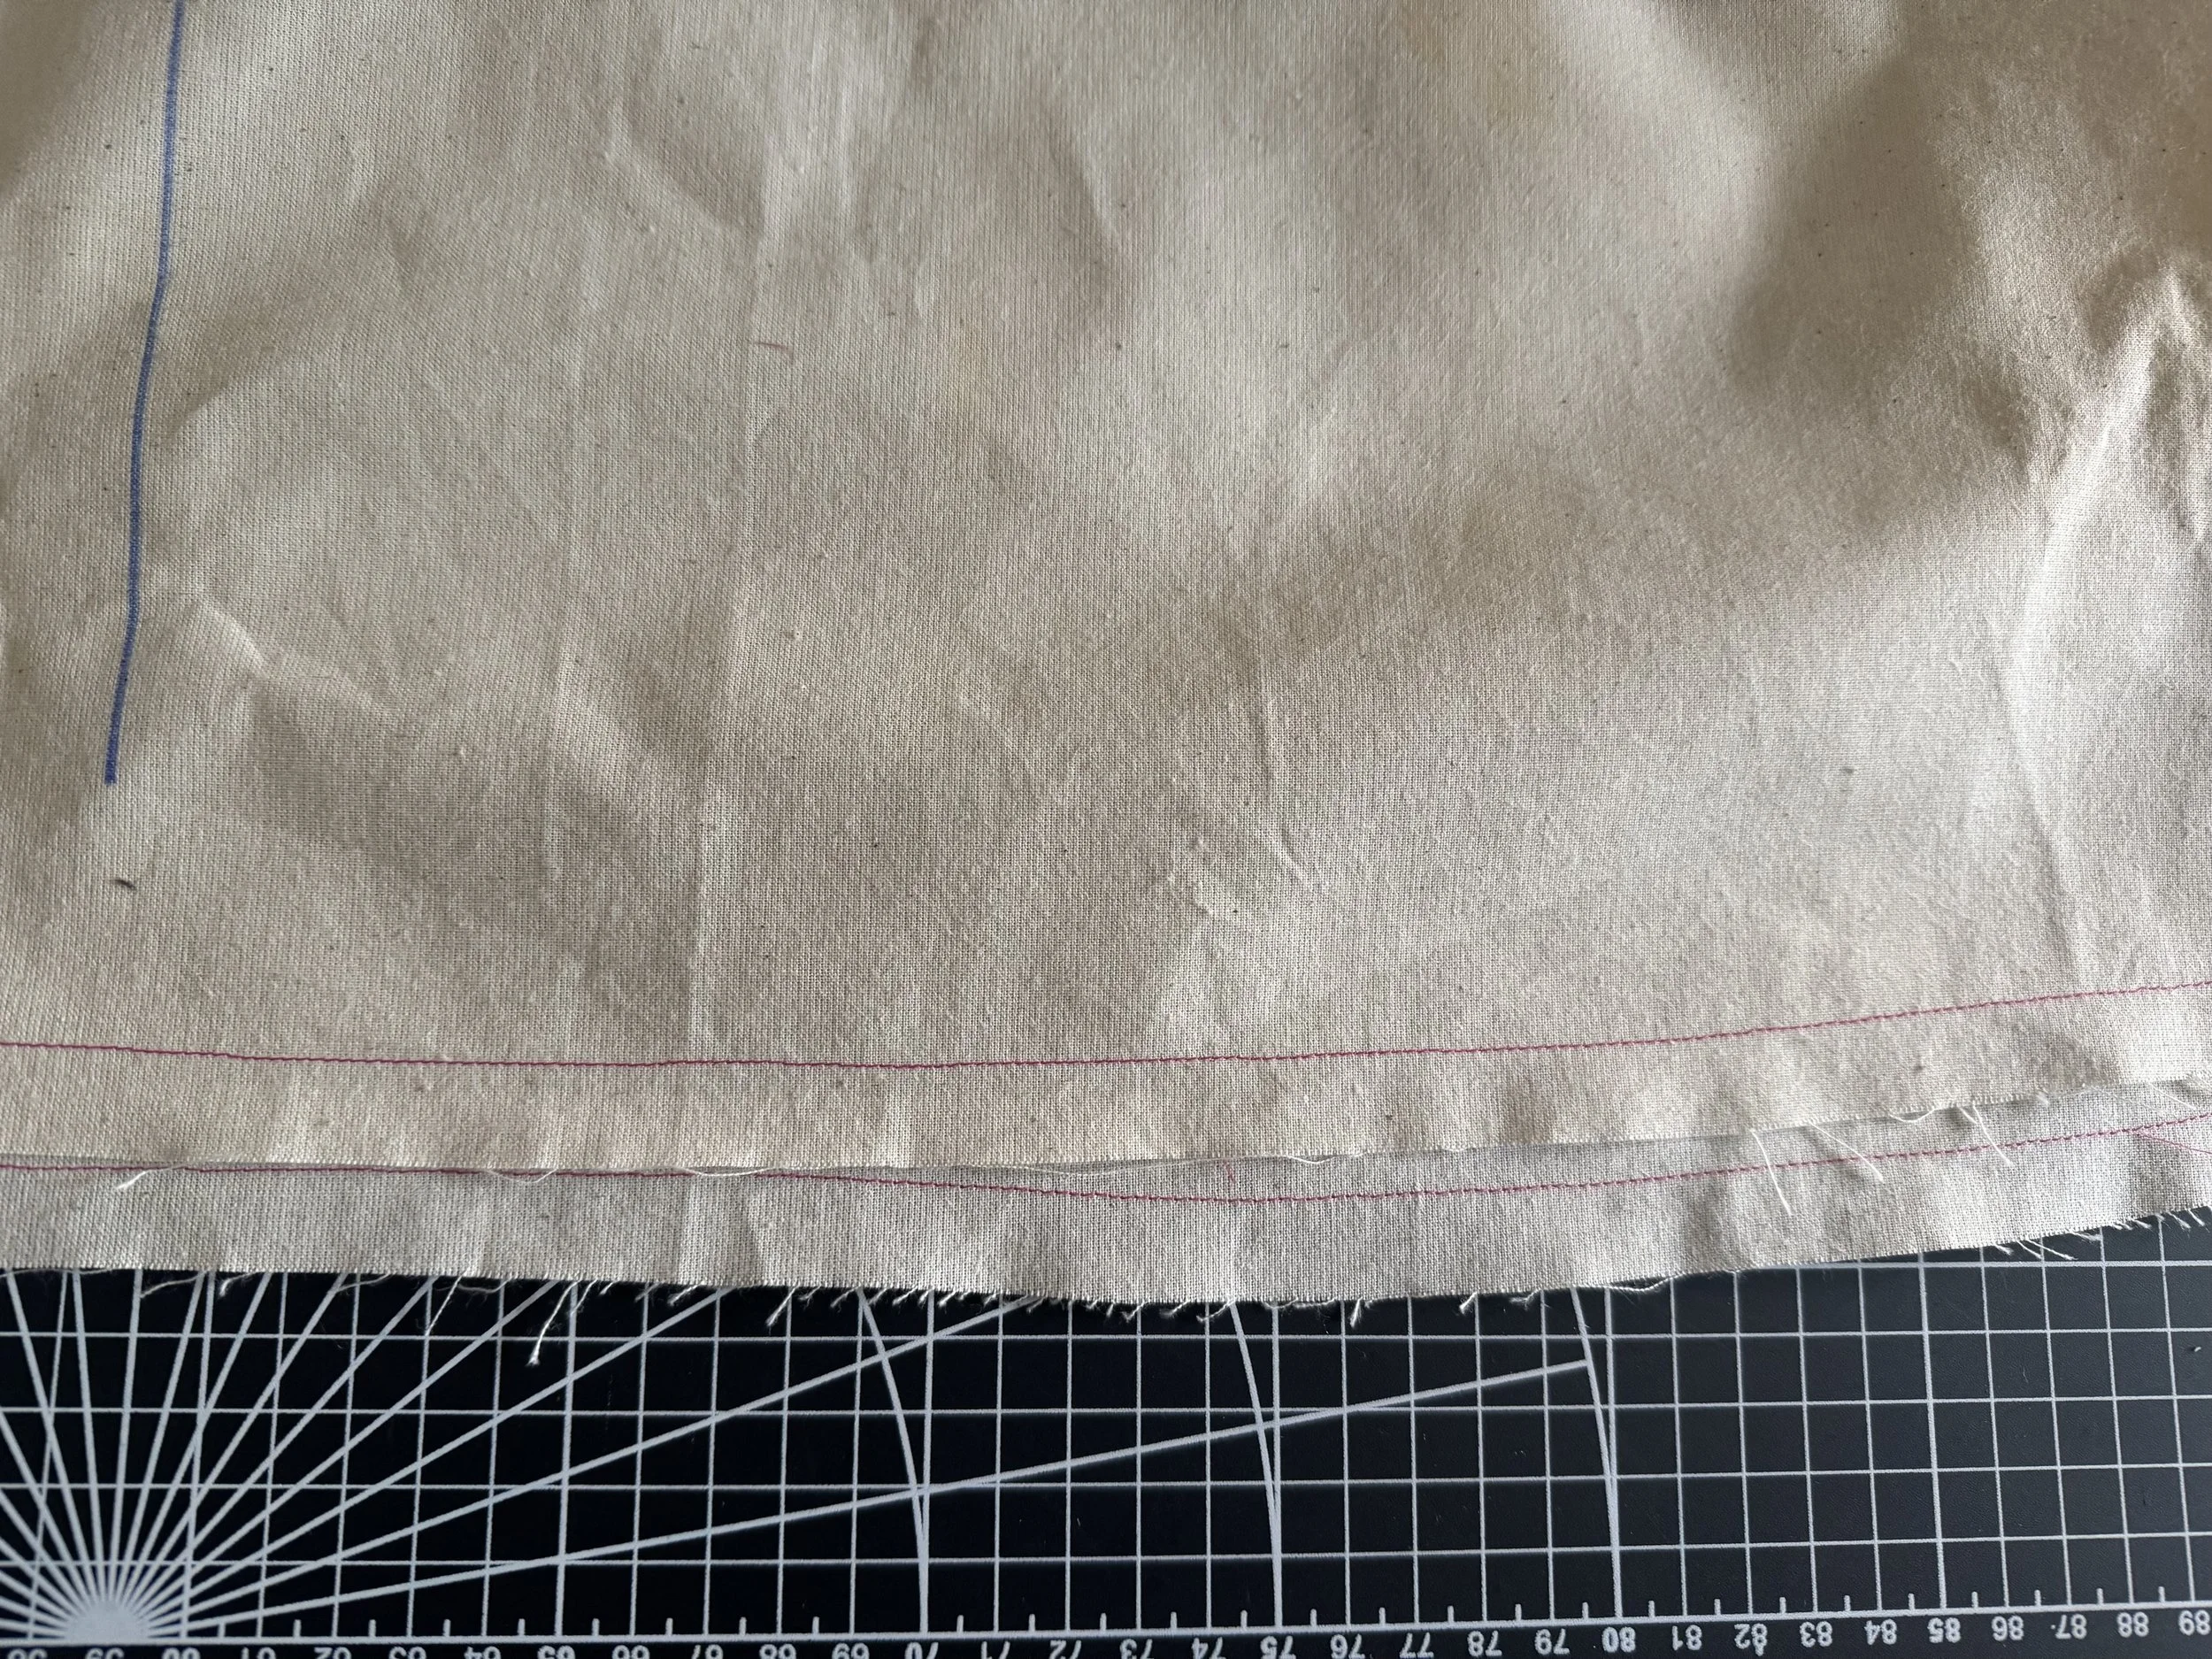 To finish your hem, sew a stitch around the hemline at 5/8” [/caption]
[caption id="" align="alignnone" width="4032"]
To finish your hem, sew a stitch around the hemline at 5/8” [/caption]
[caption id="" align="alignnone" width="4032"]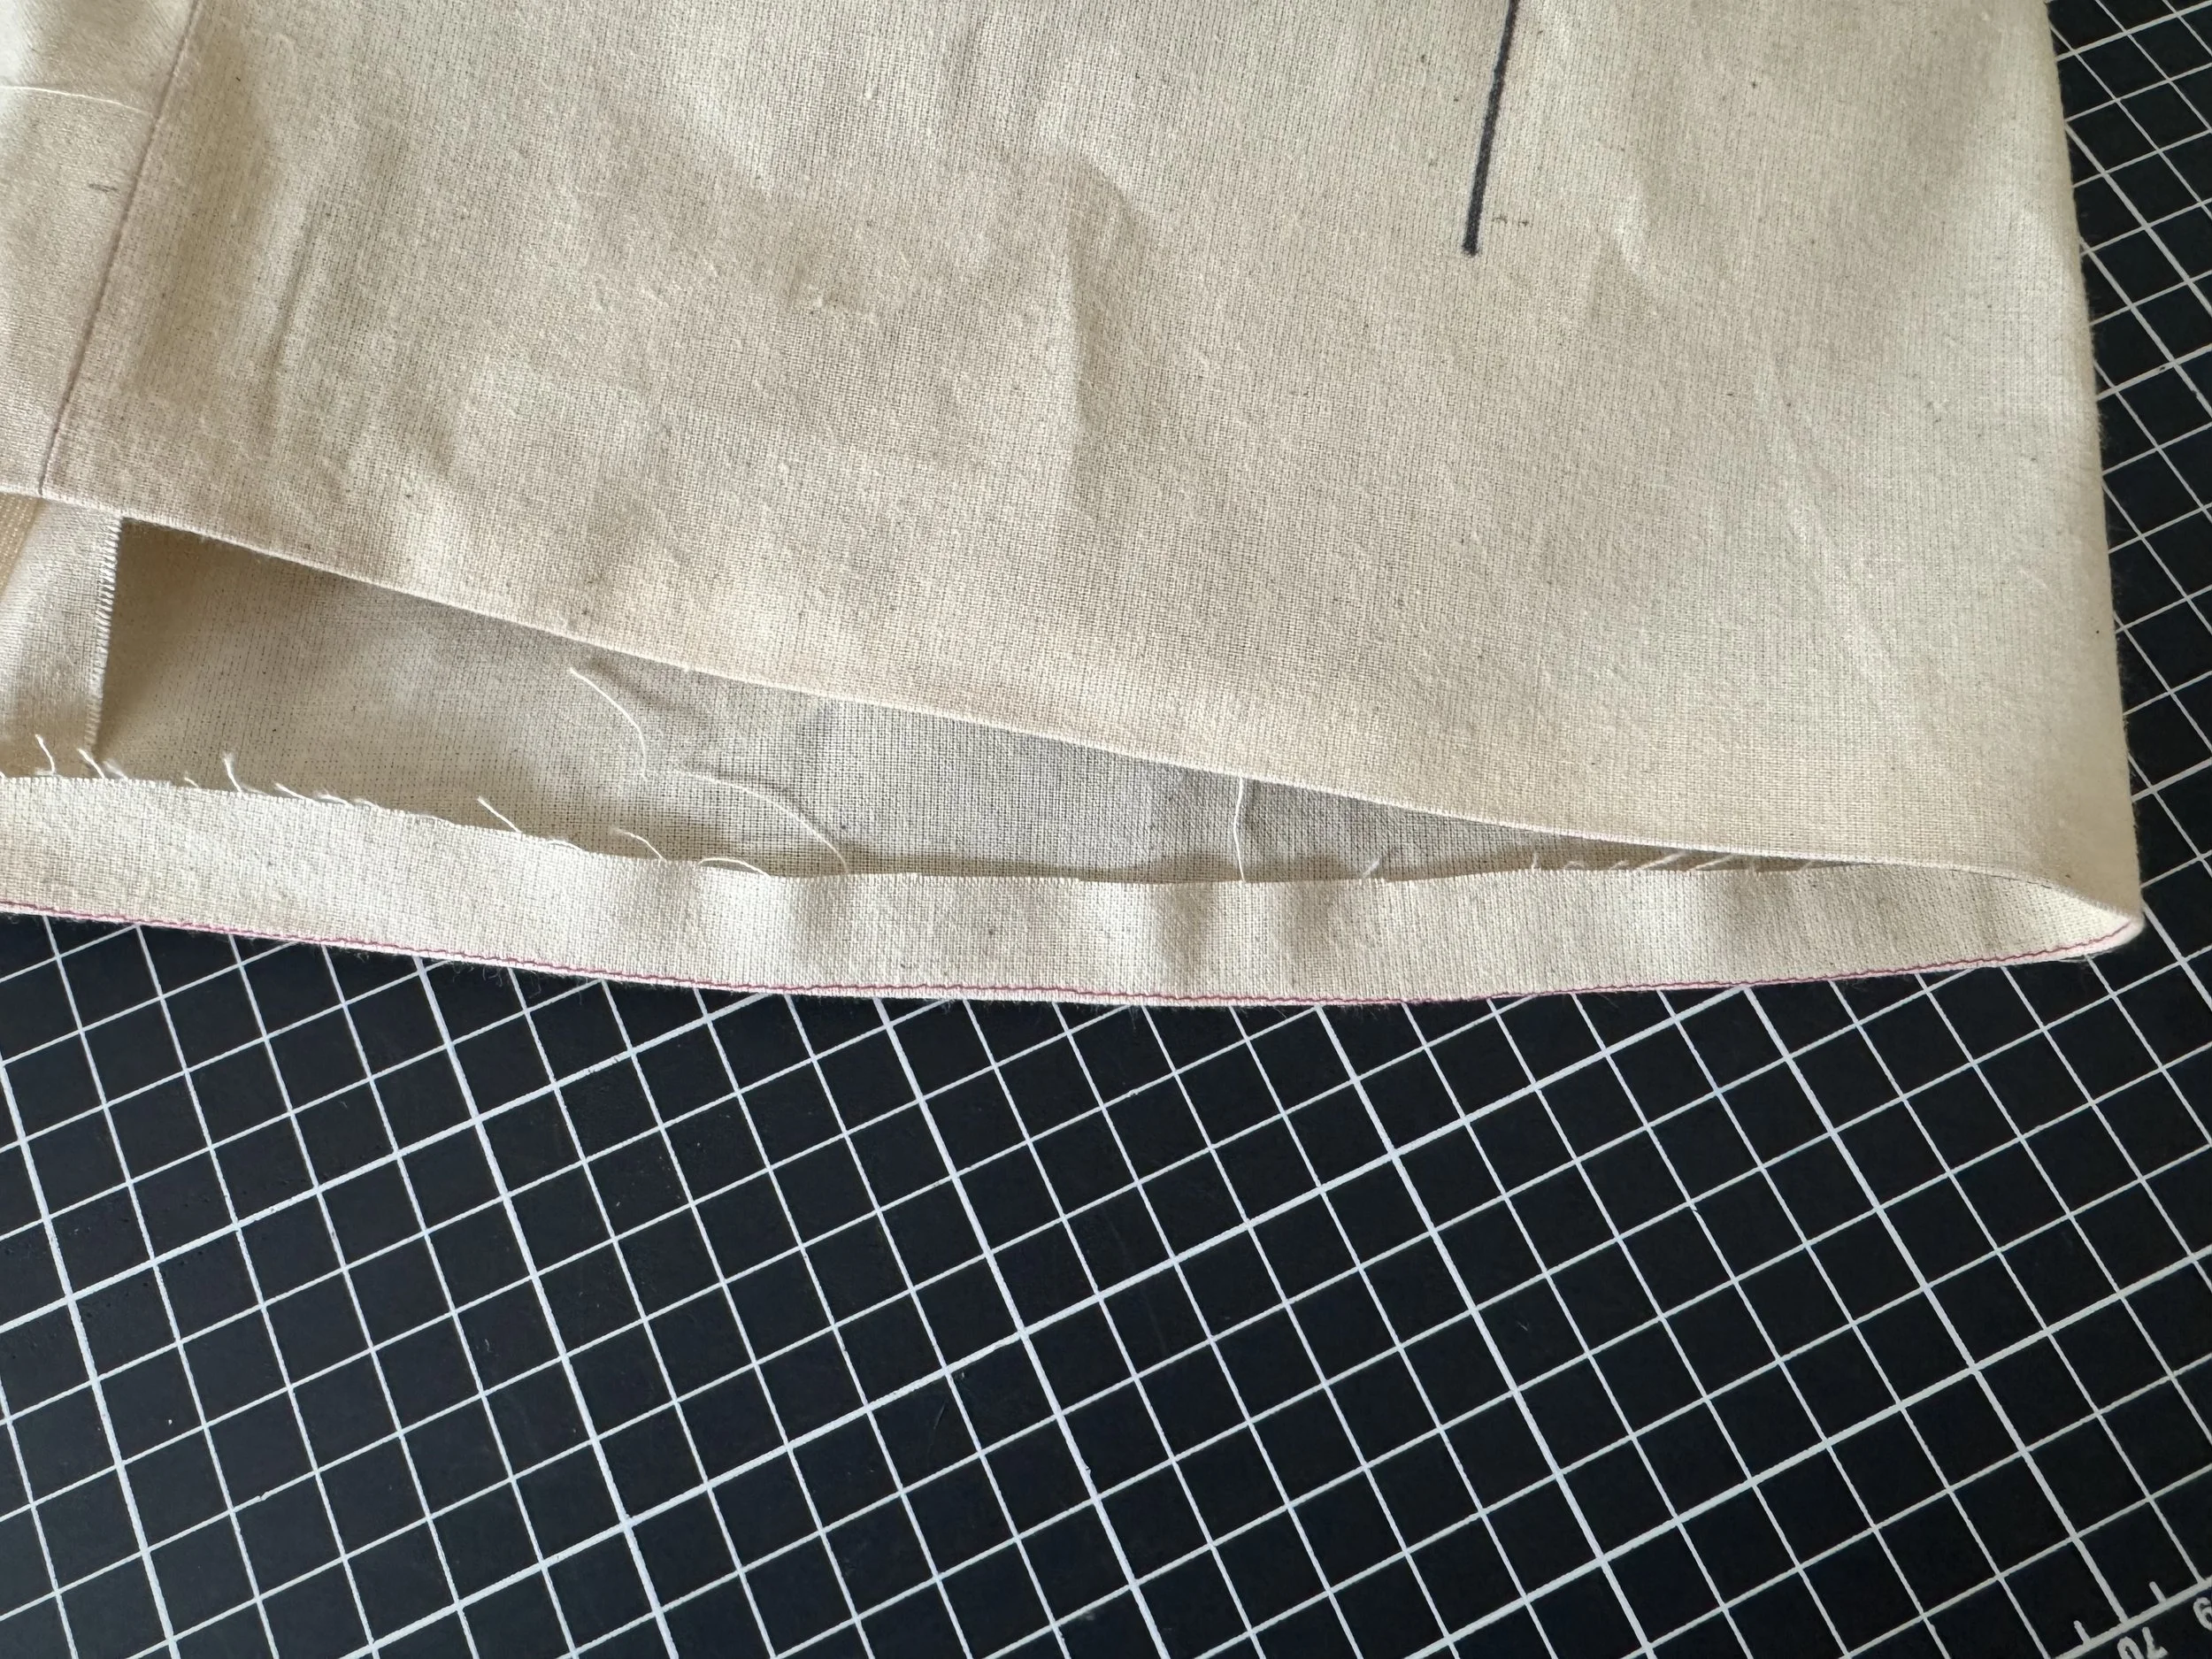 Fold and press the stitch line to the inside. [/caption]
[caption id="" align="alignnone" width="5712"]
Fold and press the stitch line to the inside. [/caption]
[caption id="" align="alignnone" width="5712"]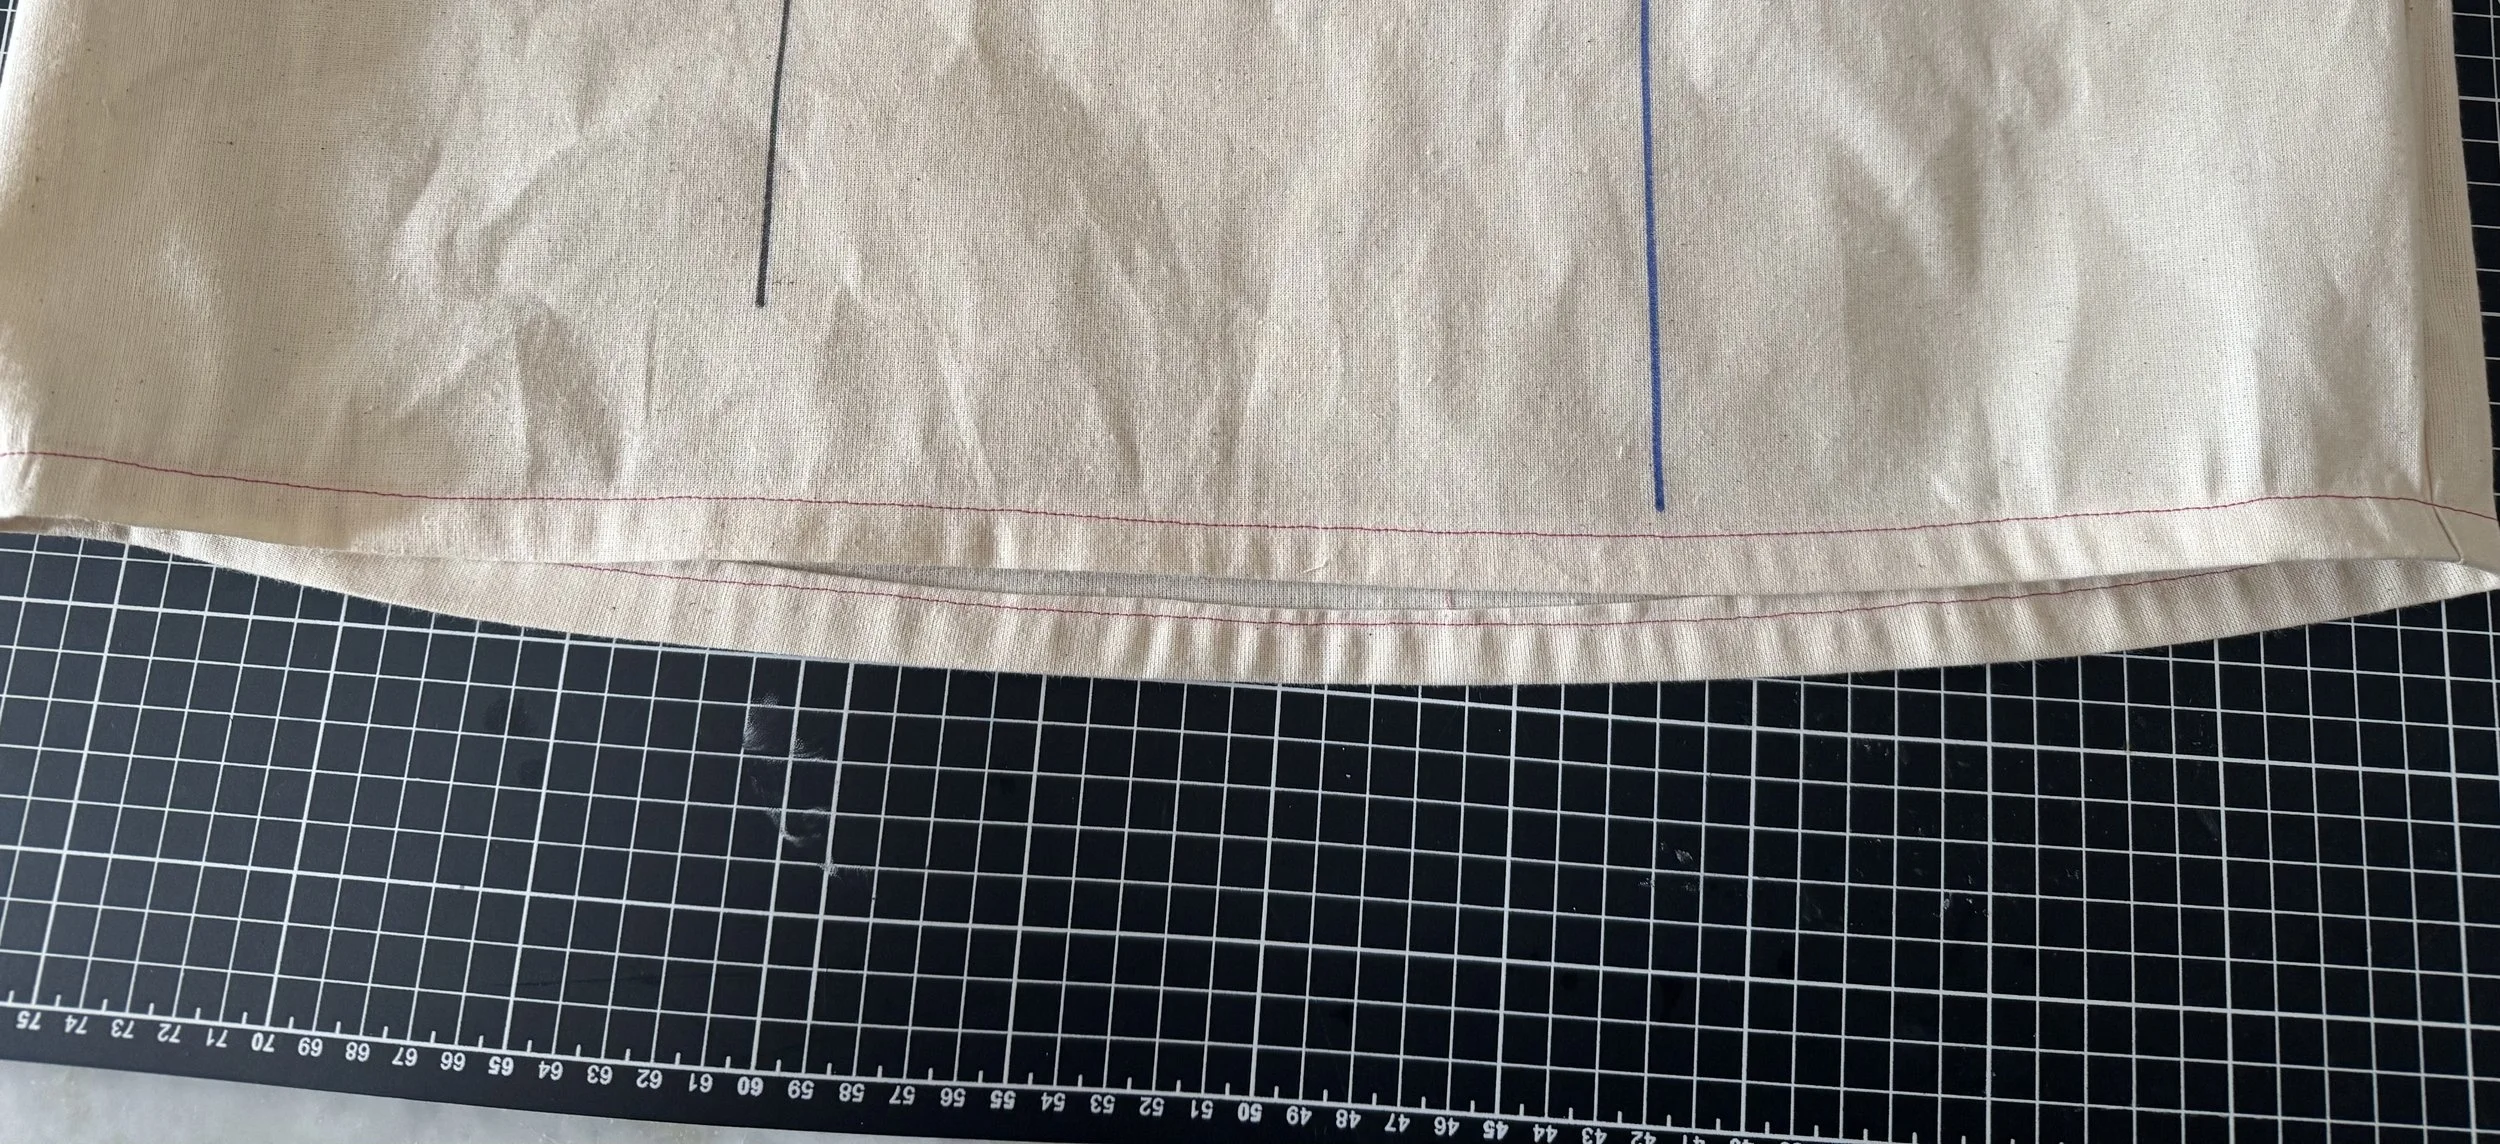 Fold again to encase the raw edge and stitch close to the edge. [/caption]
[caption id="" align="alignnone" width="4284"]
Fold again to encase the raw edge and stitch close to the edge. [/caption]
[caption id="" align="alignnone" width="4284"]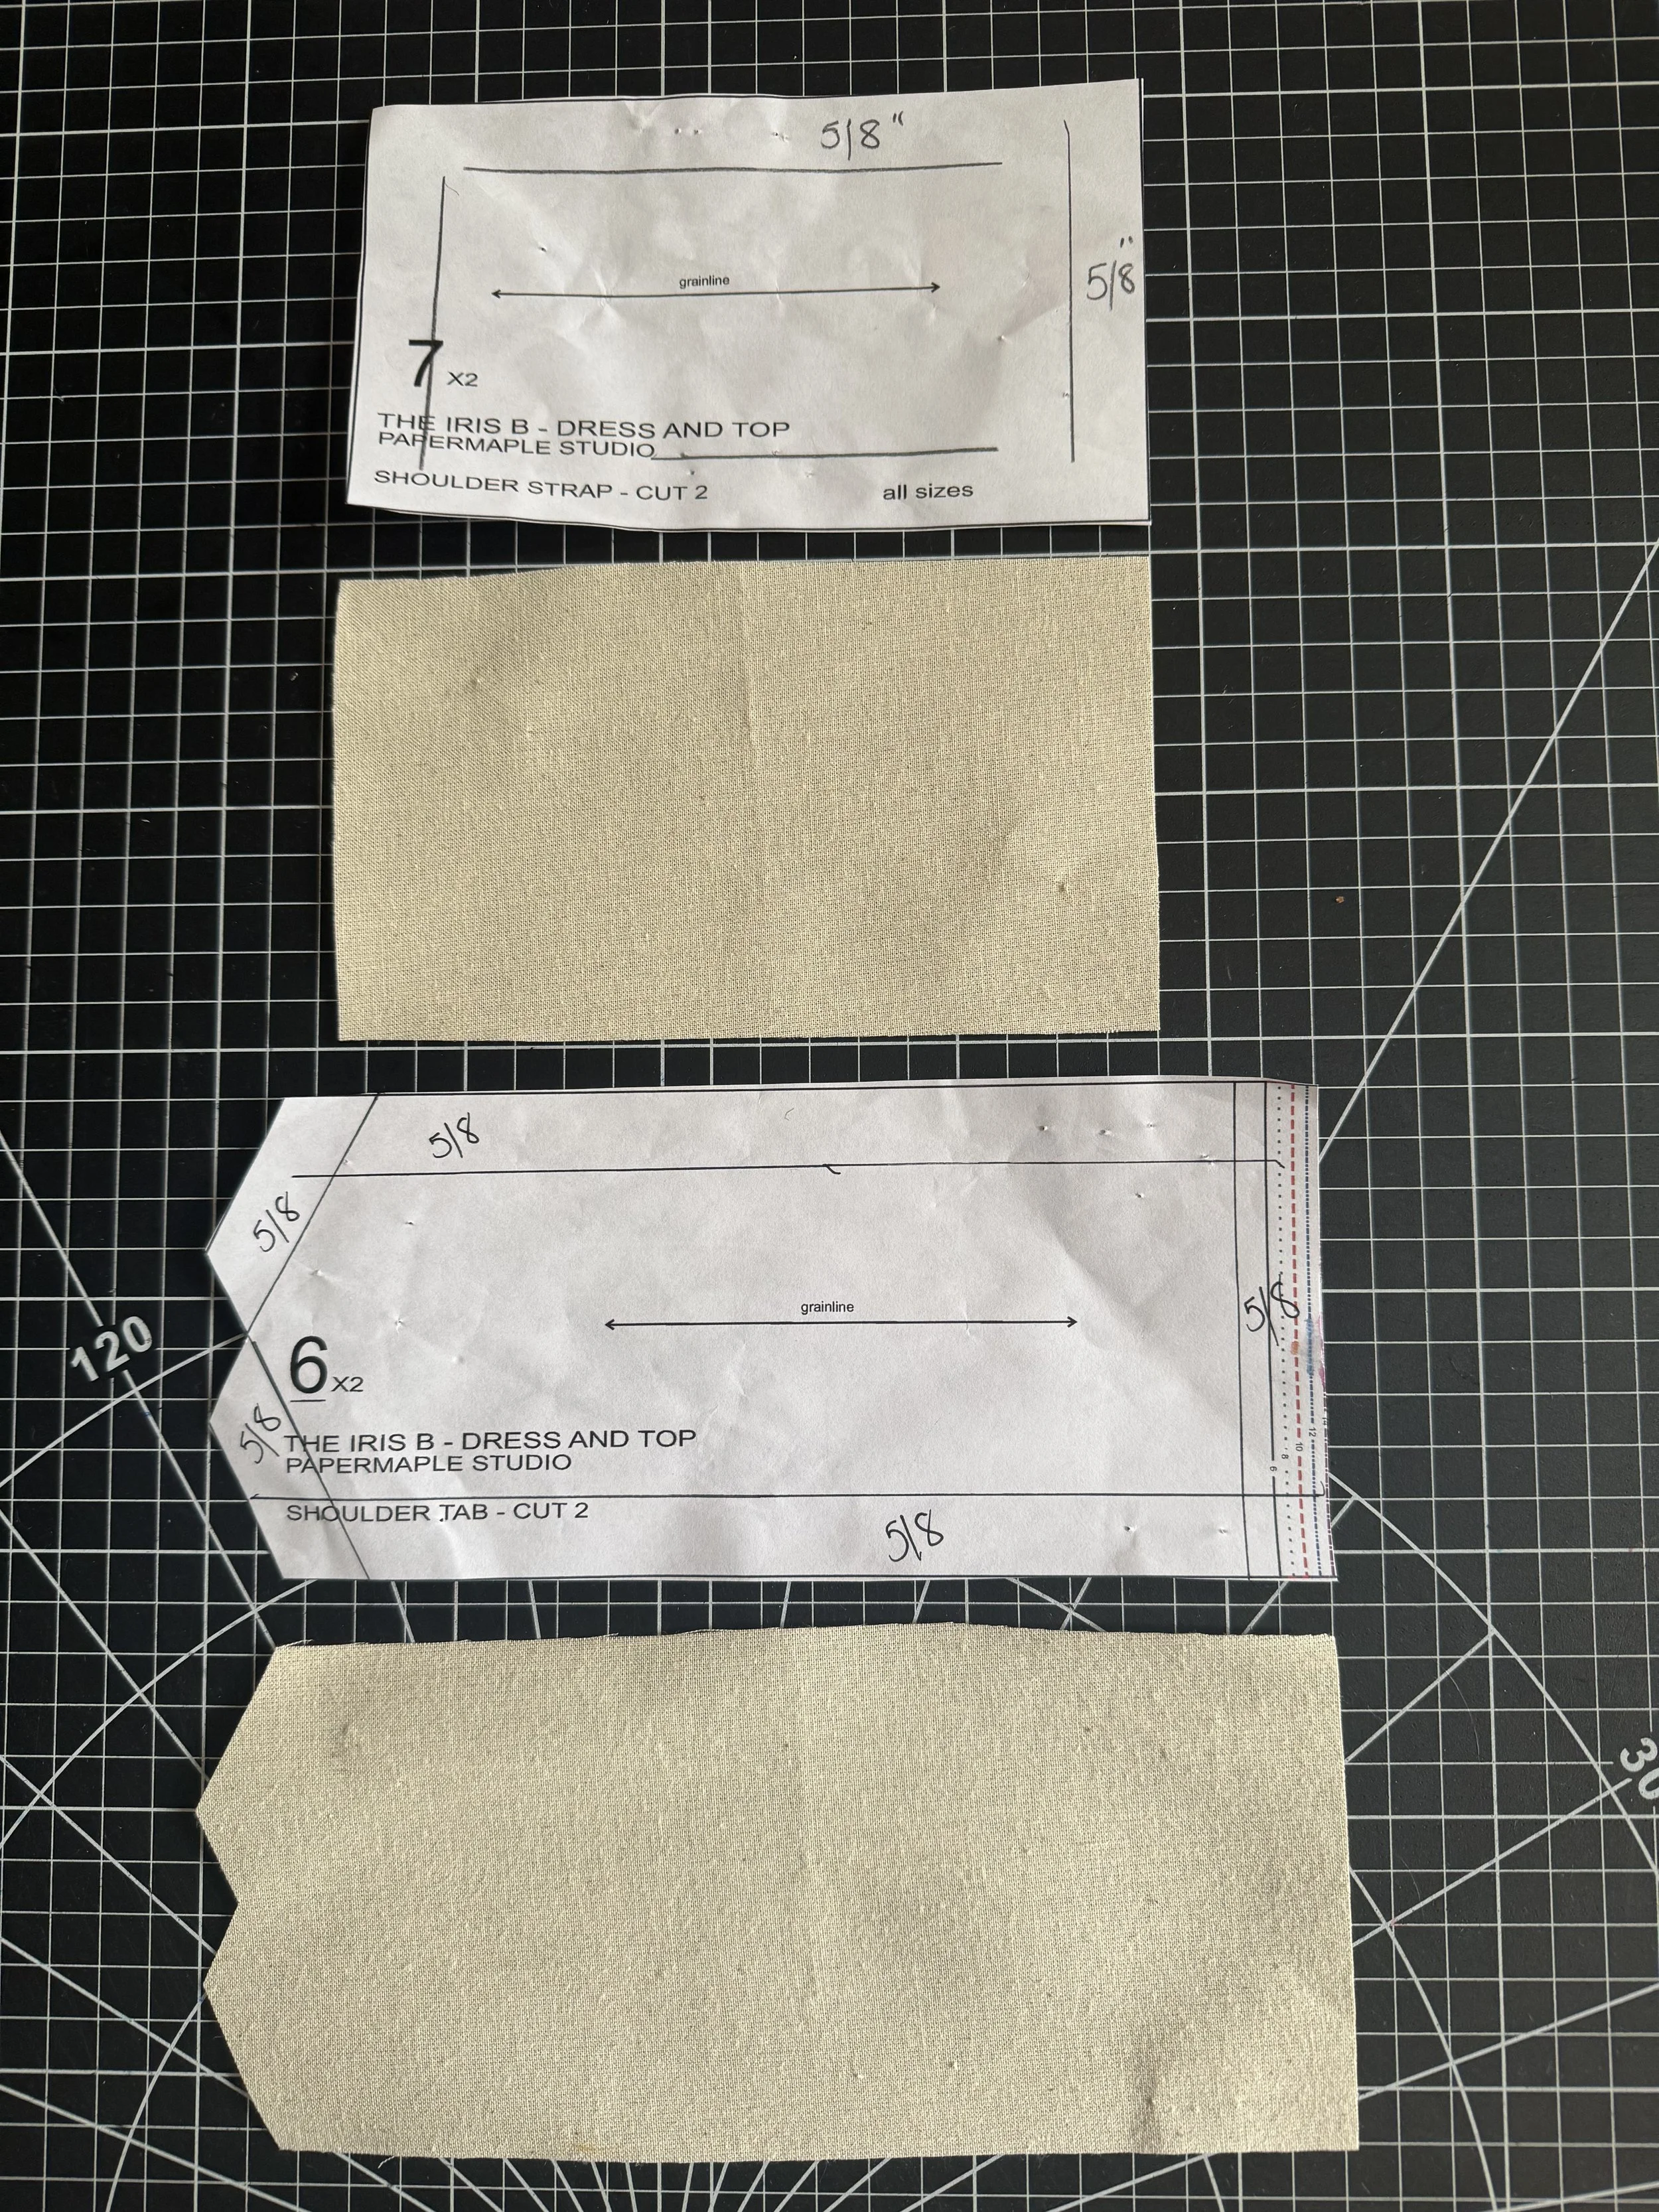 The pattern comes with an optional strap and tab set for the shoulders, this is designed to gather the shoulder and sleeve to create a new look. [/caption]
[caption id="" align="alignnone" width="4032"]
The pattern comes with an optional strap and tab set for the shoulders, this is designed to gather the shoulder and sleeve to create a new look. [/caption]
[caption id="" align="alignnone" width="4032"]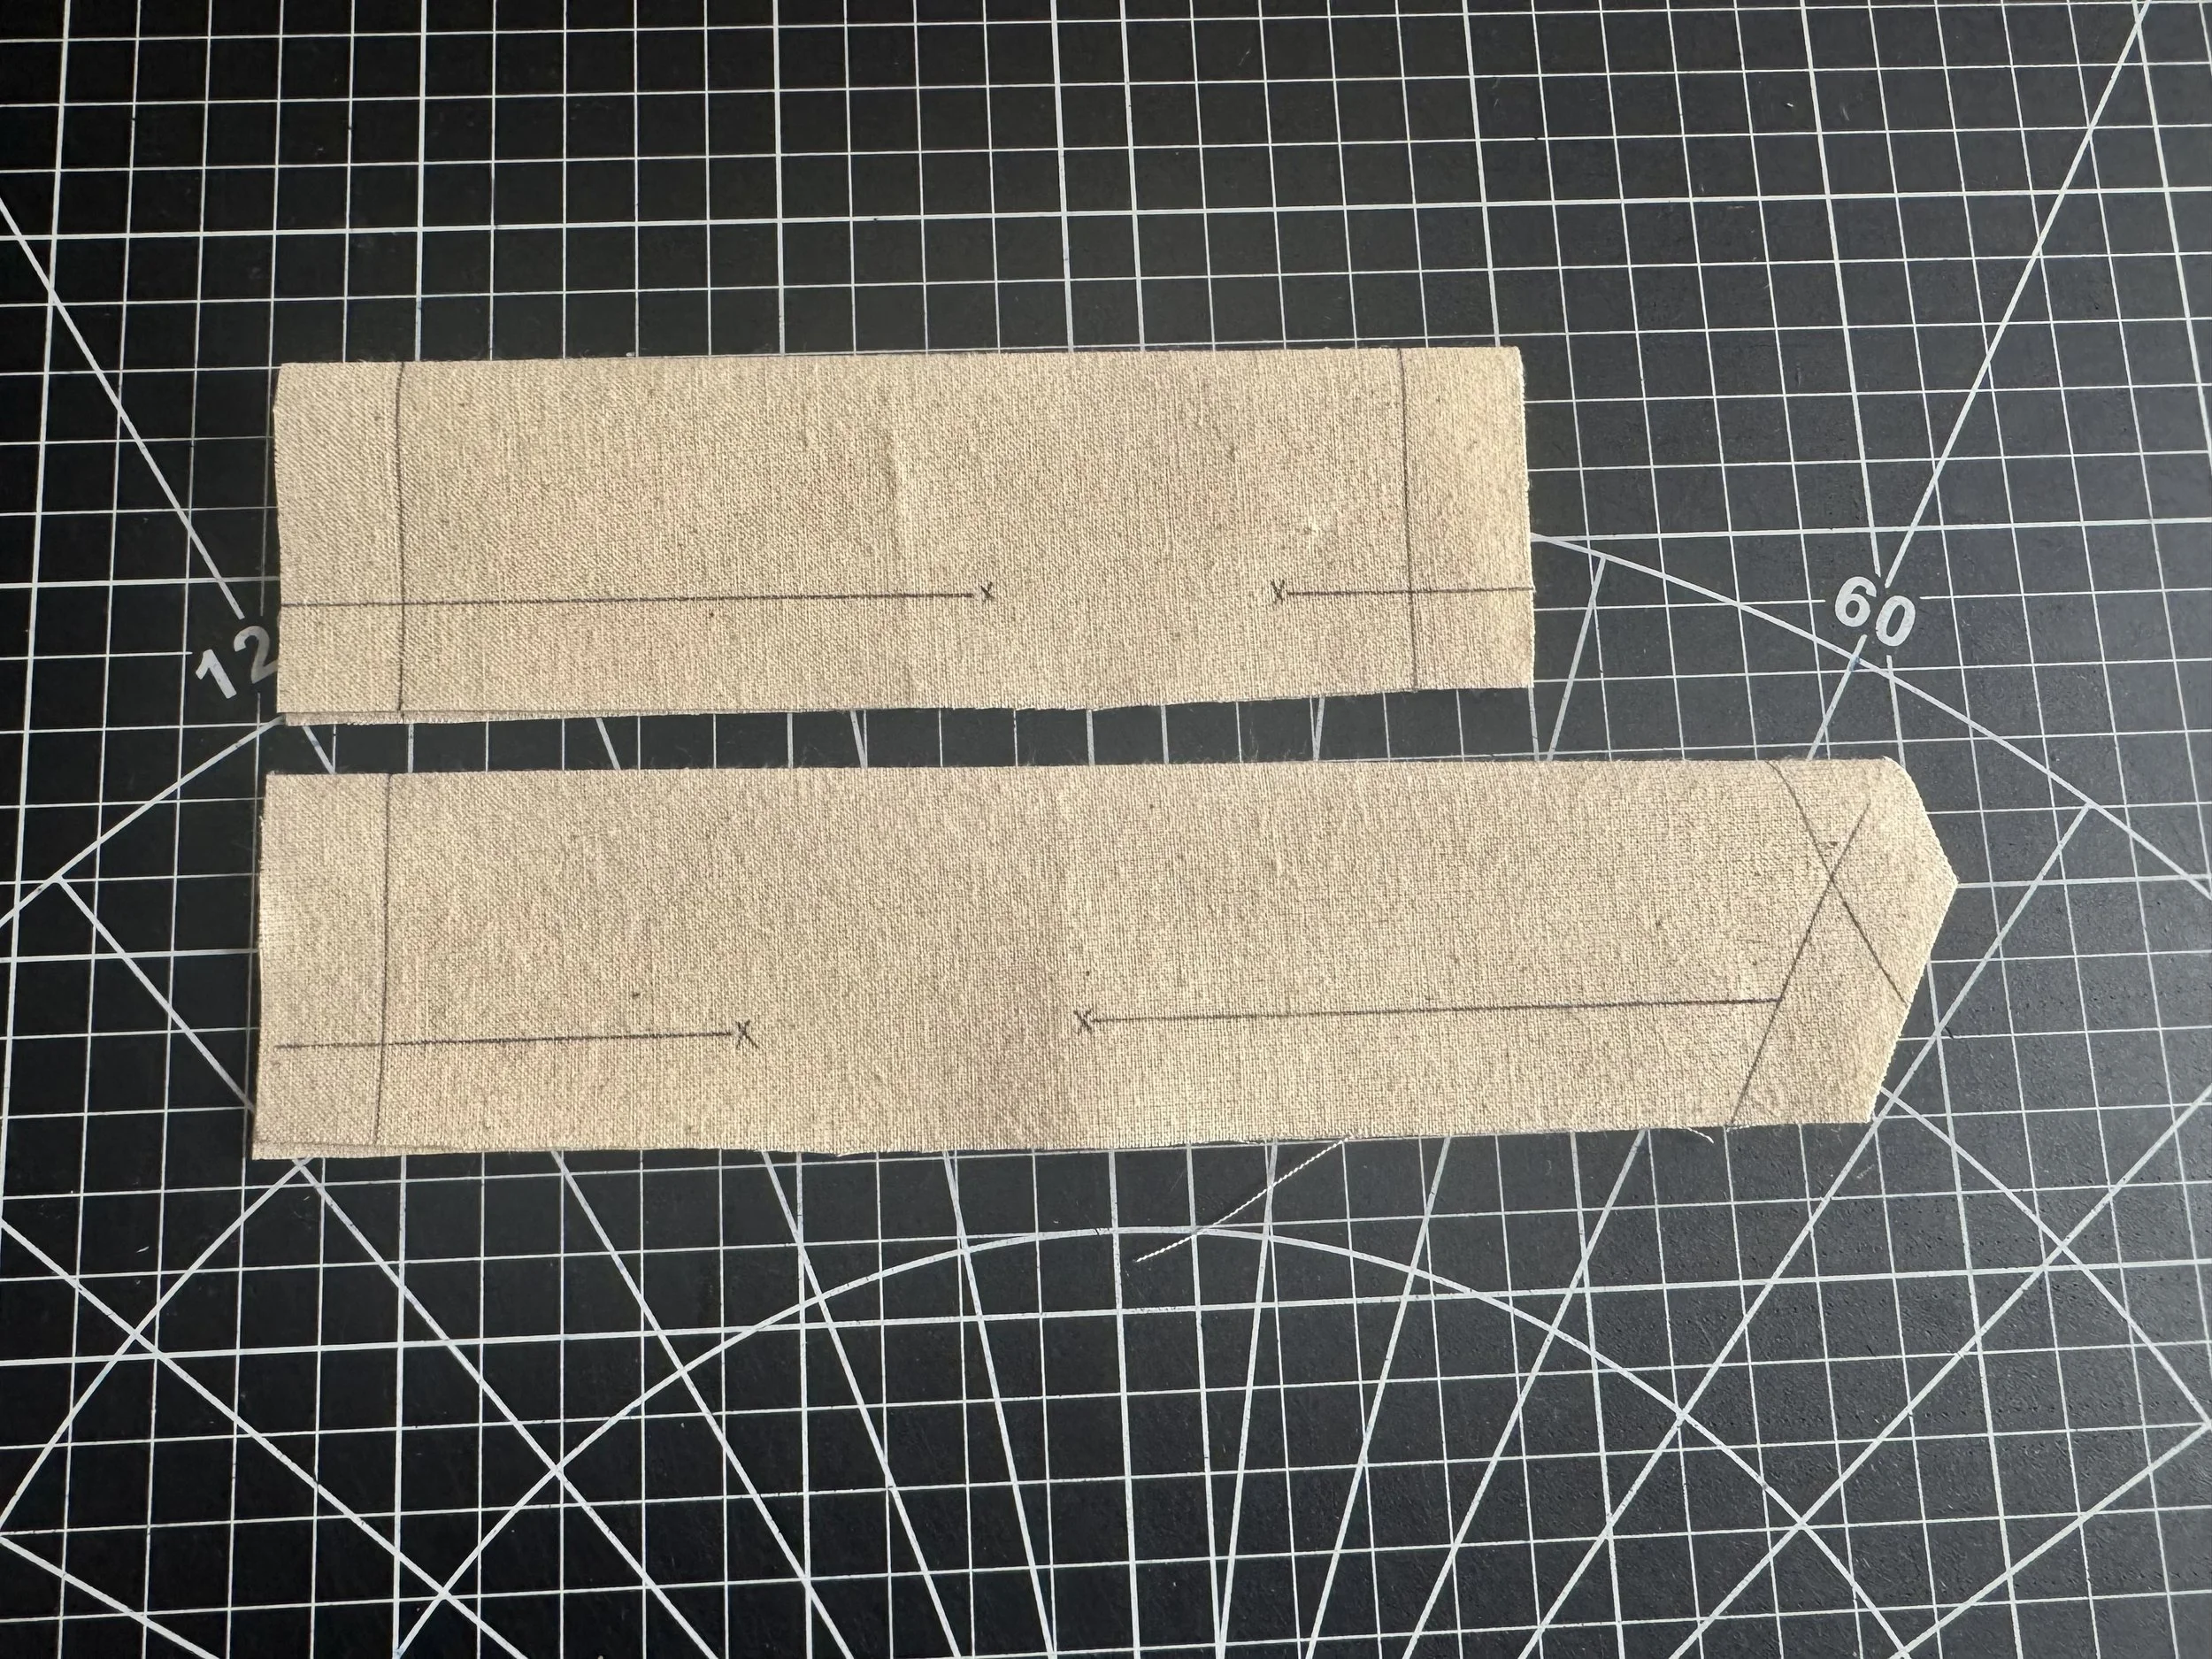 Press each piece in half, and mark a 5/8” seam allowance along each edge. Leave an opening as shown. [/caption]
[caption id="" align="alignnone" width="5374"]
Press each piece in half, and mark a 5/8” seam allowance along each edge. Leave an opening as shown. [/caption]
[caption id="" align="alignnone" width="5374"]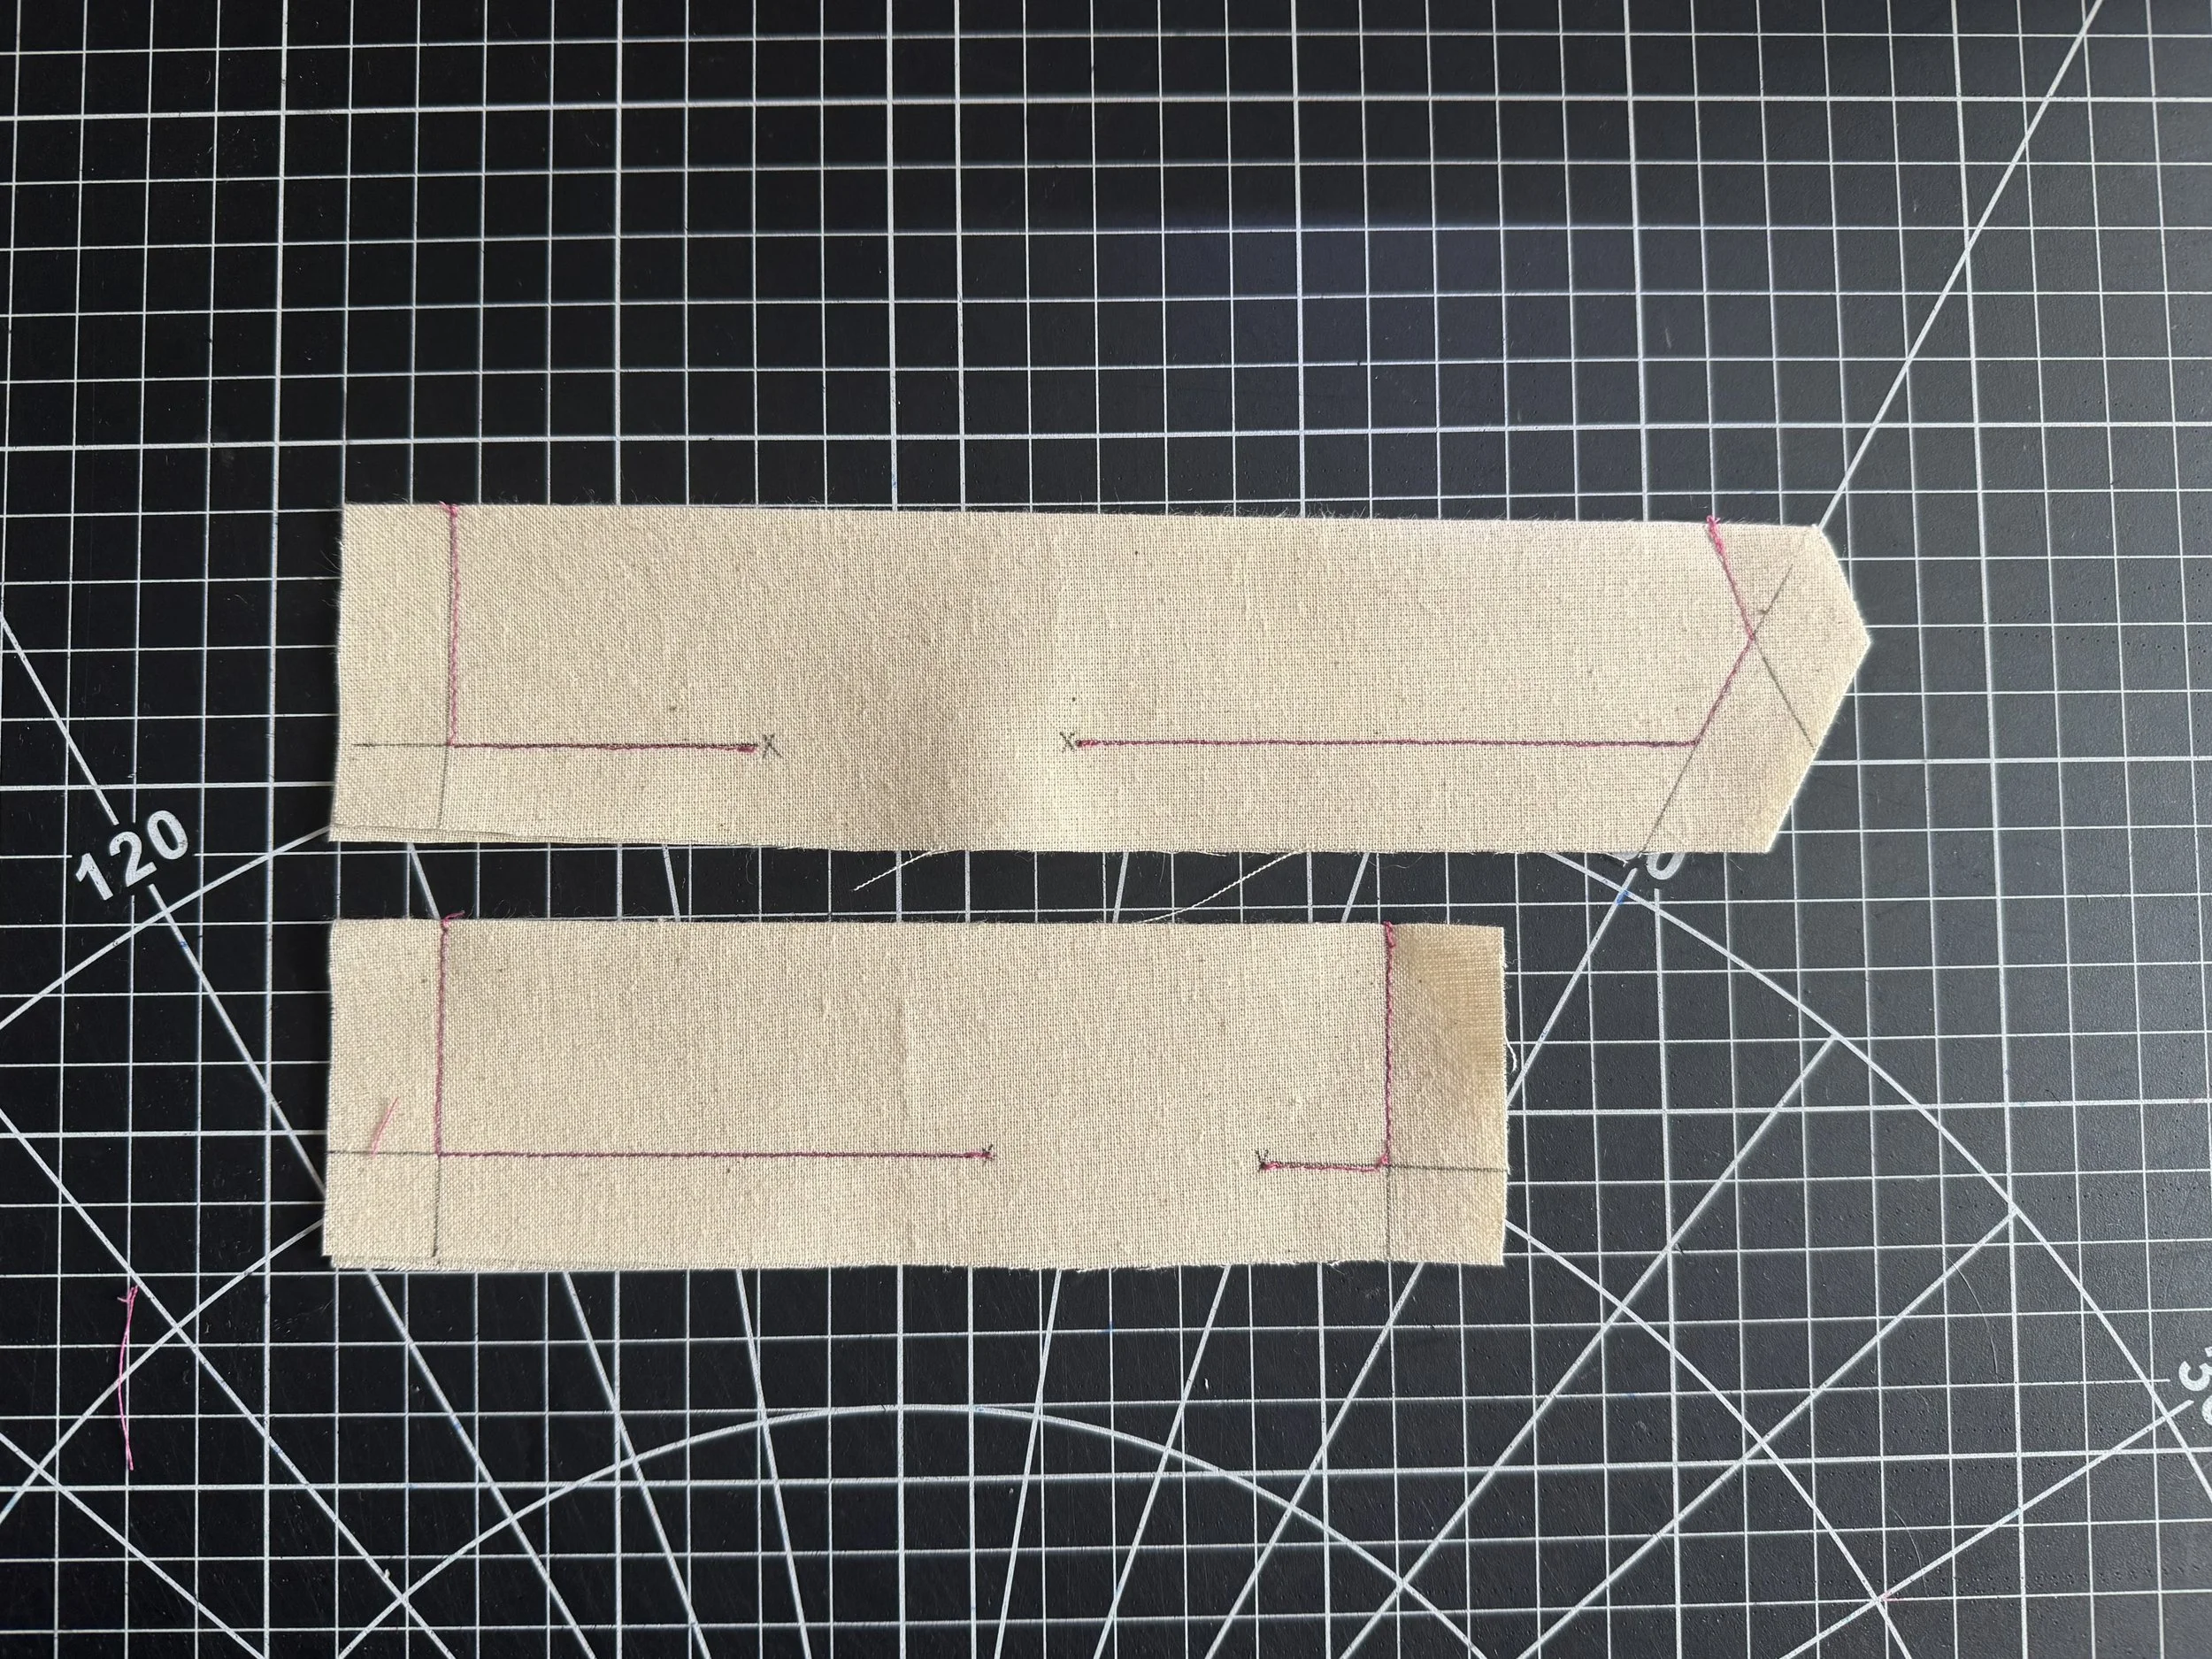 Sew using a 2.4 stitch length. Back tack at the beginning, the opening and at the end. [/caption]
[caption id="" align="alignnone" width="5712"]
Sew using a 2.4 stitch length. Back tack at the beginning, the opening and at the end. [/caption]
[caption id="" align="alignnone" width="5712"]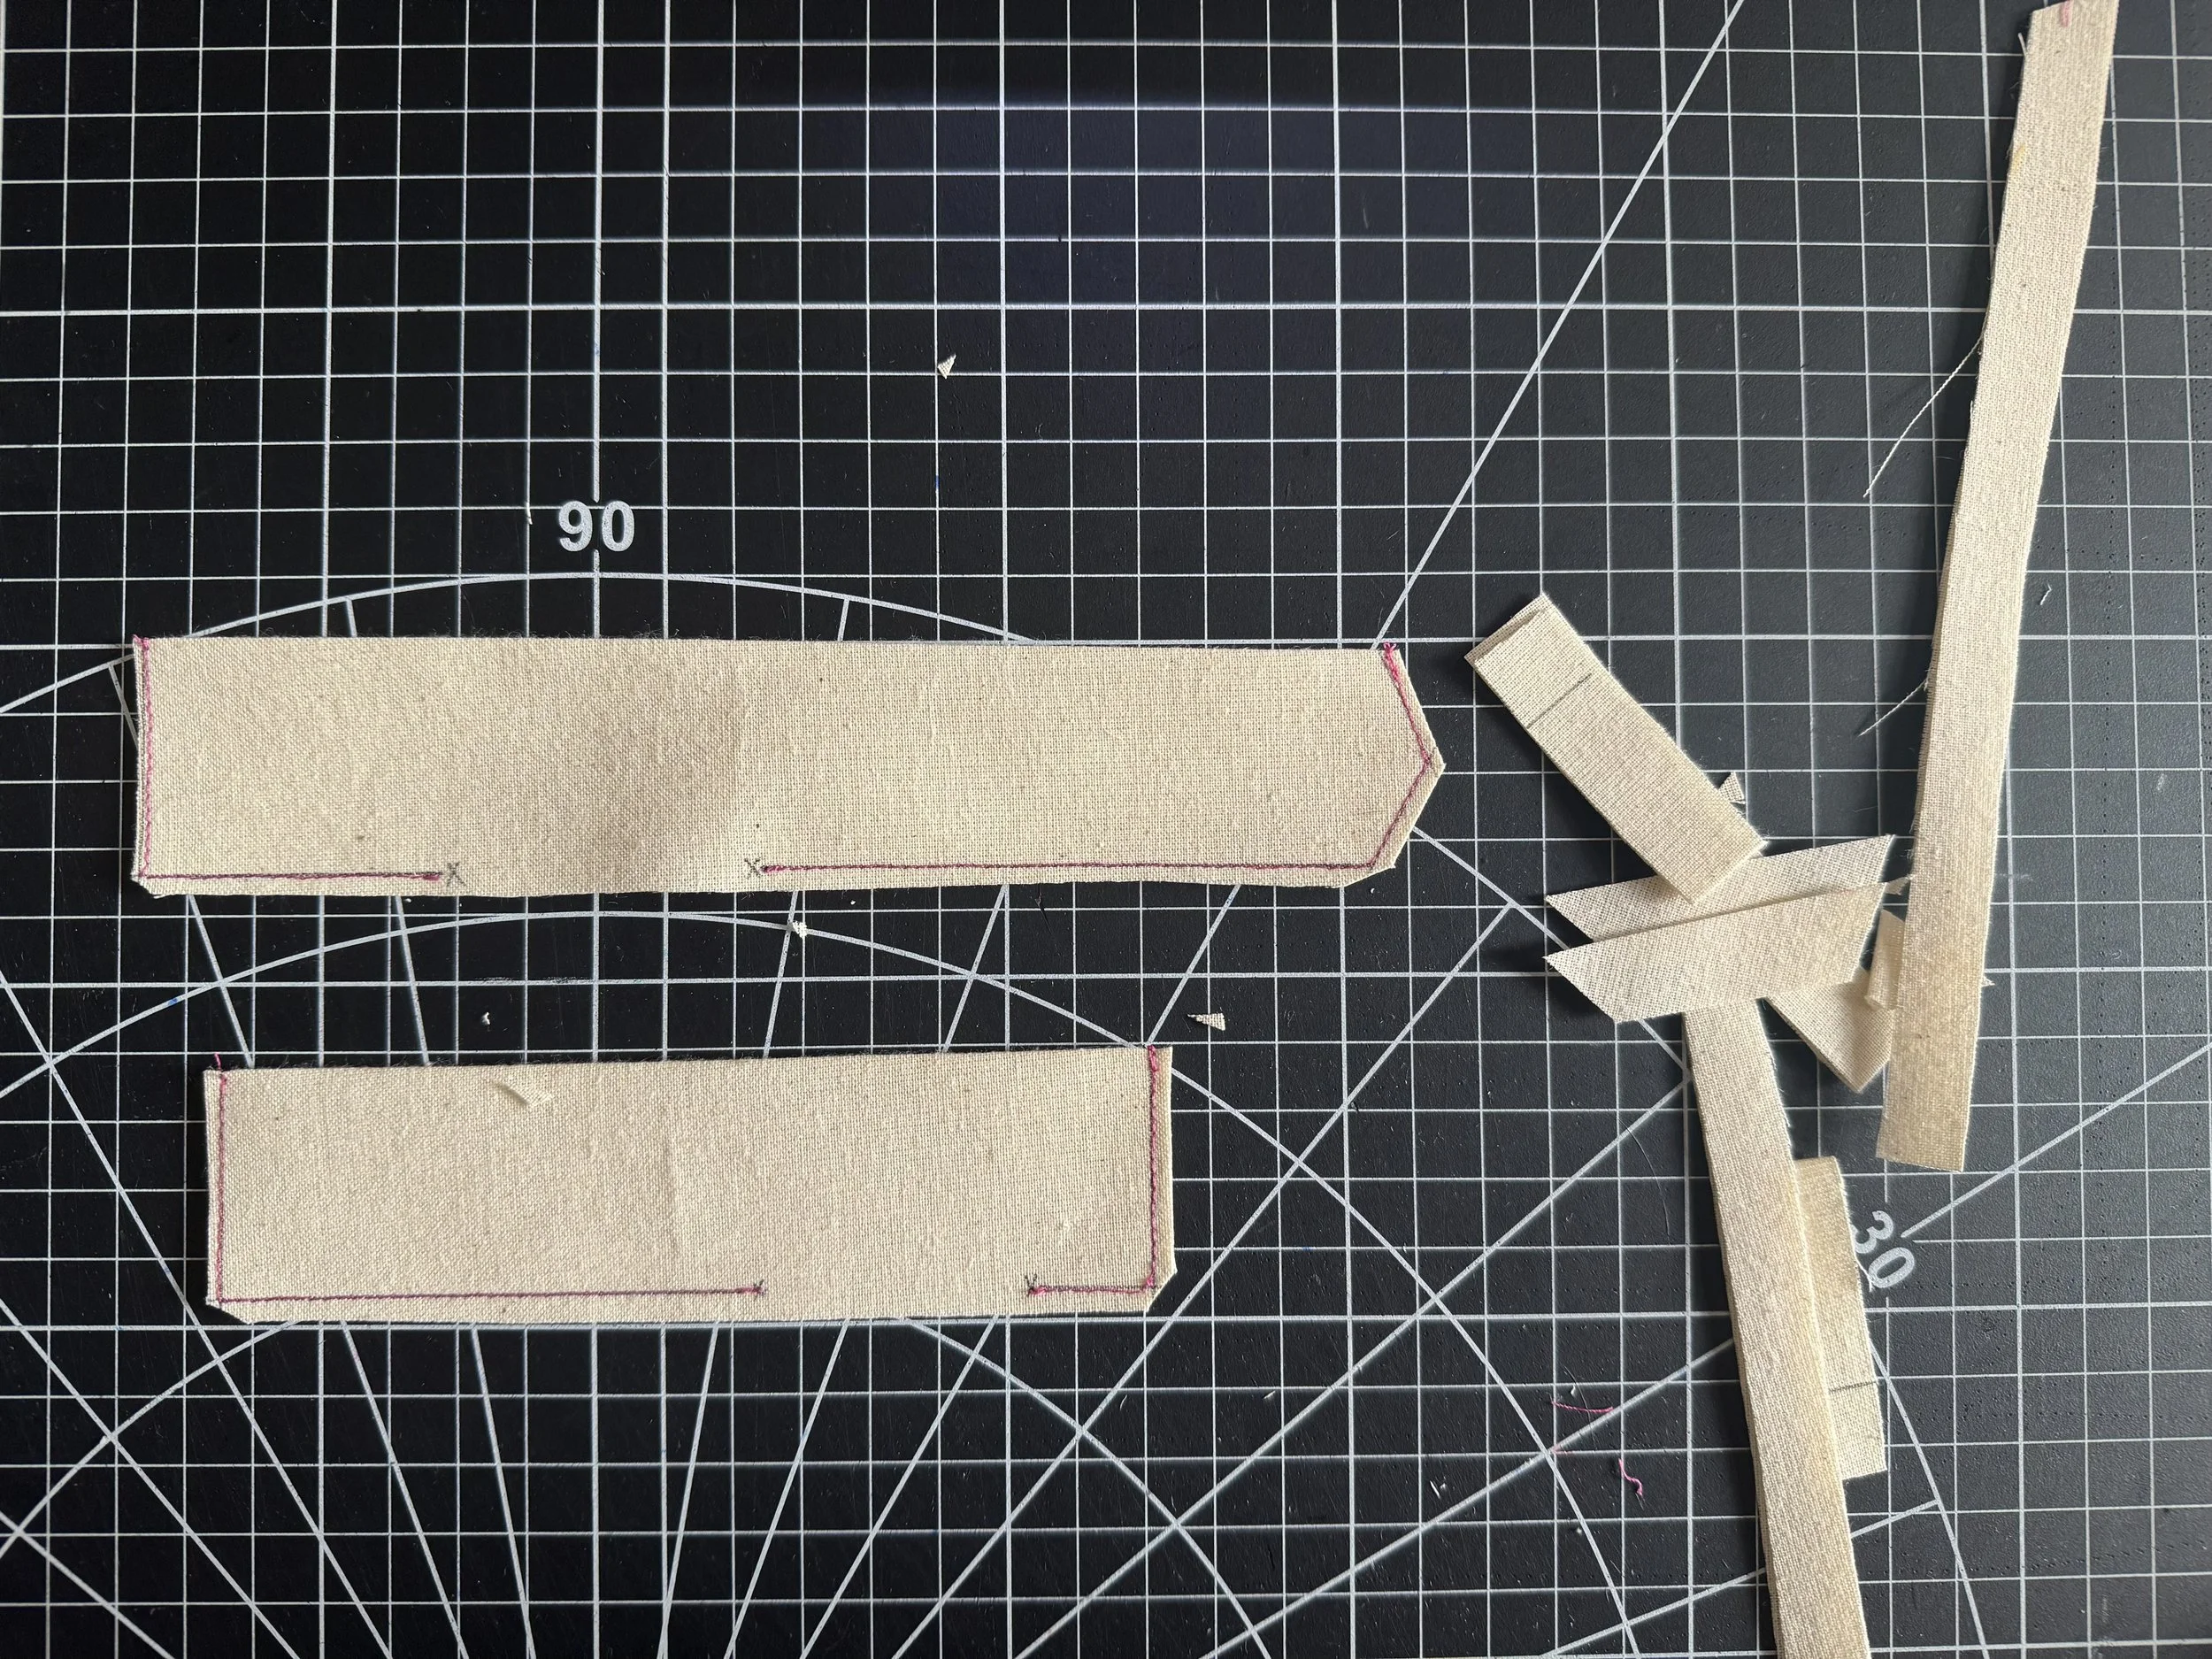 Trim the seams, and snip the corners. [/caption]
[caption id="" align="alignnone" width="5414"]
Trim the seams, and snip the corners. [/caption]
[caption id="" align="alignnone" width="5414"]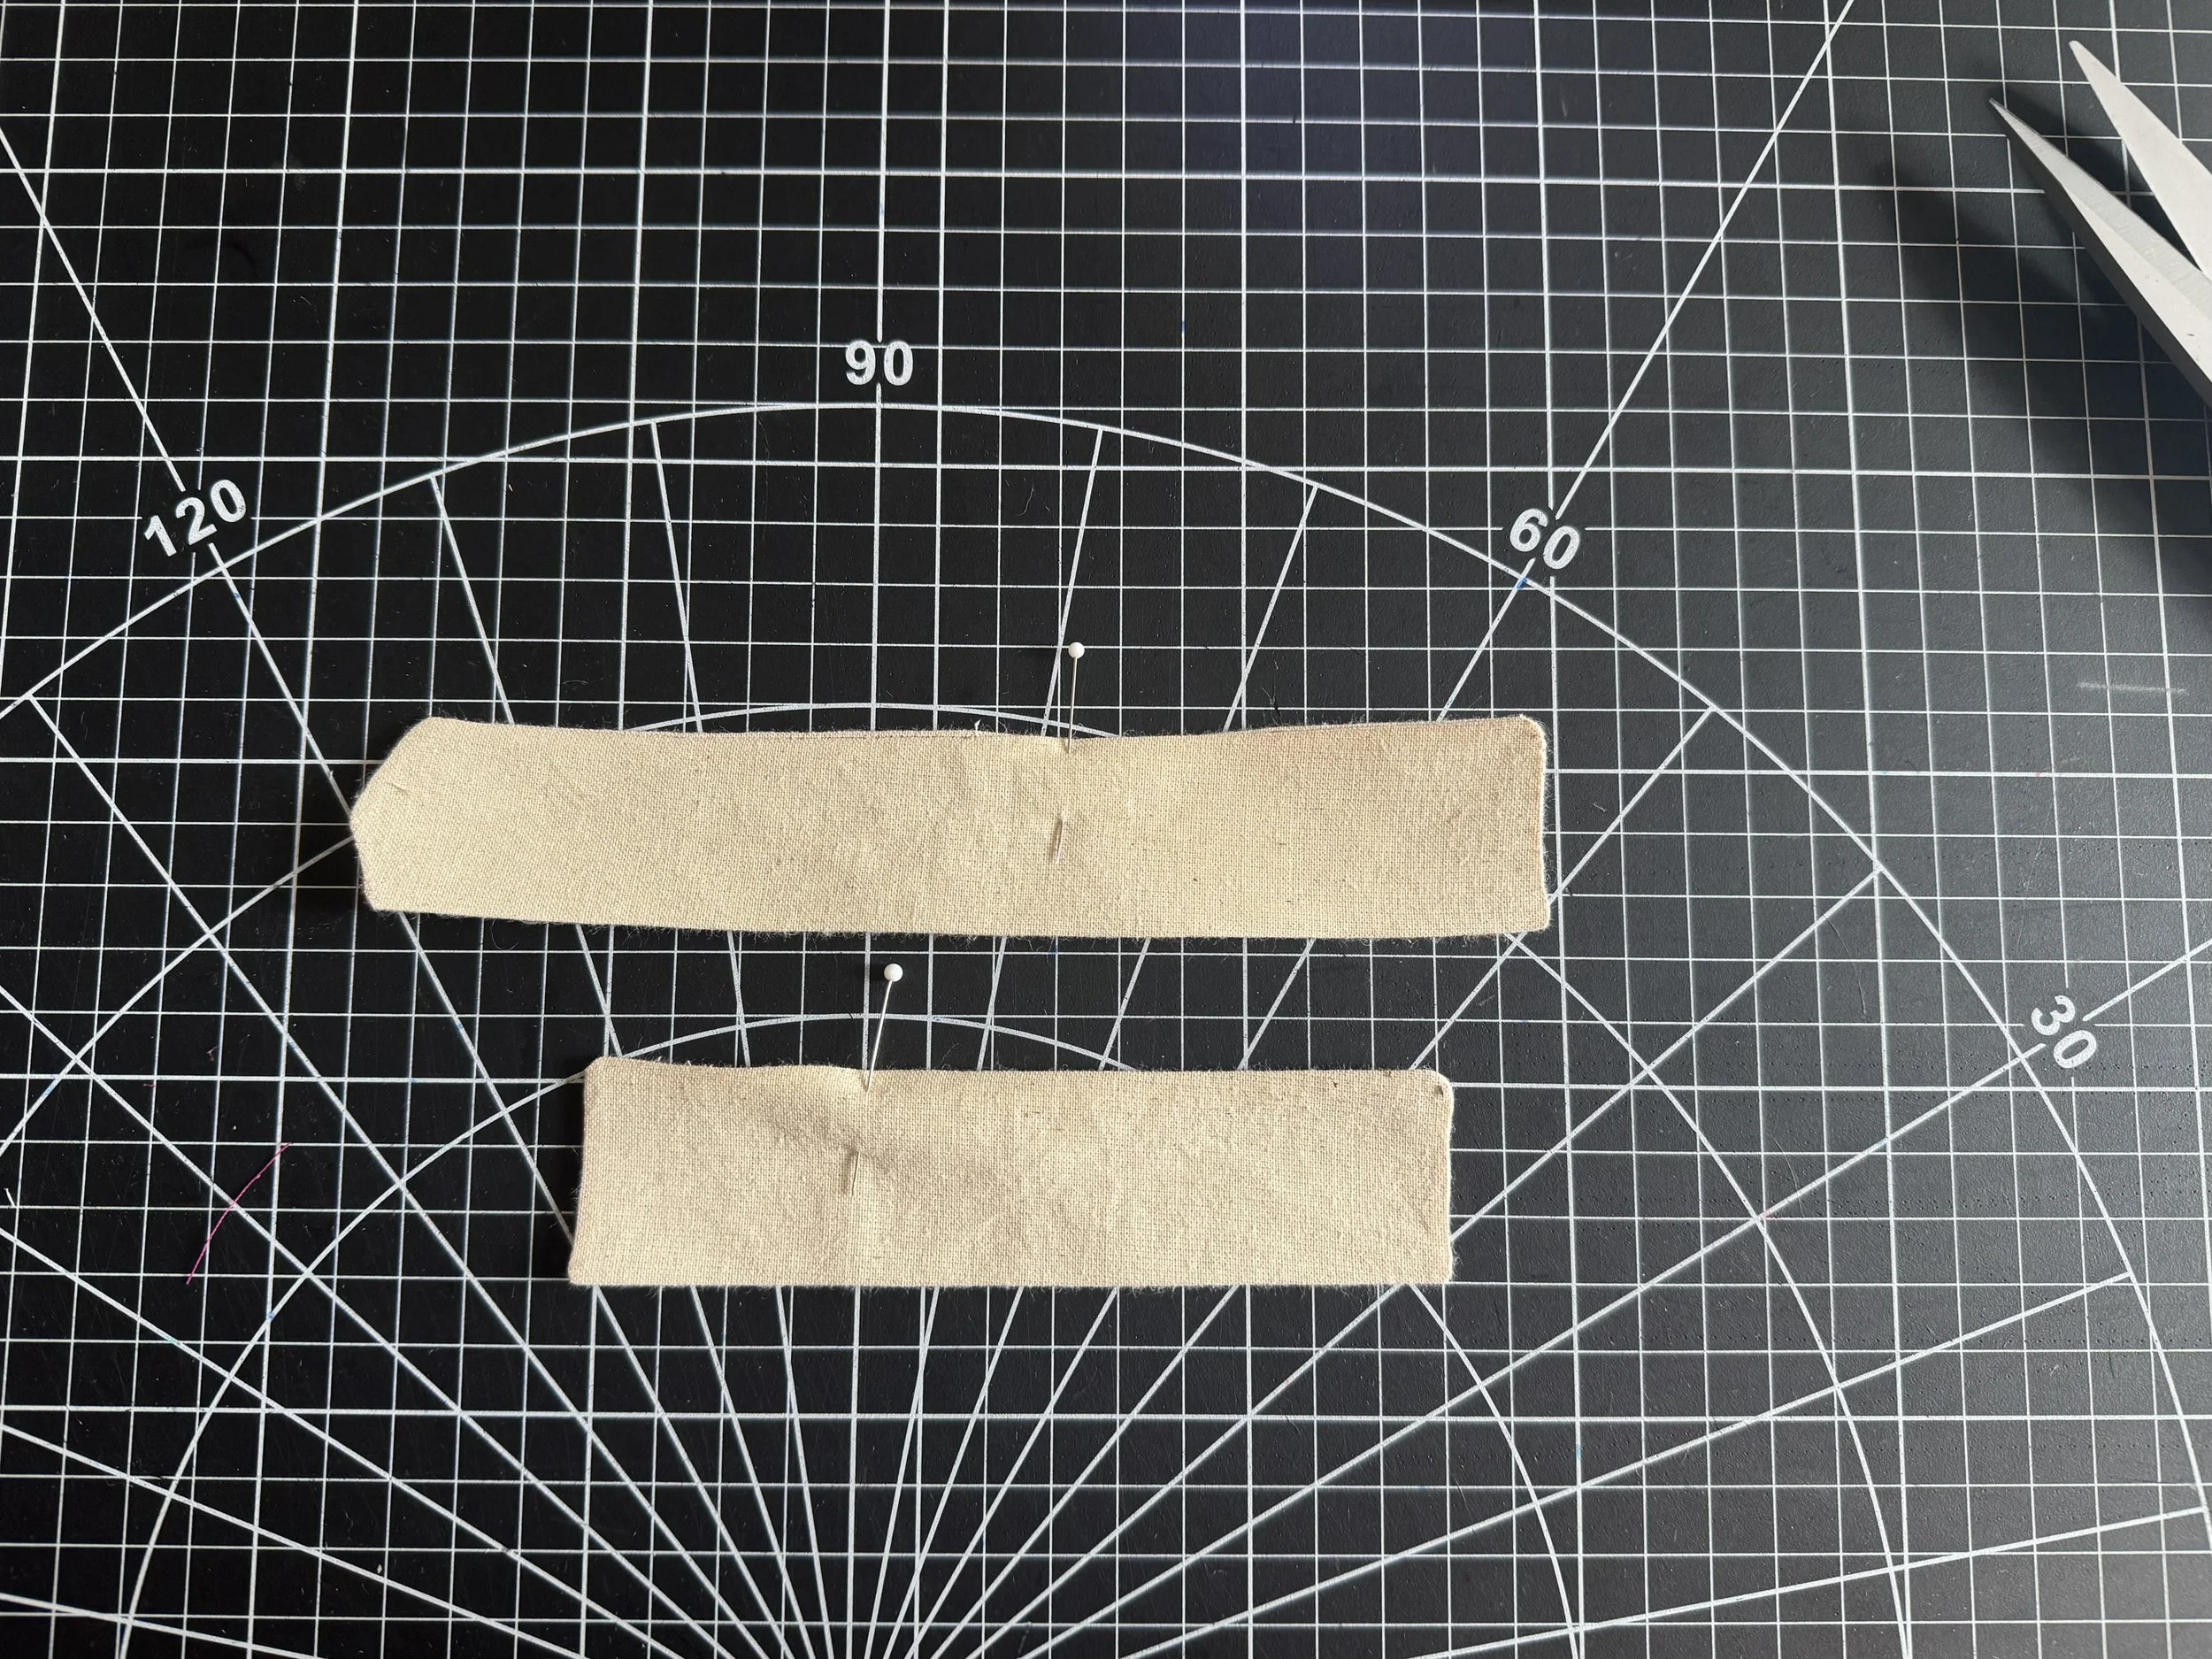 Turn your pieces, fold your opening seam allowances in and pin to hold. Press well, and top stitch. [/caption]
[caption id="" align="alignnone" width="5712"]
Turn your pieces, fold your opening seam allowances in and pin to hold. Press well, and top stitch. [/caption]
[caption id="" align="alignnone" width="5712"]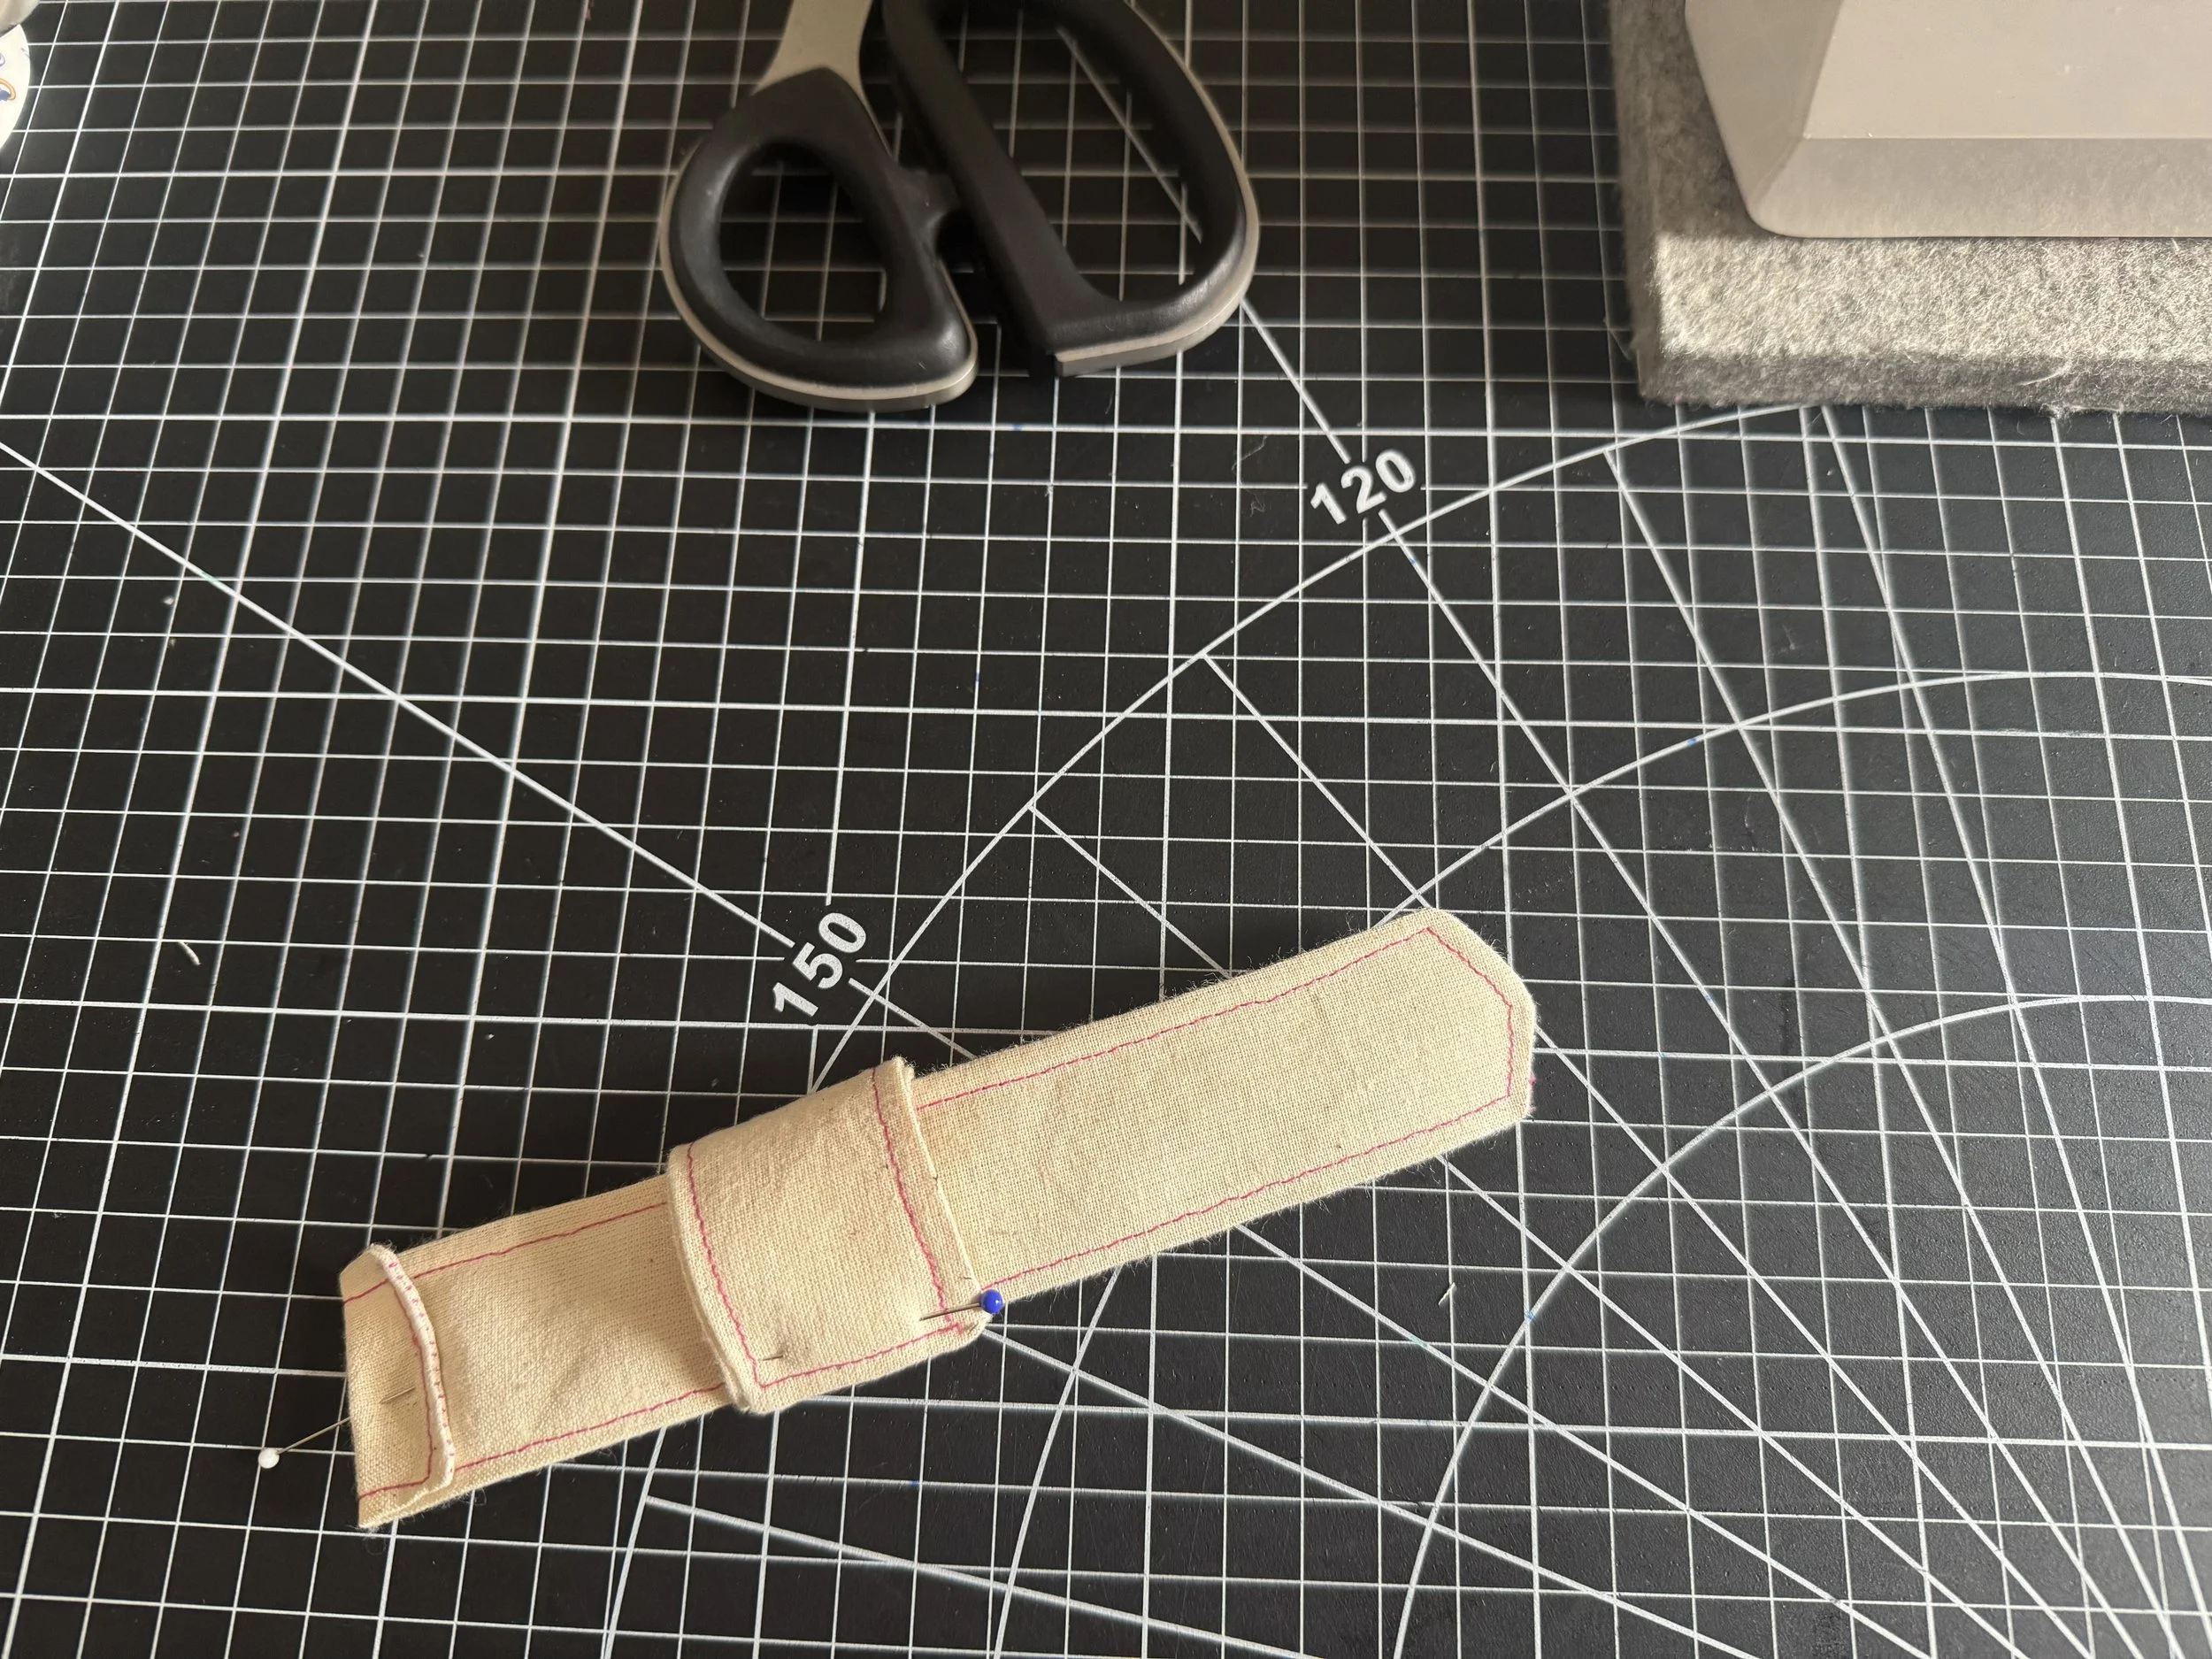 Fold your tab over your strap until it’s the same width, pin. [/caption]
[caption id="" align="alignnone" width="4032"]
Fold your tab over your strap until it’s the same width, pin. [/caption]
[caption id="" align="alignnone" width="4032"]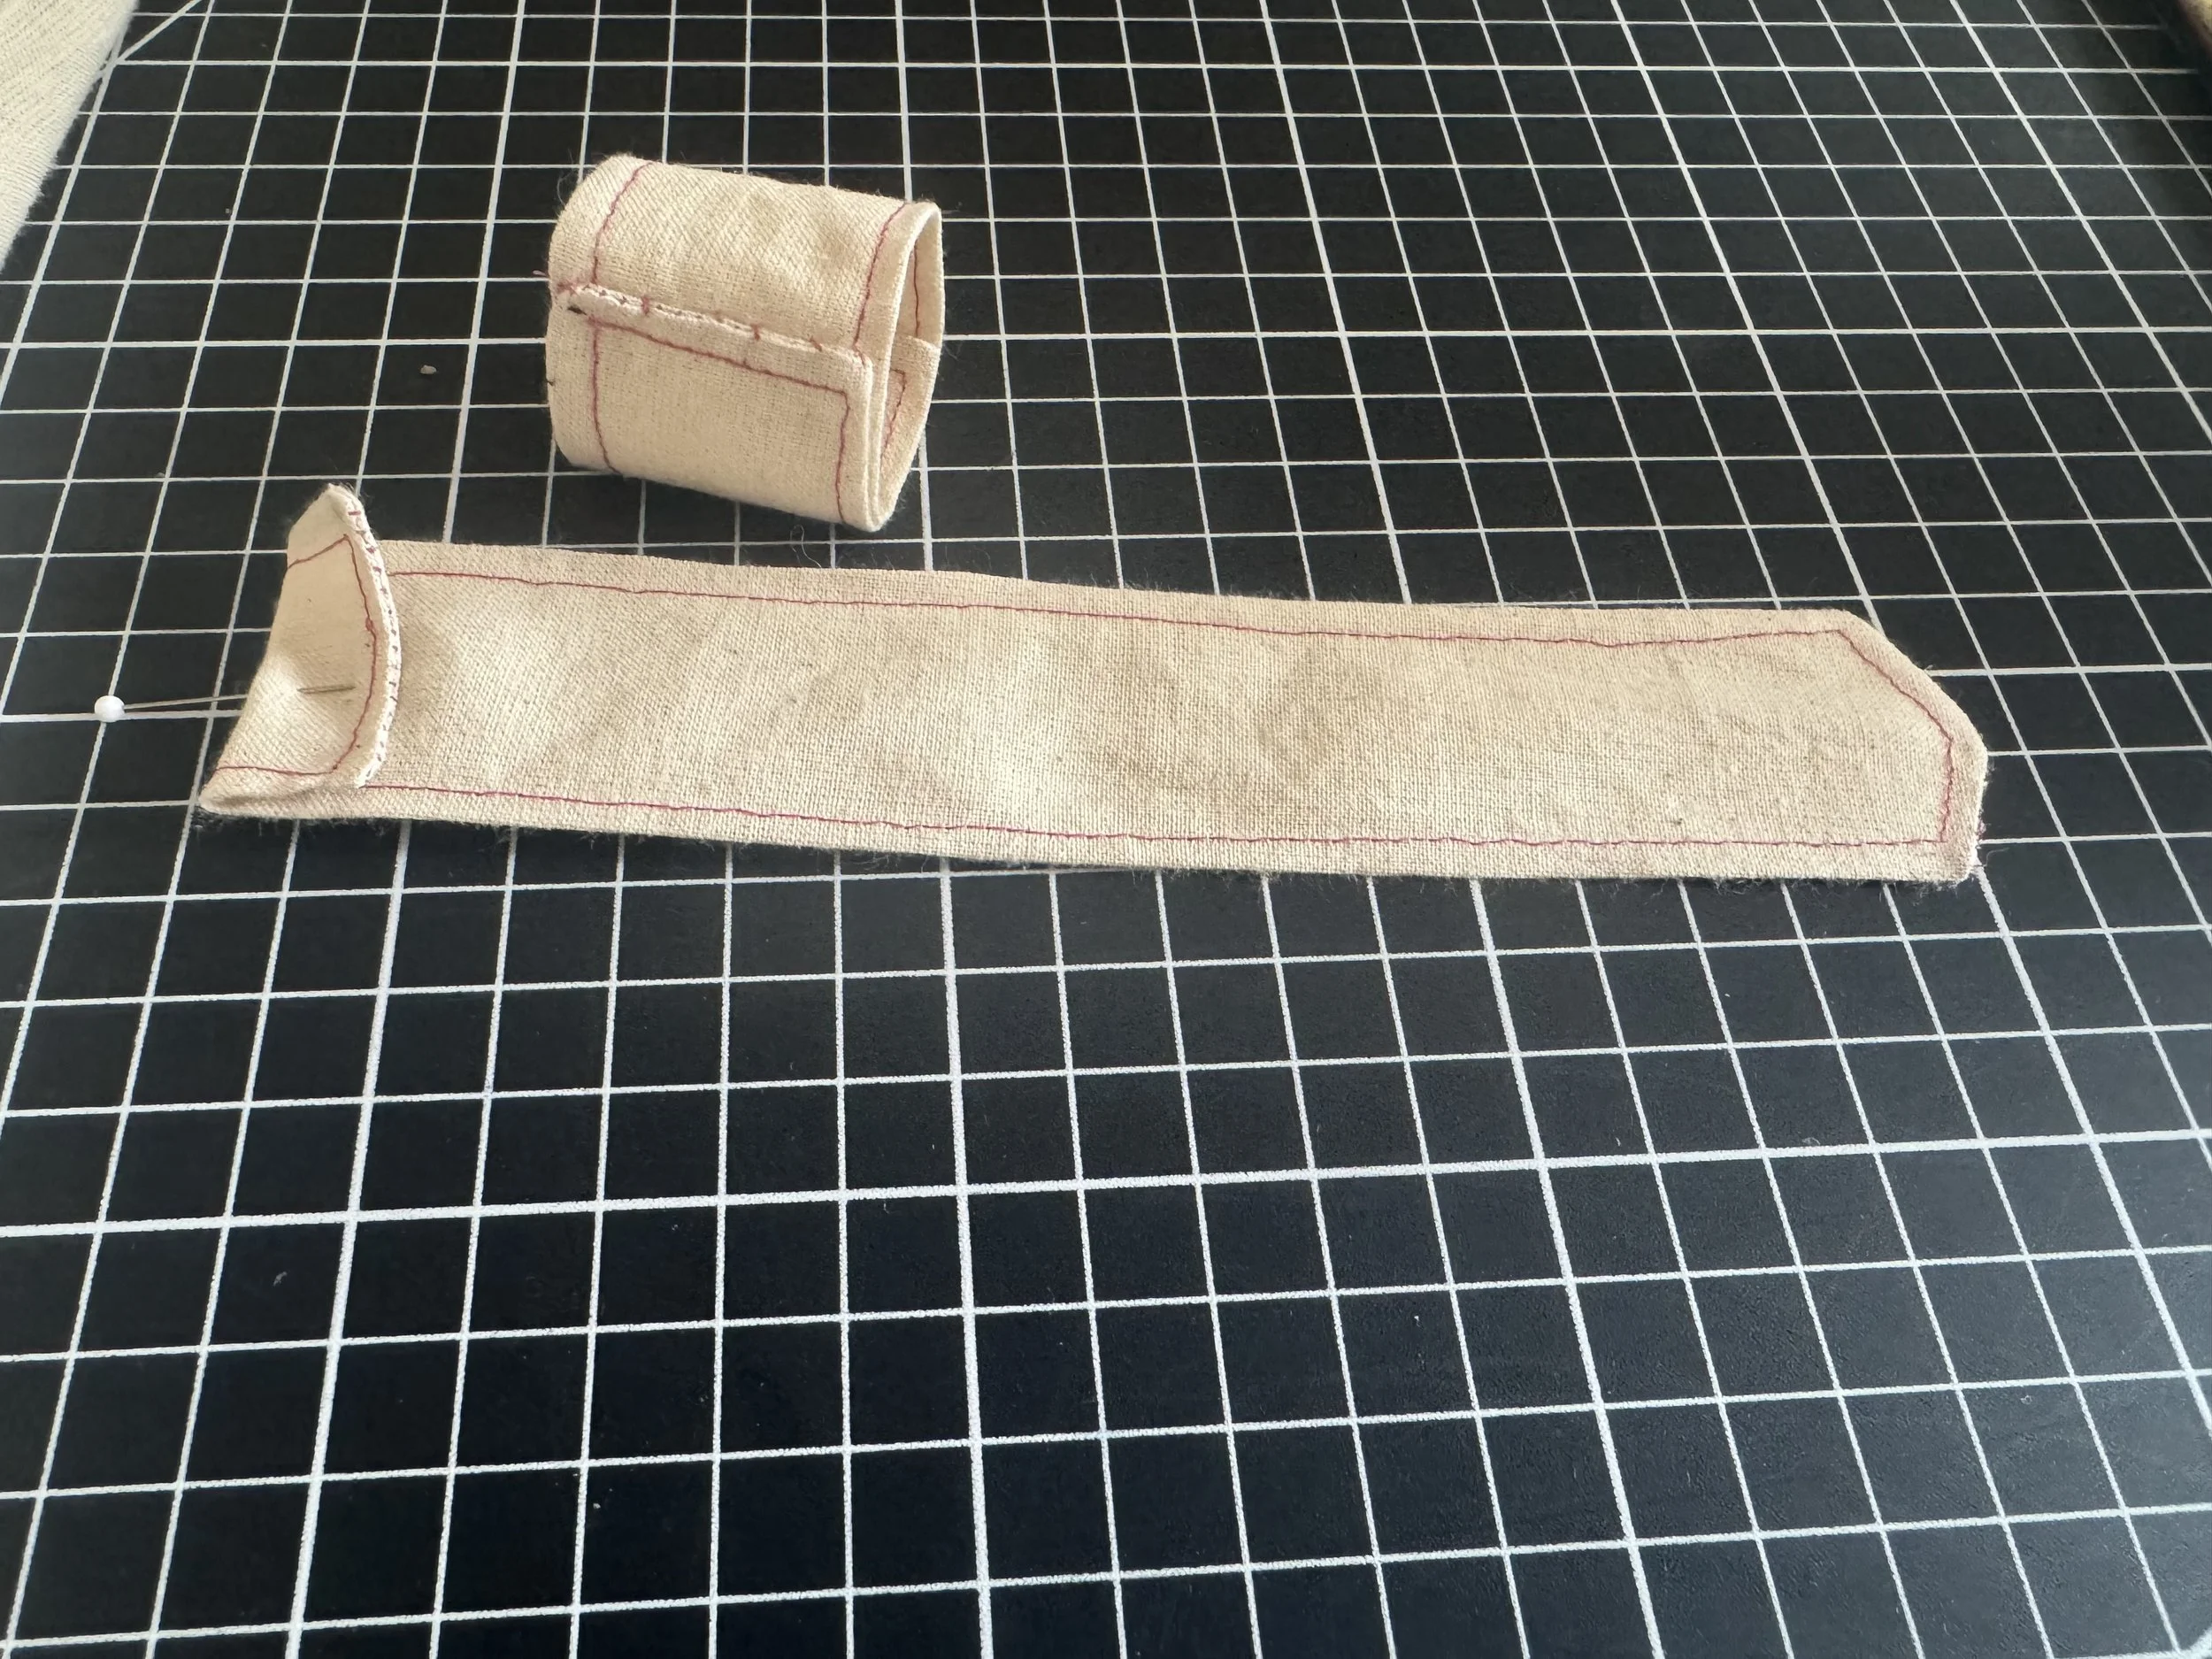 Hand stitch the loop closed. [/caption]
[caption id="" align="alignnone" width="4032"]
Hand stitch the loop closed. [/caption]
[caption id="" align="alignnone" width="4032"]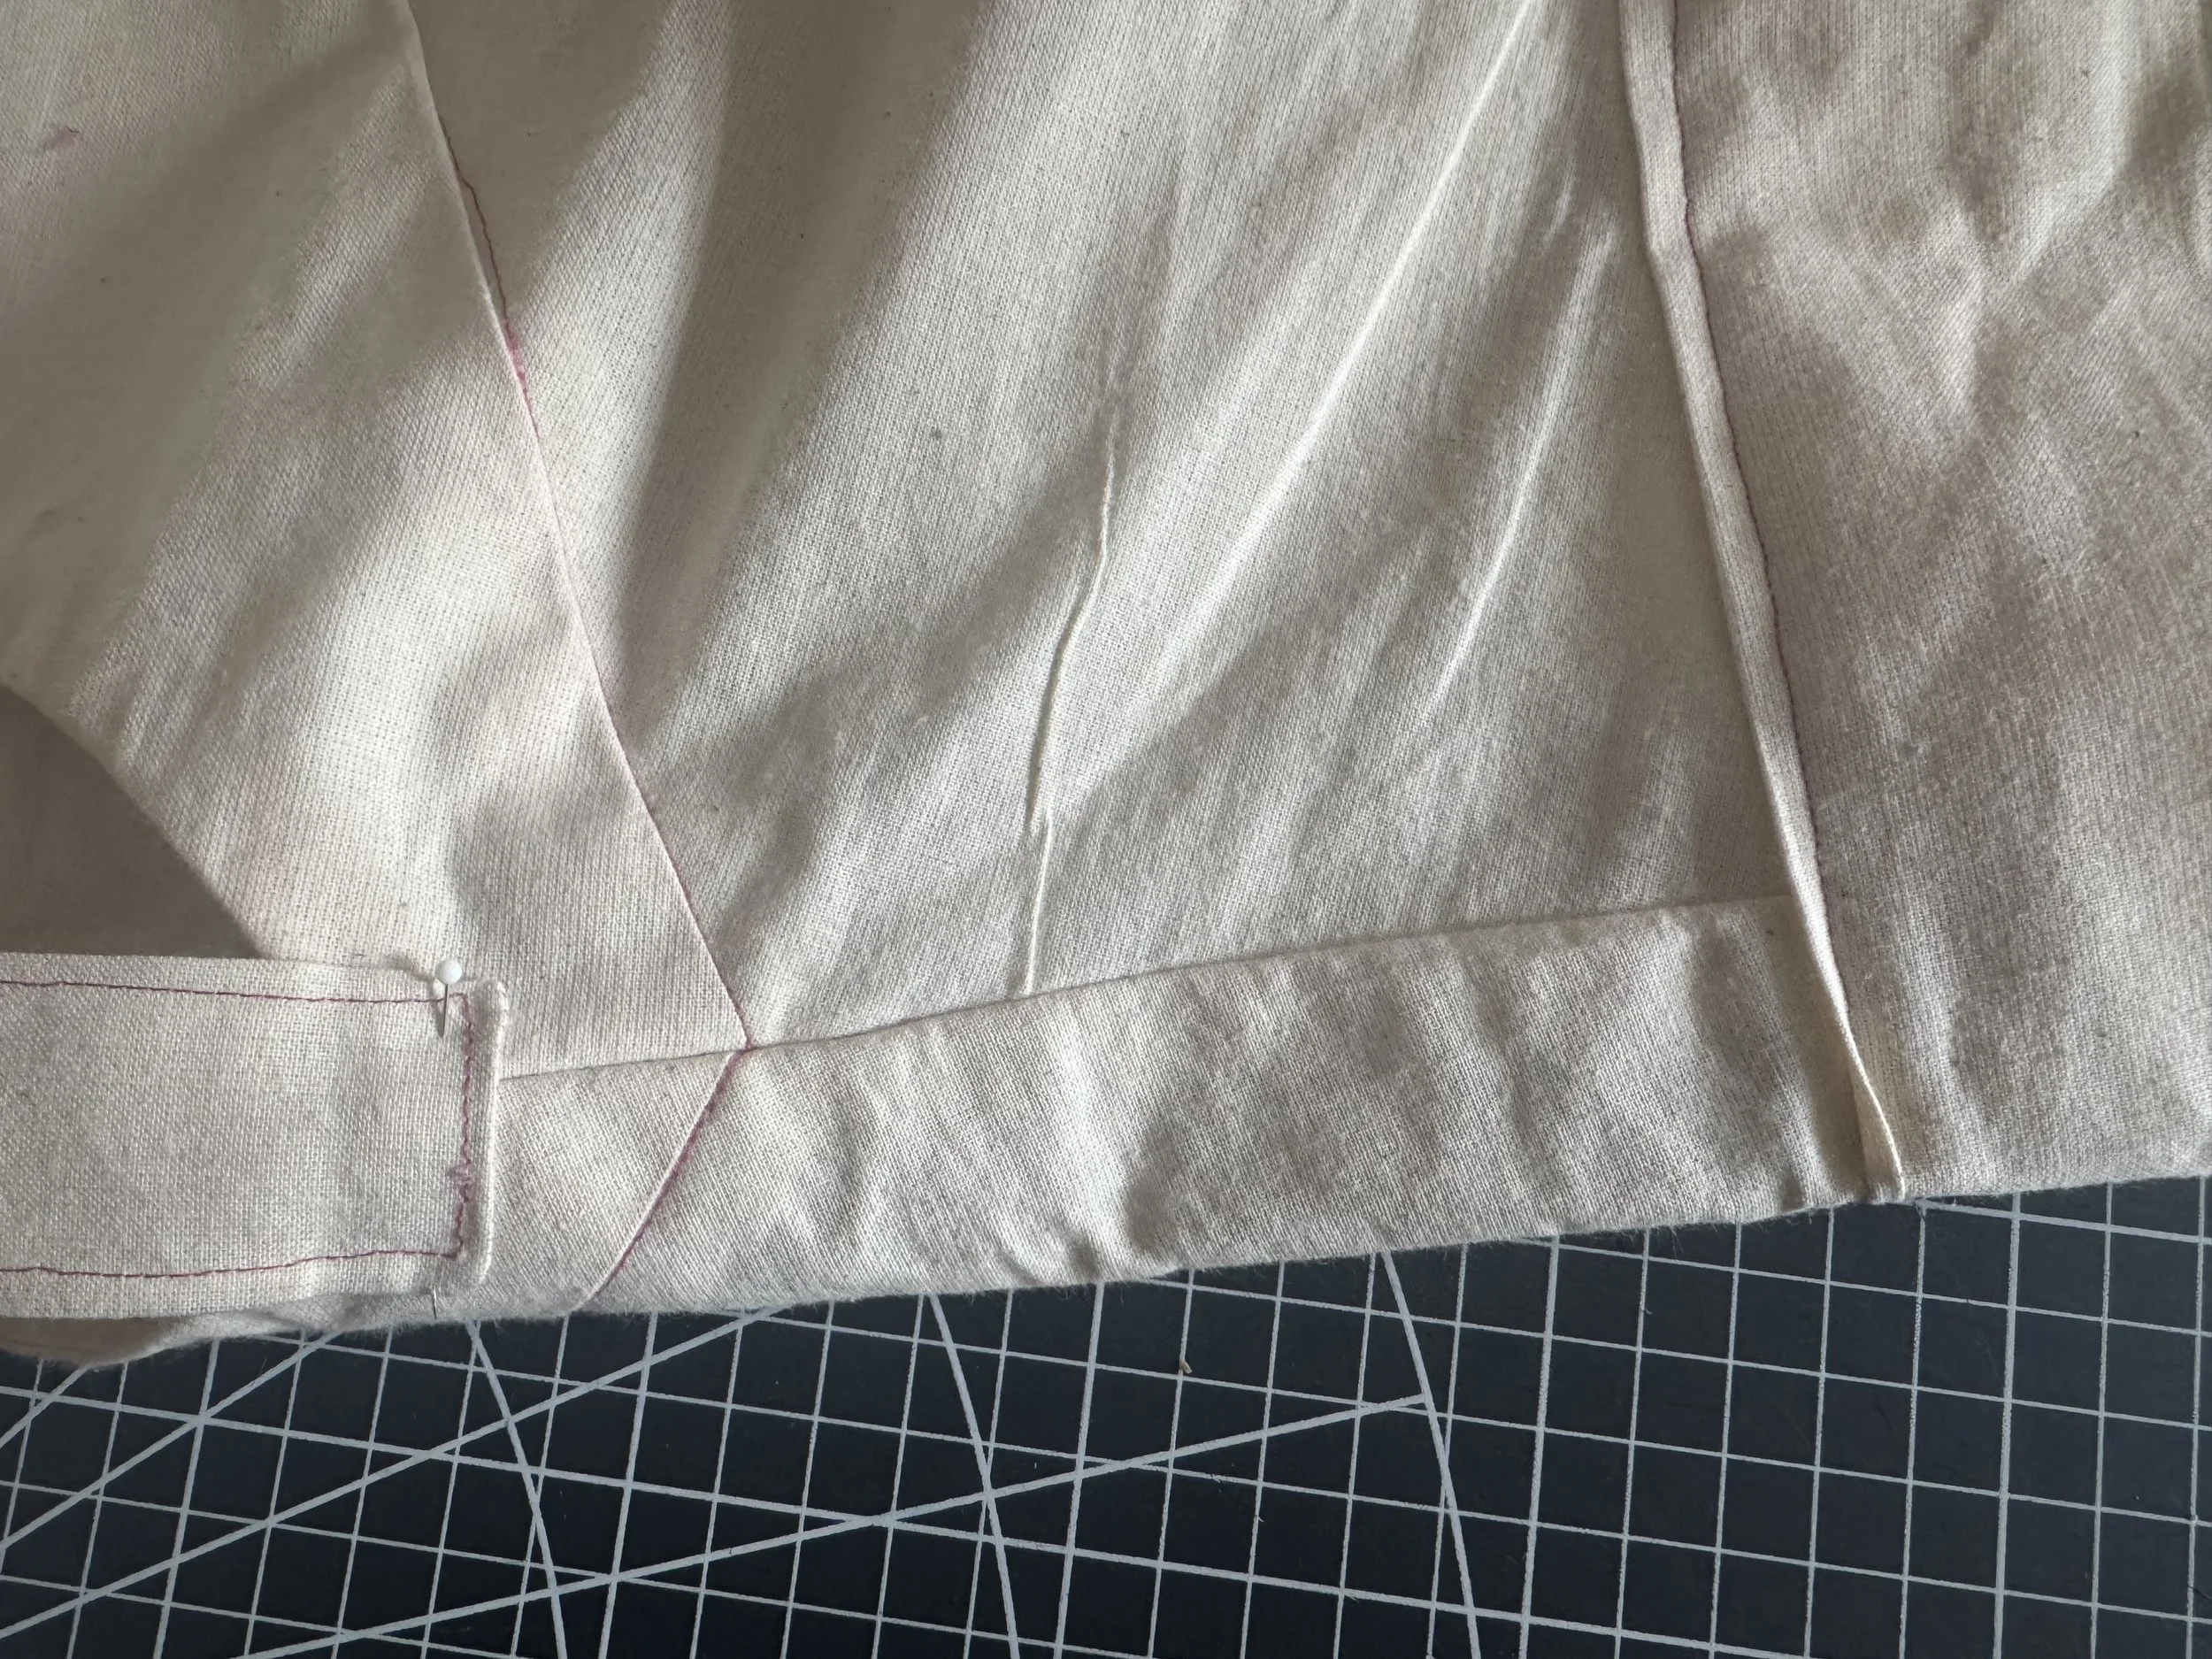 Pin the edge of the strap close to the neckline. [/caption]
 [caption id="" align="alignnone" width="3024"]
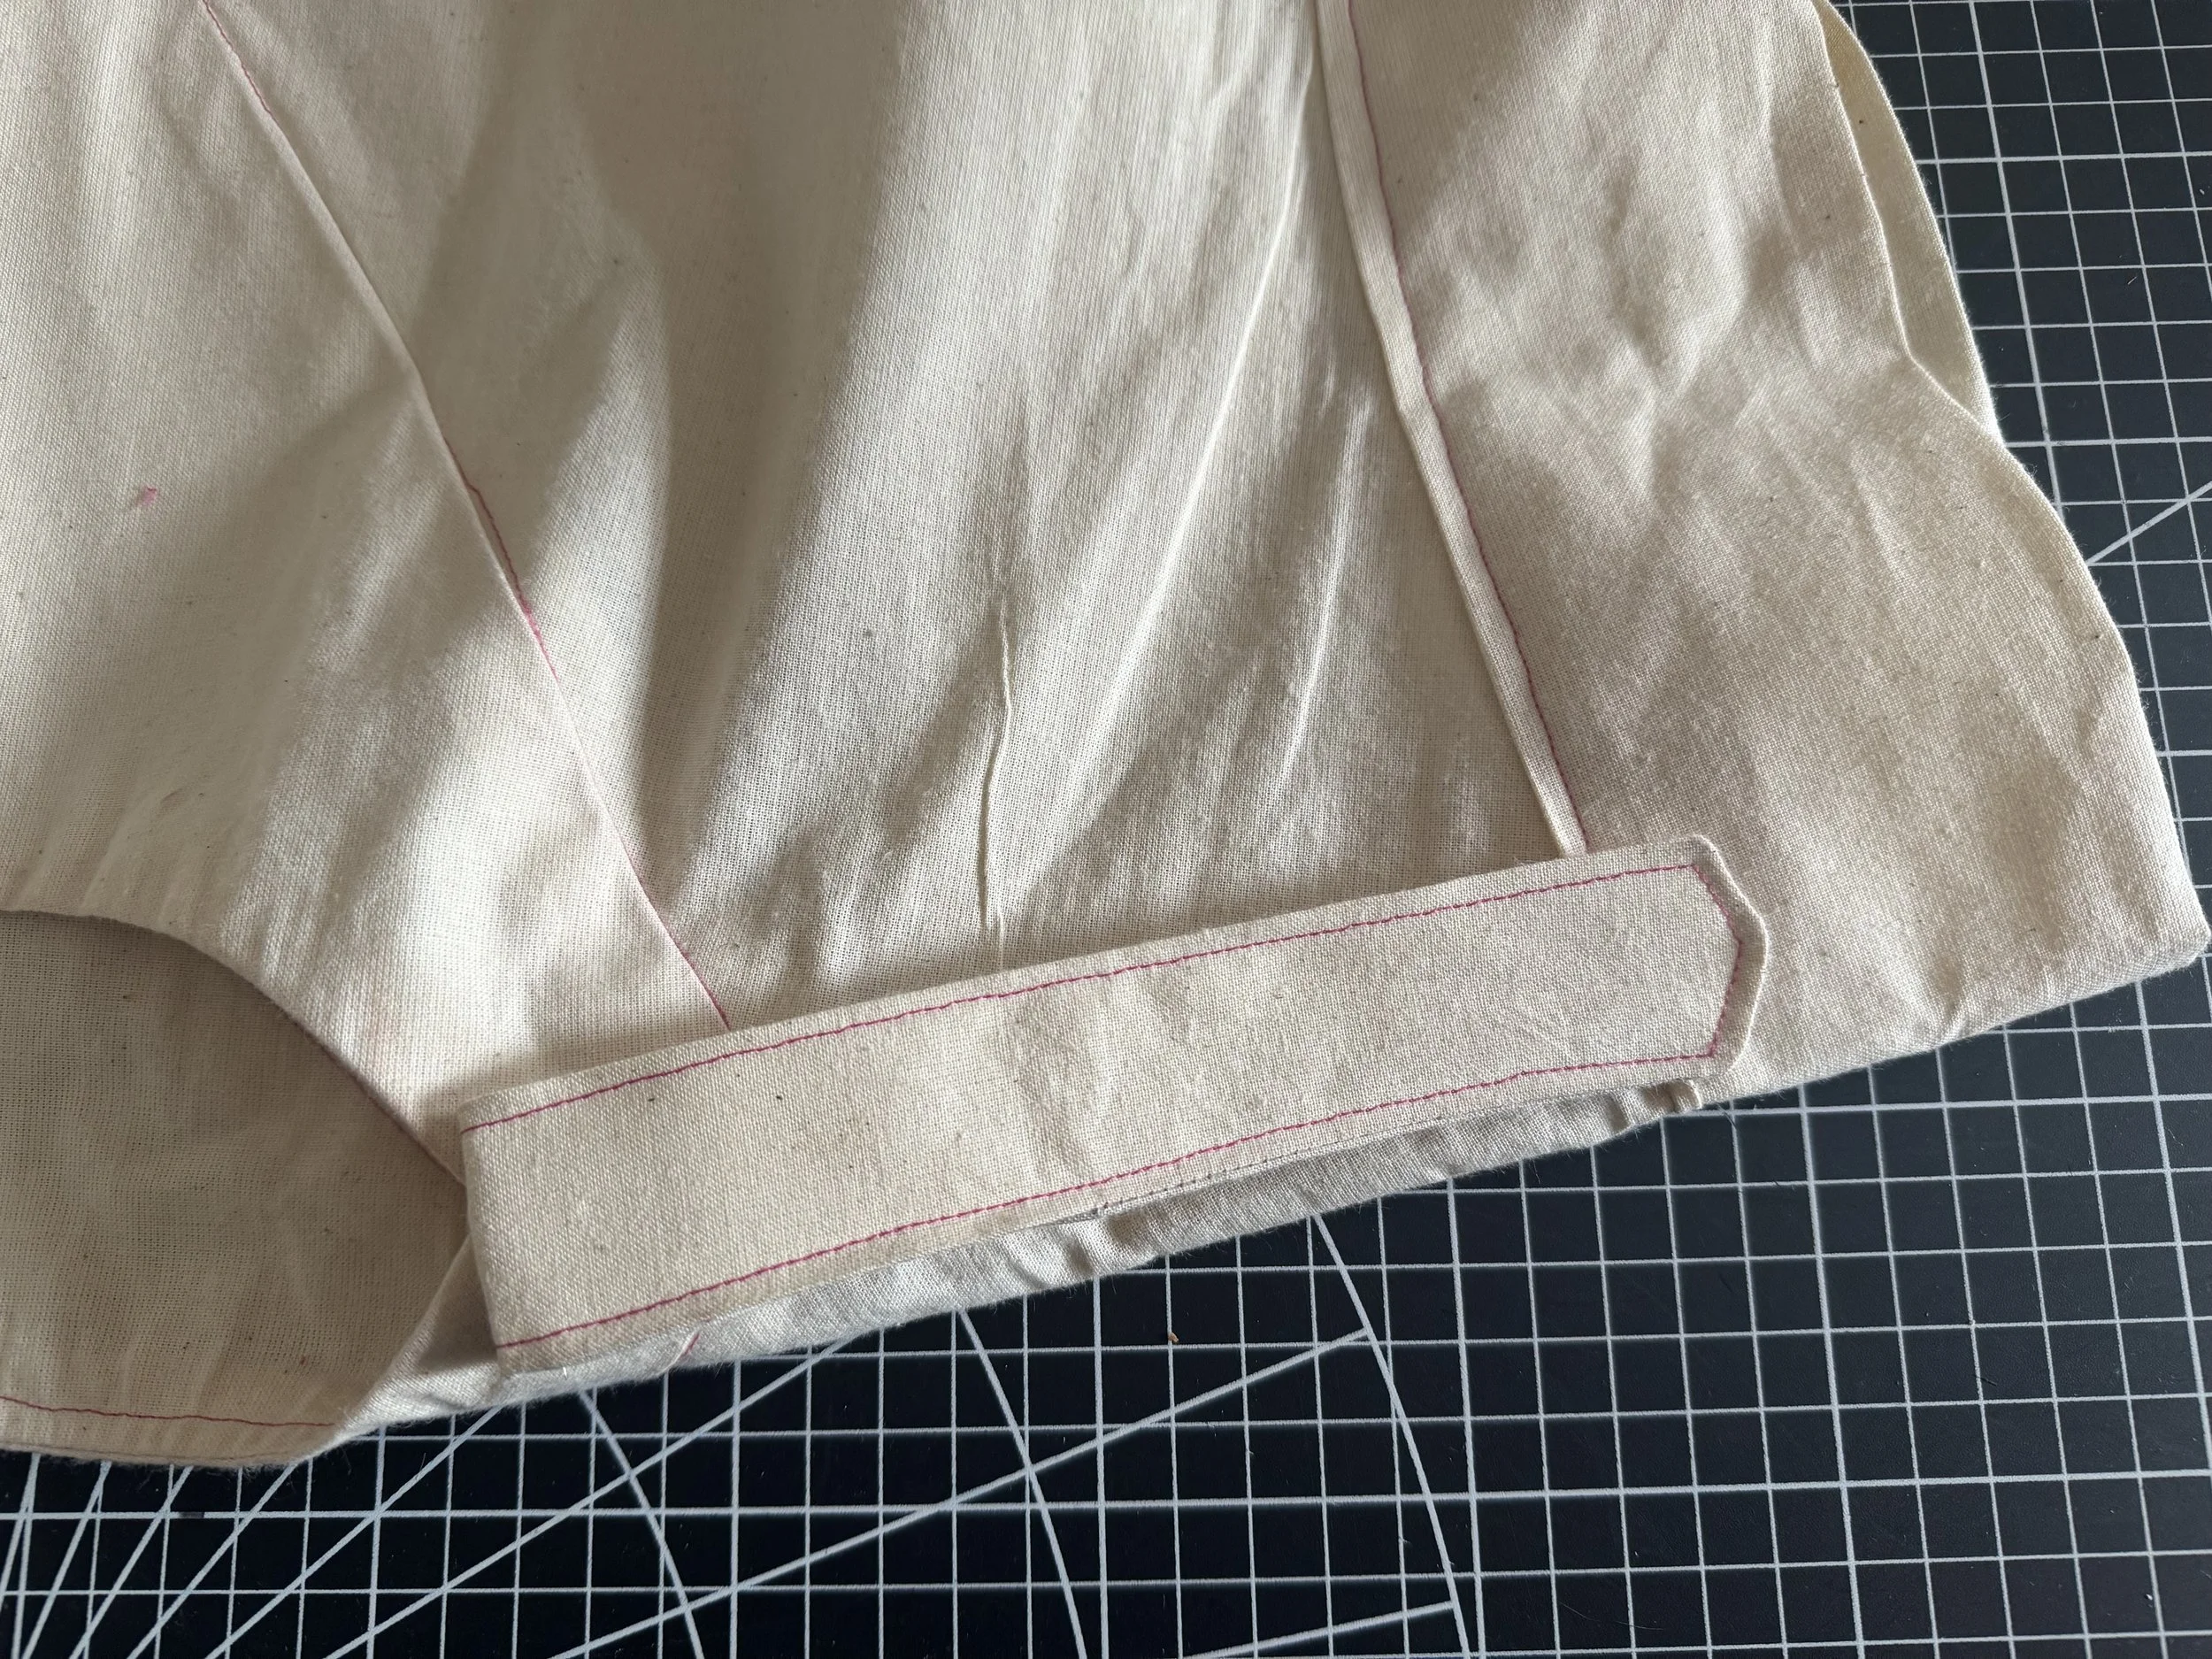
 Stitch close to the edge, and flip the strap towards the sleeve. [/caption]
[caption id="" align="alignnone" width="4032"]
Stitch close to the edge, and flip the strap towards the sleeve. [/caption]
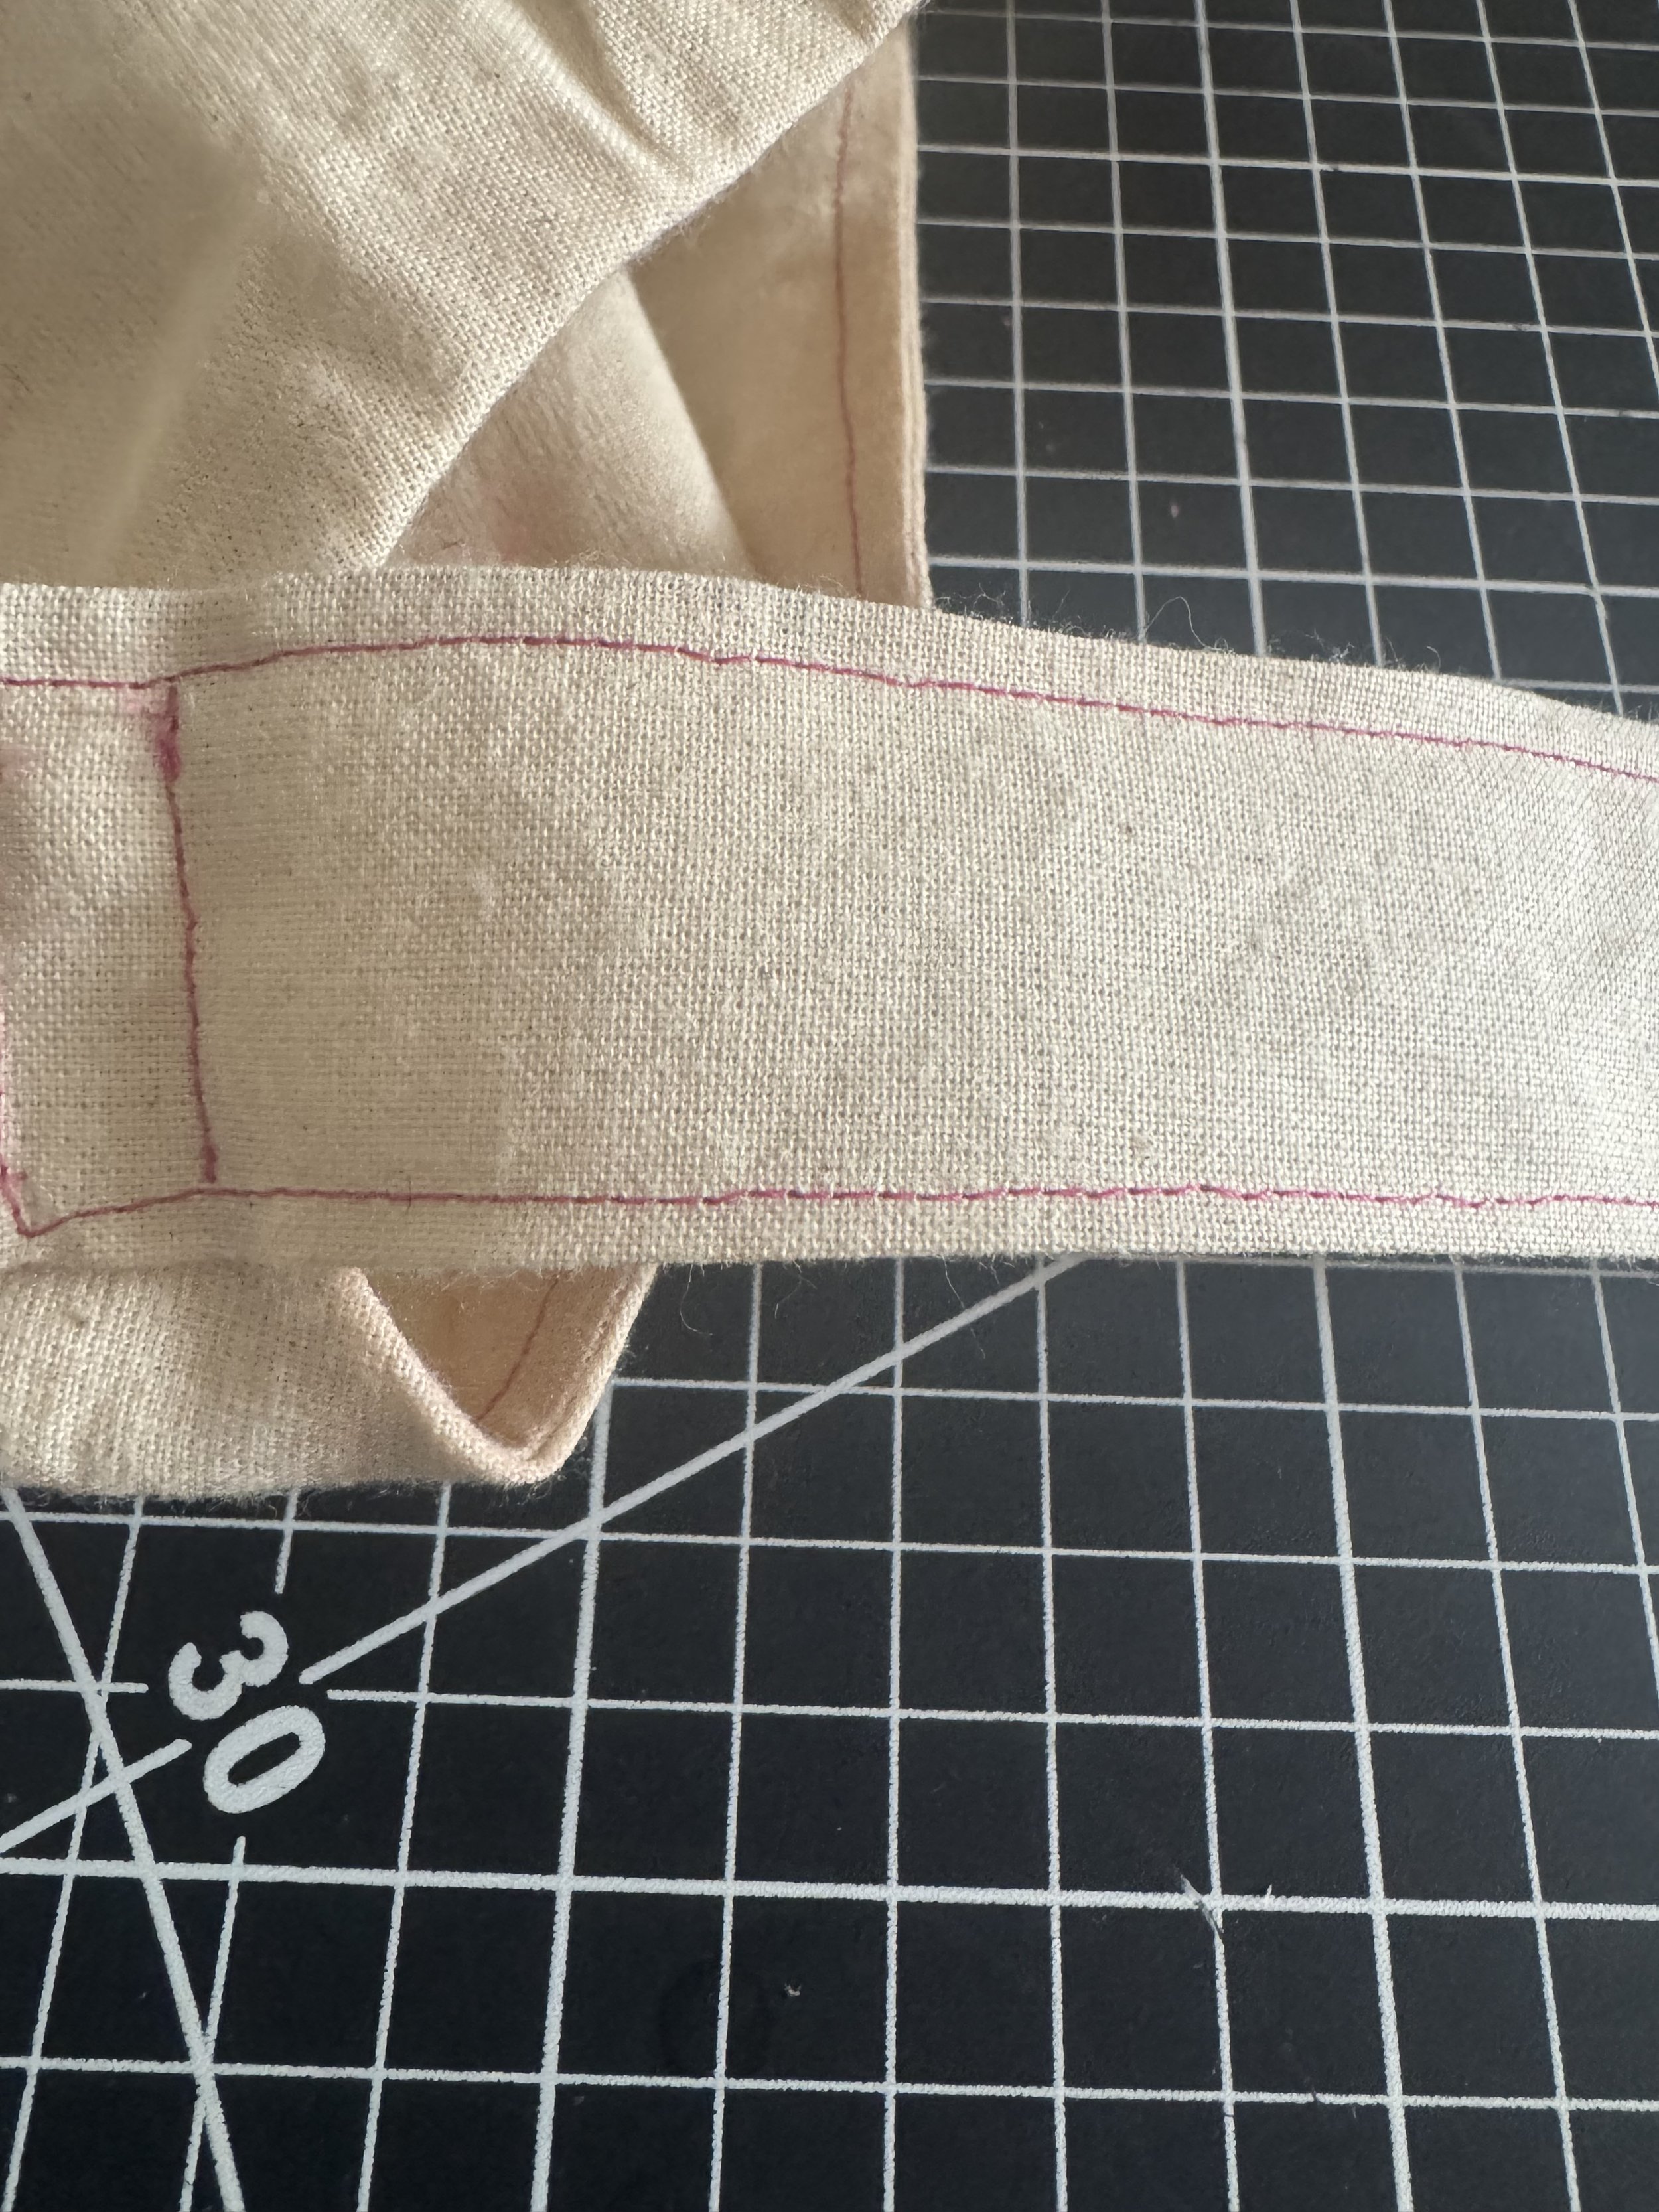
[caption id="" align="alignnone" width="4032"]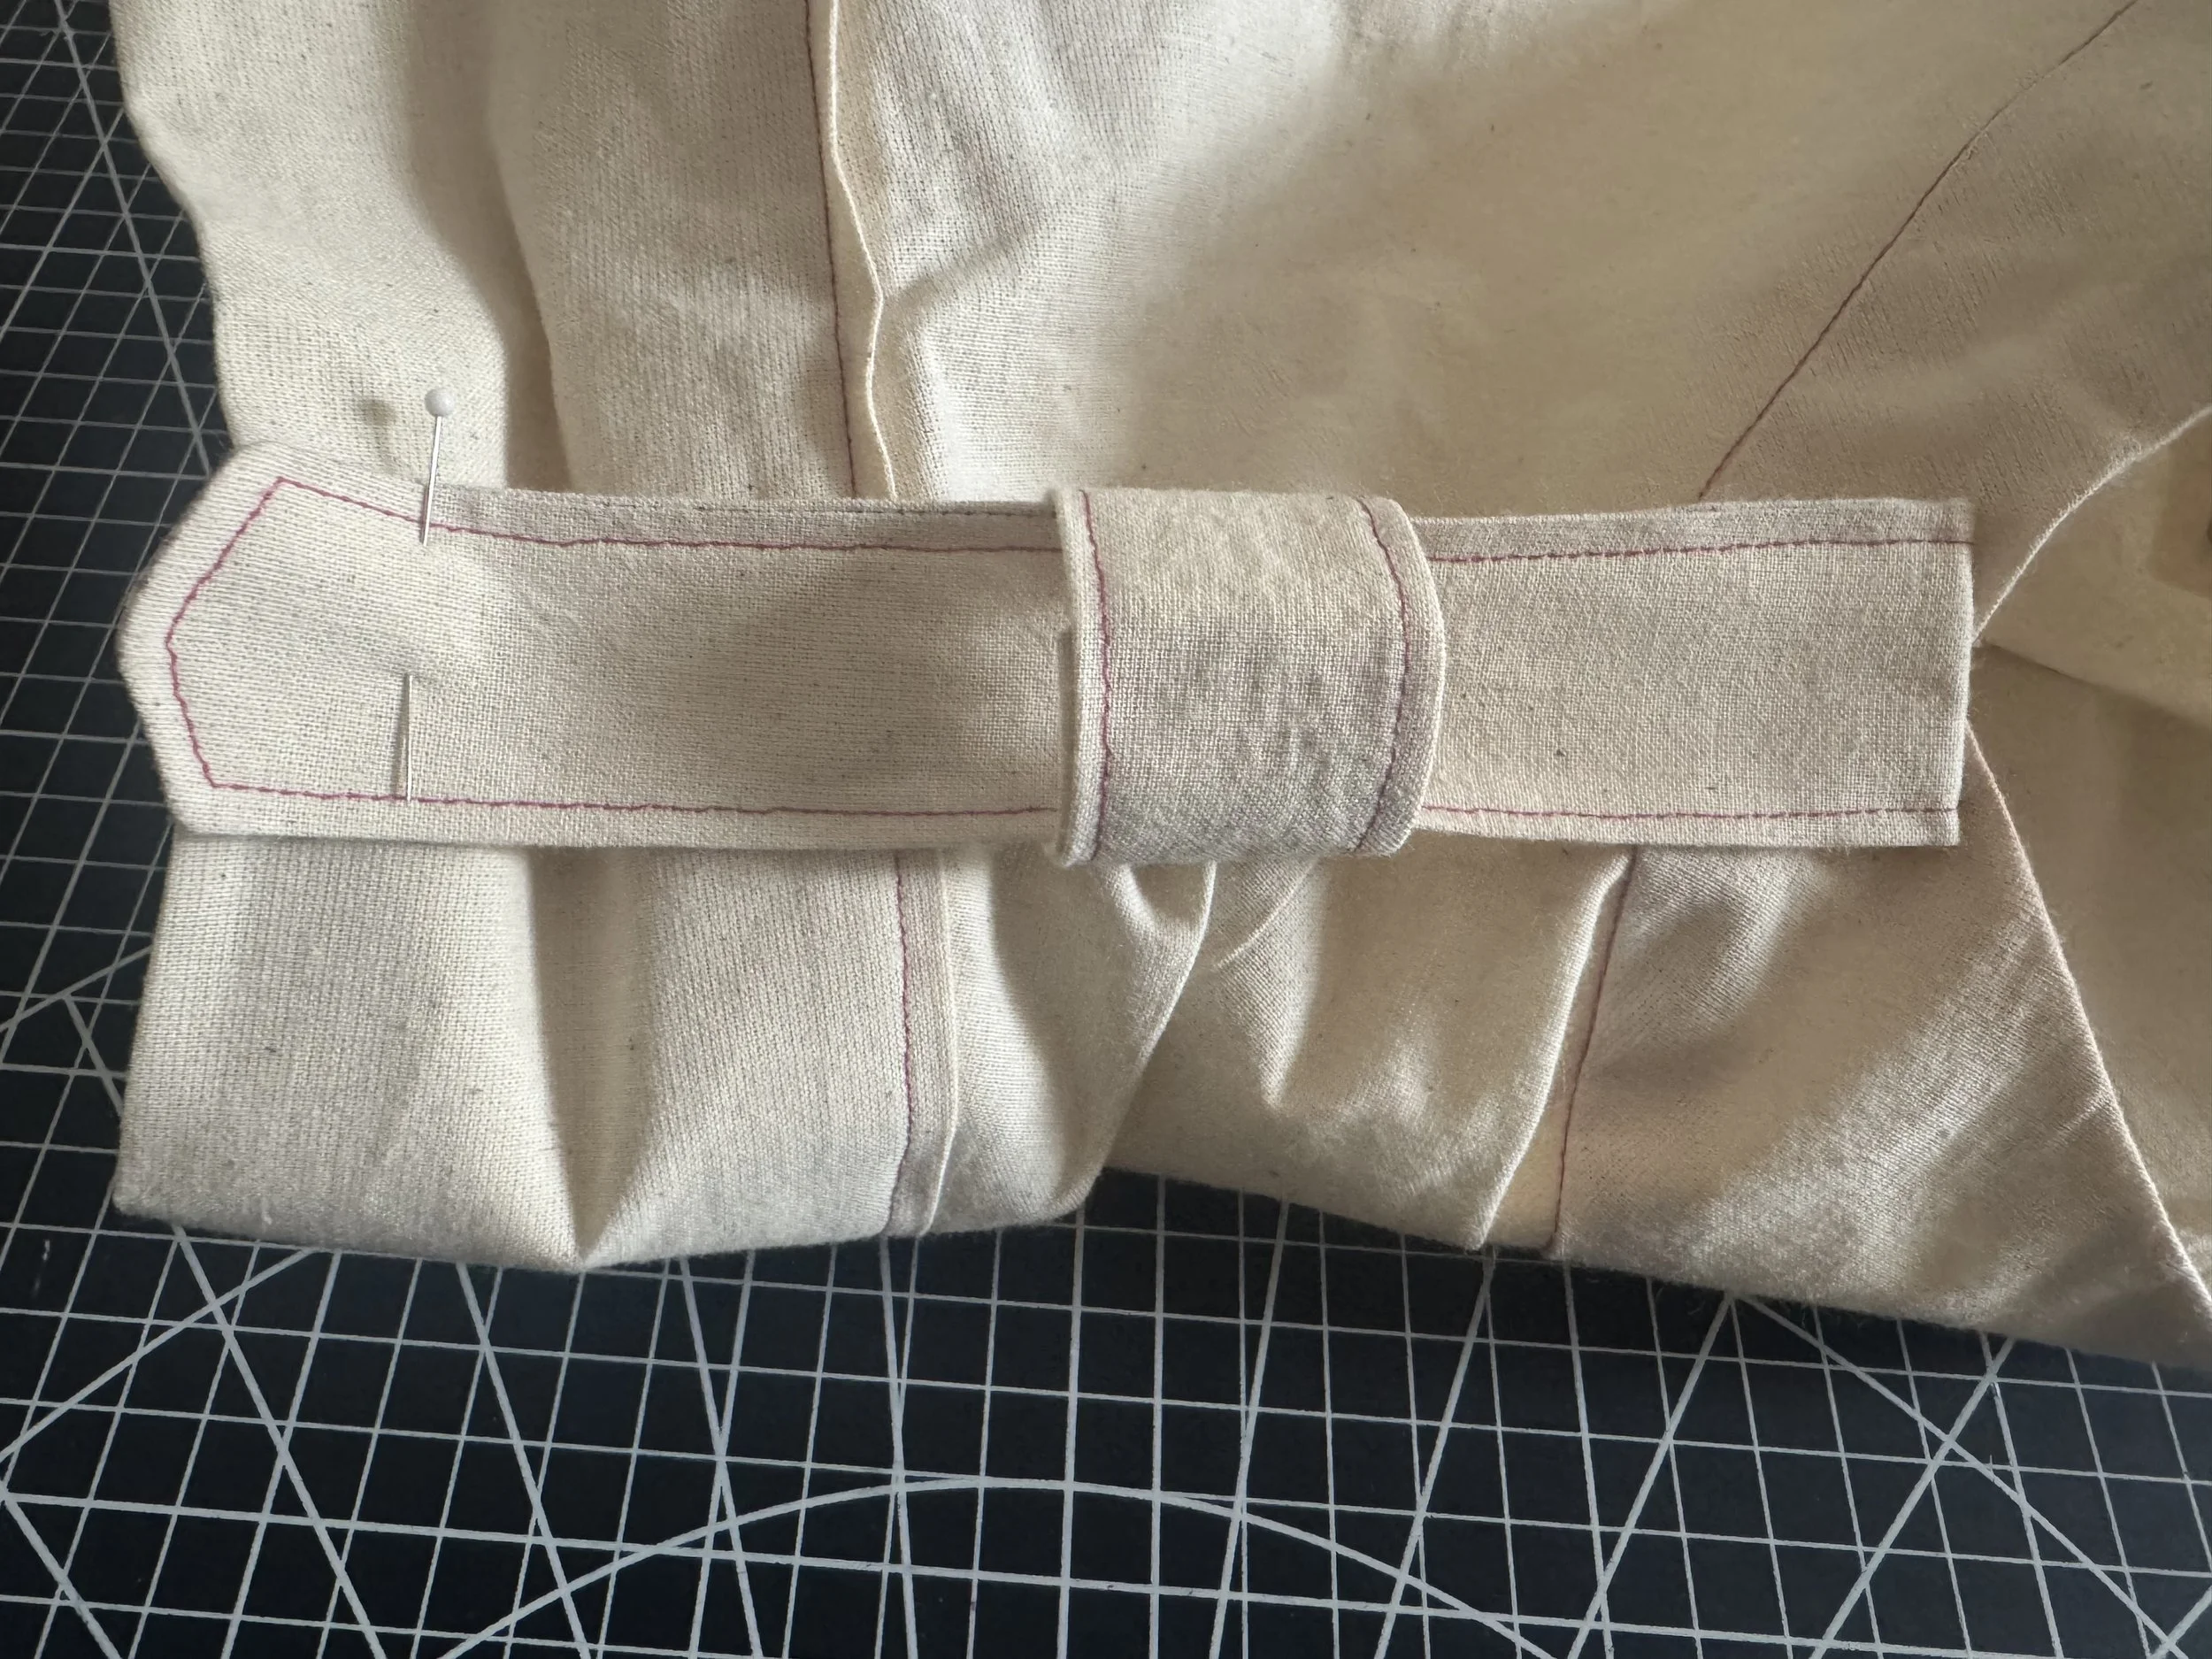 Slide the loop on and pin the strap point close to the sleeve edge. [/caption]
[caption id="" align="alignnone" width="5712"]
Slide the loop on and pin the strap point close to the sleeve edge. [/caption]
[caption id="" align="alignnone" width="5712"]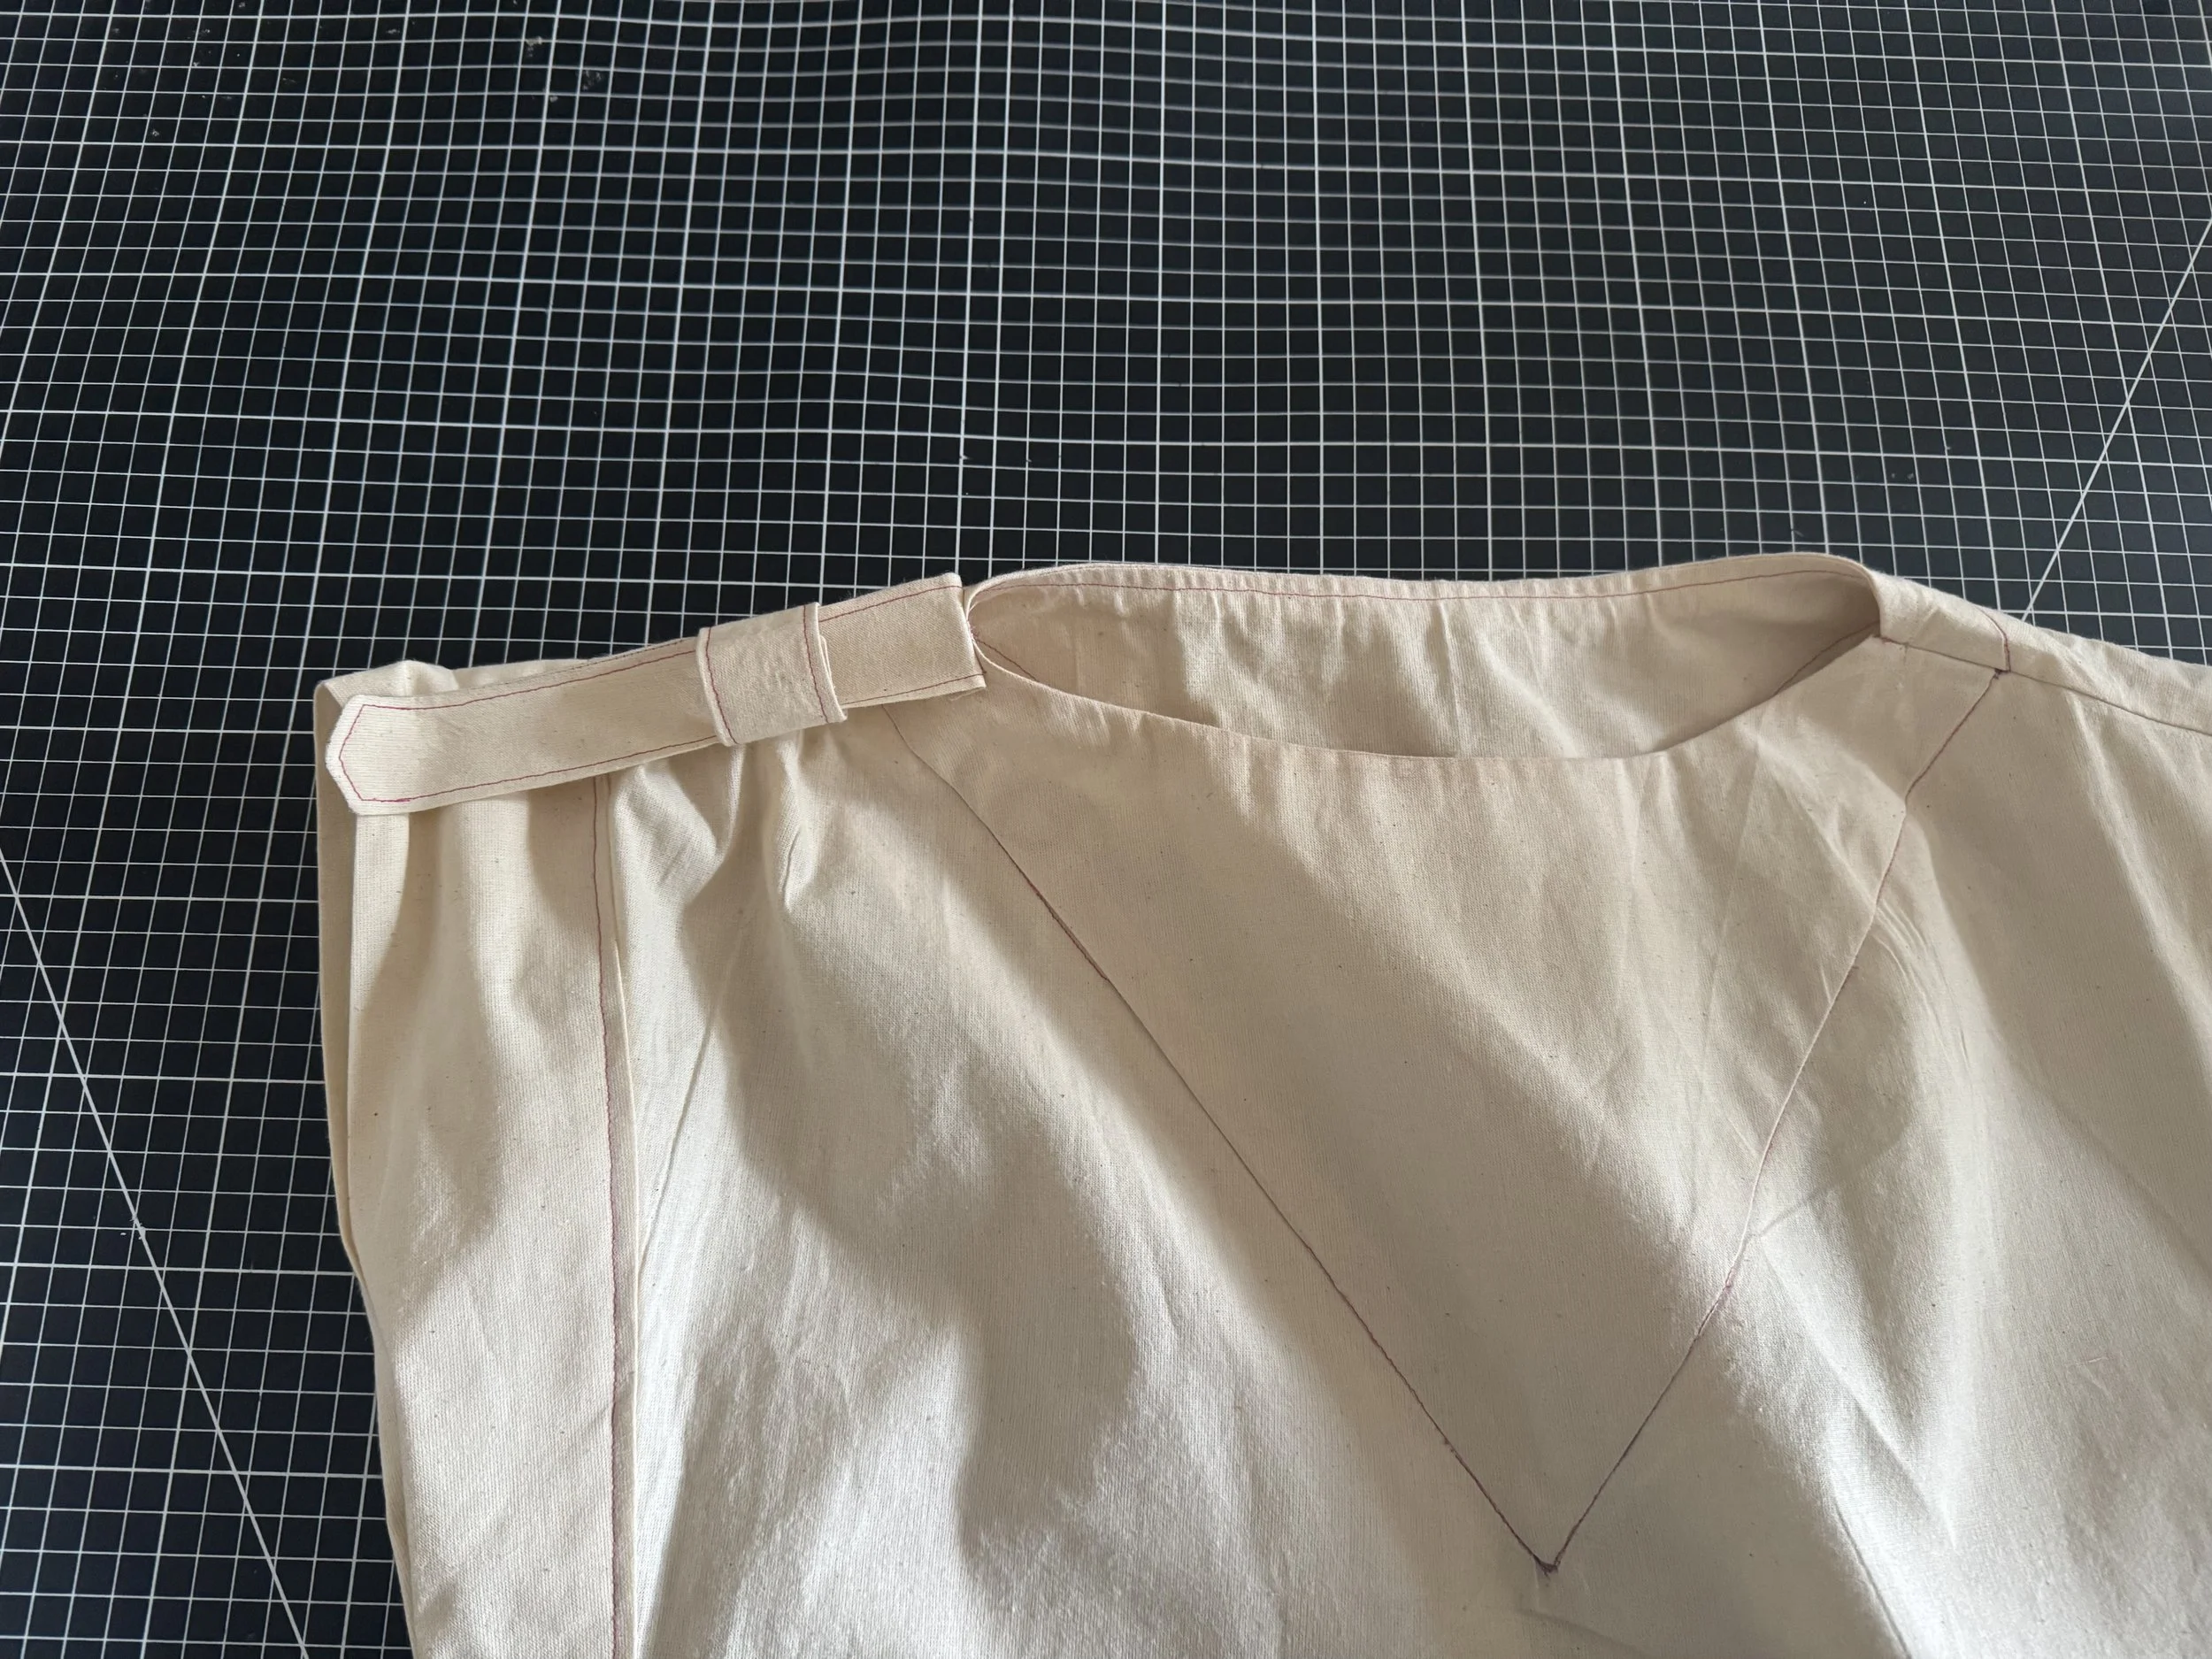 To hold the end, I sewed a small section over the top stitch as seen to the left. [/caption]
[caption id="" align="alignnone" width="1024"]
To hold the end, I sewed a small section over the top stitch as seen to the left. [/caption]
[caption id="" align="alignnone" width="1024"]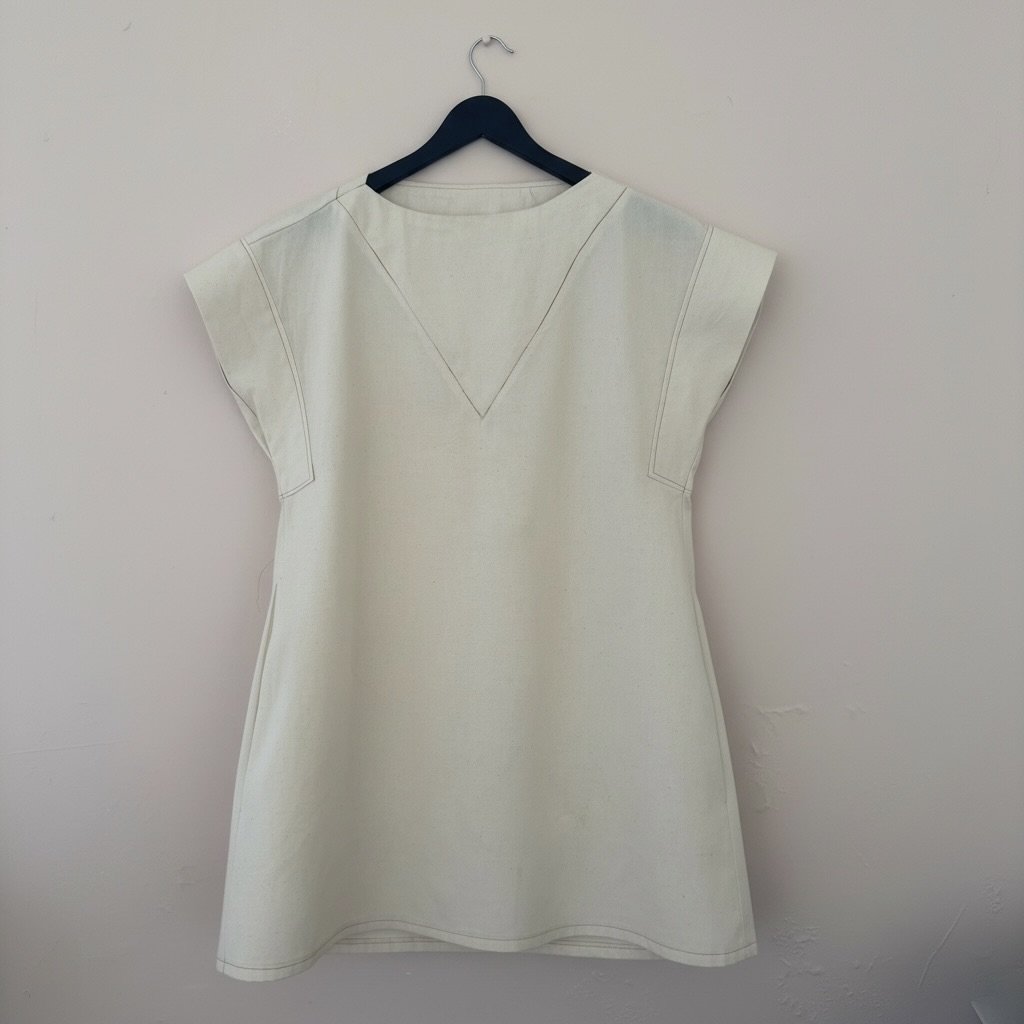 Congratulations! [/caption]